 Annual potato harvesting can take place quickly and comfortably if manual labor is replaced by the use of special potato diggers for walk-behind tractors or mini tractors.
The use of special devices will not only greatly facilitate and speed up the process of harvesting potatoes, but also significantly preserve health and good physical condition, since it does not require such titanic physical labor as manual digging of potatoes.
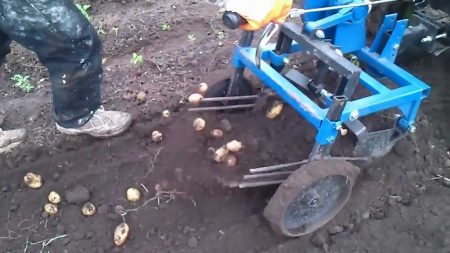
Potato digger on a tractor or a walk-behind tractor is an attachment that is mounted on a walk-behind tractor or mini tractor. Potato diggers have teeth that dig up the ground during movement. In the process of moving along the conveyor, between the teeth of the unit remain potatoes. Tubers are automatically either placed in a special tank or discarded between rows. The device itself digs and cleans the crop from the earth, it remains only to collect it from the surface of the earth.
The device allows you to clean the area from the crop much faster and more efficiently than using manual labor.
Potato digger on a walk-behind tractor can be purchased at summer cottage or garden equipment stores, or can be made independently. How to make a potato digger we will certainly consider in more detail below.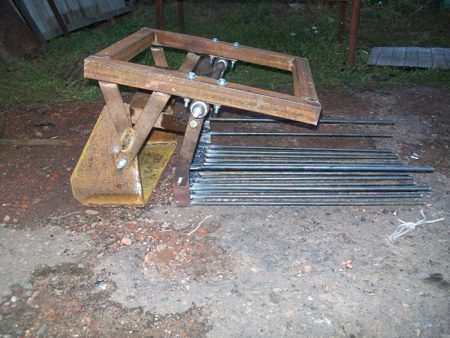
Content
Advantages and disadvantages of homemade potato diggers
Make a homemade unit quite real and quite profitable. However, everything has a flip side of the coin, so there are downsides to homemade diggers for a walk-behind tractor, although there are not many of them.
Cons of homemade potato diggers:
- The design process requires painstaking work, because you need to find the drawings. Even the finished drawings found on the network sometimes require refinement and customization;
- Homemade Potato Digger Weight, do-it-yourself, there will be more. Manufacturers of ready-made diggers maximize potatoes to optimize their products, using all the opportunities to reduce its weight;
- More fuel consumption with a walk-behind tractor / mini tractor when working with a hand-made potato digger. The greater the weight of the mounted potato digger, the more fuel is consumed;
Pros of Homemade Potato Digger
- The cost of the unit as a result is much lower. Potato digger from the manufacturer is not cheap, not everyone can afford it. The cost of a potato digger is several times lower than the finished option;
- An individual project for a specific site, soil and the person who will manage the process. As mentioned above, even a finished drawing of a digger, as a rule, is finalized taking into account the characteristics of the site, soil, own physical strength, etc.
- Improvement in the drawing development process. You can upgrade the potato digger device by adding additional parts that can increase the efficiency of the device;
As you can see, the disadvantages are not too significant.At least they do not outweigh the virtues of making potato diggers do it yourself. However, when it comes to huge areas, a potato digger for a tractor or a walk-behind tractor from the manufacturer will still be more profitable. Homemade devices are more suitable for medium or small areas with a relatively small landing area.
Types of potato diggers
The units under consideration are divided into two main types - lancet and vibration (screening).
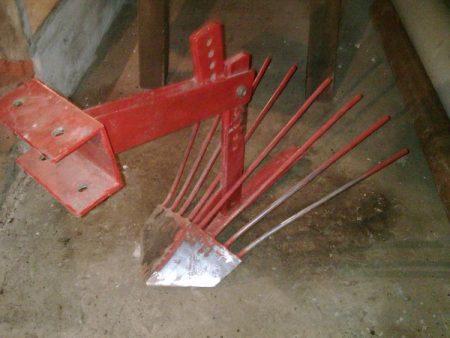
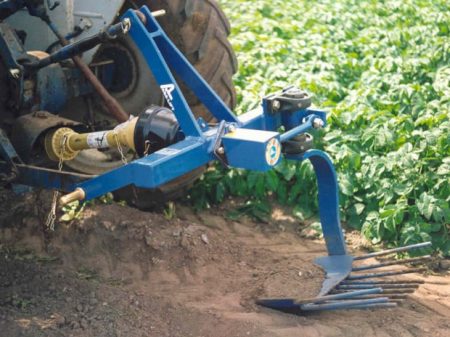
Lancet diggers of potatoes, they are also called fan-shaped, are a ploughshare to which inclined rods are welded. This is the simplest type of device that can be attached to any walk-behind tractor or small tractor. Similar potato digger to walk-behind tractor made pretty simple.
The principle of operation of a simple potato digger is to cut a layer of land with a ploughshare, along with the crop, after which the earth falls back between the rods, and the tubers remain on the surface. This design is effective only on loose soils.
Vibratory or screen digger for potatoes consists of two main parts. This is a ploughshare (plow) and a vibrating sieve located on the support wheels. In the process of operation of the unit, the ploughshare grabs part of the earth with tubers and throws it onto a sieving grid. Thanks to vibration, the earth is sifted, only potatoes remain on the grate.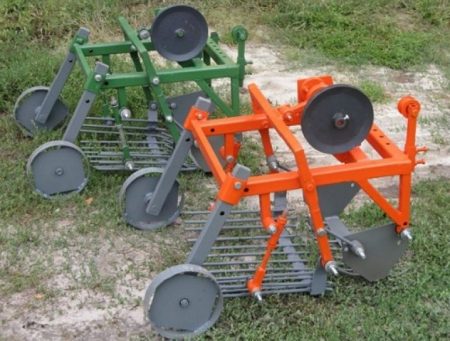
Despite the simplicity and ease of use, as well as high productive efficiency, a screening potato digger for a walk-behind tractor is difficult and time-consuming to make. However, all the difficulties in the manufacturing process subsequently more than pay off.
The most popular potato digger models
Today, there are several of the most popular types of potato diggers: ordinary KKM-1, ordinary KKM-3, ordinary Garden Scout, vibration Neva and vibration Poltavchanka. Let us consider in more detail each of the models.
Kartofelekopalka simple for the KKM-1 motor-block
- The canopy includes a share and a sowing grid;
- The device is well suited for soft and medium soils, with a moisture level of not more than 25%;
- Digging depth is 20 cm, and the cultivation area is about 35 cm;
- The design productivity ranges from 0.05 ha to 0.2 ha per hour;
- KKM-1 weighs an average of about 40 kg;
- The speed of the device is 1-2 km / h;
- The canopy is suitable for motor units such as Neva, Cascade, Salute, Favorite, etc.
Simple potato digger for KKM-3 motor-block
Apparatus the third generation is similar in characteristics to the KKM-1, however, it has a number of improvements. For example, compared with KKM-1, the KKM-3 unit has an increased processing area of 40 cm. The device is serviced by one machine operator. Digging depth can be changed using the support wheels.
Such a potato digger for a mini tractor is the best option due to its weight - 40 kg.
Simple potato digger for Garden Scout walk-behind tractor
- It is a product of a Chinese factory;
- The width of the processing area is 40 cm, and the depth of cultivation is 28 cm;
- The design weighs 42 kg;
- Garden Scout design capacity reaches 0.2 ha per hour;
Vibrating potato digger for Neva walk-behind tractor
- This compact vibrating potato digger is designed specifically for Neva motor units;
- Has a relatively low weight - 34 kg;
- The depth of tillage is 20 cm, and the width of the plow share is 36 cm
- The construction productivity is from 0.15 ha to 0.2 ha per hour;
- The speed of the device is 1-2 km / h;
- The design has cost advantages over competitors;
Vibrating potato digger Poltavchanka
- The design is suitable for moderate soils, the moisture level of which can reach 30%;
- The nozzle has a weight of 34 kg;
- The penetration depth into the soil is only 18 cm, the plow share is 39 cm;
- The speed of the device is 2-3 km / h;
- The canopy is suitable for different types of walk-behind tractors and mini-tractors (Neva, Favorit, etc.)
- The wheel level of the device can be adjusted;
How to make a potato digger for a walk-behind tractor
Making potato diggers with your own hands is a rather laborious and painstaking process. You can make it yourself in several stages. We will dwell on each in detail and tell how to make a potato digger for a walk-behind tractor with your own hands.
Tools for work
Initially, you need to prepare the tools that you need to create a potato digger on a walk-behind tractor with your own hands, as well as other consumables.
Work tools that can not be avoided in the process of collecting a potato digger -
- welding machine,
- angle grinder,
- electric drill,
- elbow
- level,
- perforated mounting plates,
- steel bolts with nuts.
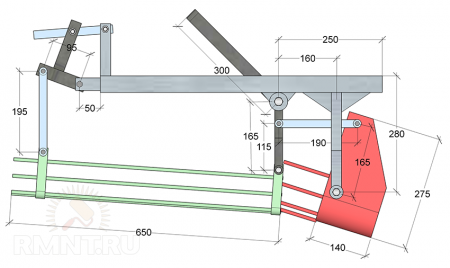
Production of vibratory catofelecope
In order to make a homemade potato digger for a walk-behind tractor on a vibration basis, we will come in handy:
- Supporting structure - metal channel;
- Steel sheets to create a share. Steel should have a thickness of at least 5 mm.
- Steel or iron corners from metal;
- Steel or iron rods, preferably of small diameter;
- Metal pipe
The design of the potato digger contains a frame, a suspension system, traction control, wheels or other moving units.
Step 1. The basis of the vibrating potato digger
It is necessary to start the process of making a potato digger for a walk-behind tractor with a foundation.
In order to weld the frame, a profile pipe 40 * 40mm in size will do. We take as a basis a square pipe 4 meters long, cut off parts of 80 cm and 120 cm. The length of the workpiece is enough for 4 pieces, which will serve as the supporting beams.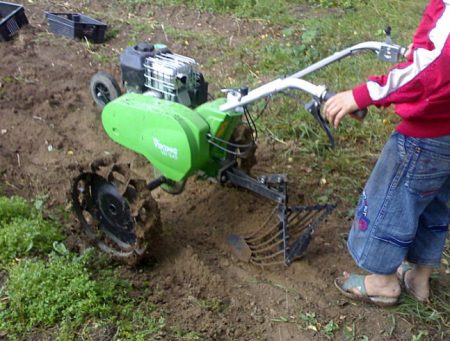
Support beams are welded at an angle of 90 degrees, creating a rectangular frame with sides of 0.8m and 1.2m. The frame is ready.
Step 2. Mount for rods
To create a mount for rods, we take the rectangular base mentioned. It is necessary to fix the metal channel with a welding channel to it a third or a quarter from the middle of the frame.
On the reverse side of the frame, vertically weld the tubes for mounting the axis. Subsequently, movable elements will be installed there.
We drill centimeter holes with an electric drill in a place convenient for fastening.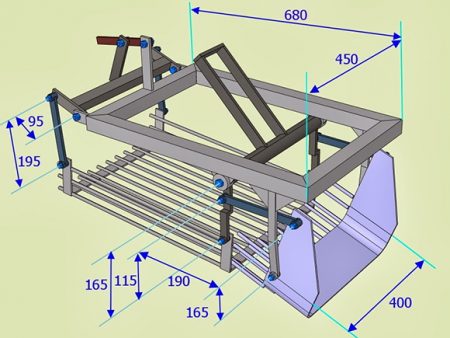
Step 3. We make vertical racks
Having taken an indent from the edge of the base at least 5 centimeters, we weld the stand. The length of the square profile is up to 50 centimeters. Having retreated another 15-20 centimeters, we again attach the second rack, smaller than the previous one, with a length of not more than 40 centimeters, with a welding machine. Then 40 centimeters are measured, the subsequent profile is already 30 centimeters, it is also fixed by welding. At the end of the work, we get a device that looks like a pair of stairs.
Racks are fixed in the lowest compartment of the device with a metal strip. We take a strip no more than 0.5 millimeters and connect the profiles with a welding machine at an angle of 45 degrees.
Step 4. We create a ploughshare and horseman
Having constructed the main part of the home-made potato digger, we proceed to the production of the active part of our digger, the ploughshare, which will carry out the main part of the potato harvesting work.
To create a ploughshare, a knife that will cut the soil, we need a metal plate with a thickness of at least 0.3 millimeters. According to a pre-selected drawing, two blades, the main working parts, are cut out of the plate. The blades are fastened with a welding machine, fixed with a special rod.Now the knife needs to be given the most voluminous shape, for the convenience of digging and grabbing the soil. To do this, tap in the middle of the blade with a hammer.
Step 5. We make a pitched board
Pitched boards, in other words, steel rods or rods, are a necessary part of the working part of a potato digger. They are attached to the share by welding to the base of the knife.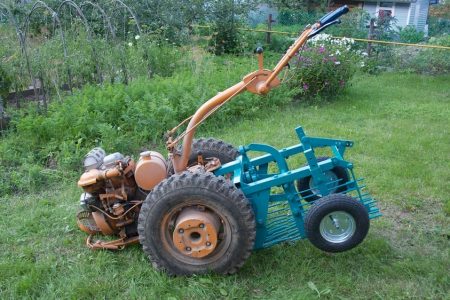
For the manufacture of pitched boards, steel rods with a diameter of 10 millimeters and a length of 1.2 meters are best suited. Welding the reinforcement to the base of the ploughshare is necessary at intervals of 4 or 5 centimeters.
Step 6. Adjustment rods
This element is not always present in the design. It is only necessary if the potentially cultivated soil is very watery. They adjust the angle of inclination of the ramp.
The easiest way to make adjusting rods for a potato digger for a walk-behind tractor - we make a movable frame on which there will be a reinforcing board.
Step 6. Install the support wheels
The potato digger ends with the support wheels. The design of excavators always implies moving elements for more comfortable movement on the surface of the site.
The best option is wheels from an ordinary garden car. It is important that the wheels must be used with a wide tire.
Earlier, we already made and fixed the axles on the frame. Now we need to fix the wheels on the axles with a hairpin, according to the same principle as on the garden wheelbarrow.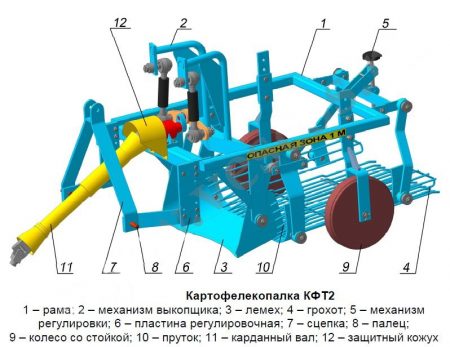
Creating a Simple Potato Digger
If the option with a vibrating digger is too complicated and time-consuming for you, you can turn to creating the most simple design of a manual digger for potatoes.
Making a simple do-it-yourself potato digger for a mini tractor or walk-behind tractor does not require special materials and even drawings.
To make a DIY potato digger do it yourself useful fry, which can easily be cut, for example, from a shovel. Damaged villas can be used as rods.
A further principle for creating a manual potato digger similar to the process of creating vibratory. There are many tutorials for creating do-it-yourself kopalka with video in the public domain on the Web.
Potato digger reviews
The unit, which greatly facilitates the work of amateur farmers, found a response among many people. The Internet stores a lot of reviews on the work of a potato digger for a walk-behind tractor or tractor. Moreover, reviews are left about both purchased devices and homemade potato diggers for a walk-behind tractor and a mini tractor
For example, summer residents who discovered the cultivation of various crops, note that such aggregates are a real find.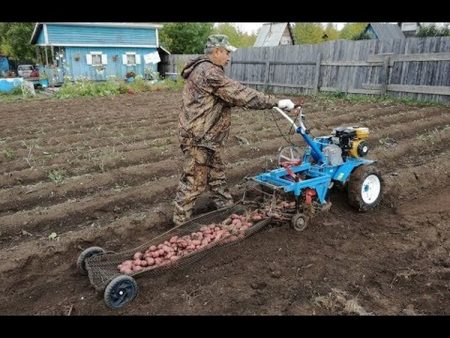
“A few years ago I bought a Neva walk-behind tractor and bought a digger for KVM-3 brand potatoes for it. This is a vibratory device with which the whole harvest has become a real pleasure. I have problems with my back, so I can’t use a shovel. And after working with a potato digger I don’t feel any unpleasant sensations in my sore back ”
As you can see, the use of a potato digger for a walk-behind tractor significantly reduces the need for physical labor. What is an important factor for summer residents, many of whom are already elderly people with health problems. Even people who do not have health problems are grateful to potato diggers for a mini tractor or walk-behind tractor. Active labor, which is abundant on earth, can lead to poor health, even if it was ideal before. So the use of potato diggers is a kind of health prevention when working with the harvest. Especially a potato digger for a walk-behind tractor can be used for other purposes, it is great for collecting different crops, not just potatoes.
“Very pleased with the purchase of a potato digger. Working with her is incredibly convenient and efficient.There is no difficulty in understanding the process. You just need to attach the device to the walk-behind tractor and calmly move around the site. At this time, the unit will do everything for you. I managed to collect all the potatoes from the plot in 2 days. But I would have to wave a shovel for at least a week. "
From this review, it becomes clear that the potato digger tractor and others protect not only health, but also another valuable resource - time. Harvesting speed may depend on various factors. Not everyone can afford to spend weeks harvesting all planted potatoes. Meanwhile, digging potatoes will help to speed up the process at times. This is especially true for those who plant potatoes in large volumes.
“Every penny given for my potato digger paid off. In fact, this year I didn’t deal with digging potatoes, I processed 30 acres over the weekend, nobody beat my hands
Even if a potato digger for a walk-behind tractor was purchased for a considerable amount, consumer practice shows that these funds were not wasted. In addition to saving time and health, a potato digger for a walk-behind tractor gives and material savings. For example, summer residents do not need to take vacations or days off to have time to collect everything from the site. Also, the device establishes a better harvest, which can increase its total volume. Finally, having managed to collect all the potatoes from the plot before frost, rains or other unpleasant circumstances, the farmer will only win. Knowing how to make a potato digger with your own hands can save even more.
Today in the virtual space there is a lot of information on all types of garden equipment. You can also find instructions for creating or fixing a potato digger for a walk-behind tractor on a video. You can find it as a detailed description of how to make a potato digger for a walk-behind tractor with your own hands, find information on proper use, repair or replacement equipment options and other relevant requests. Using global experience from open Internet sources, make almost every person can do a potato digger for a walk-behind tractor with his own hands, it only takes time and minimal ability to weld, work with a drill, grinder, etc.



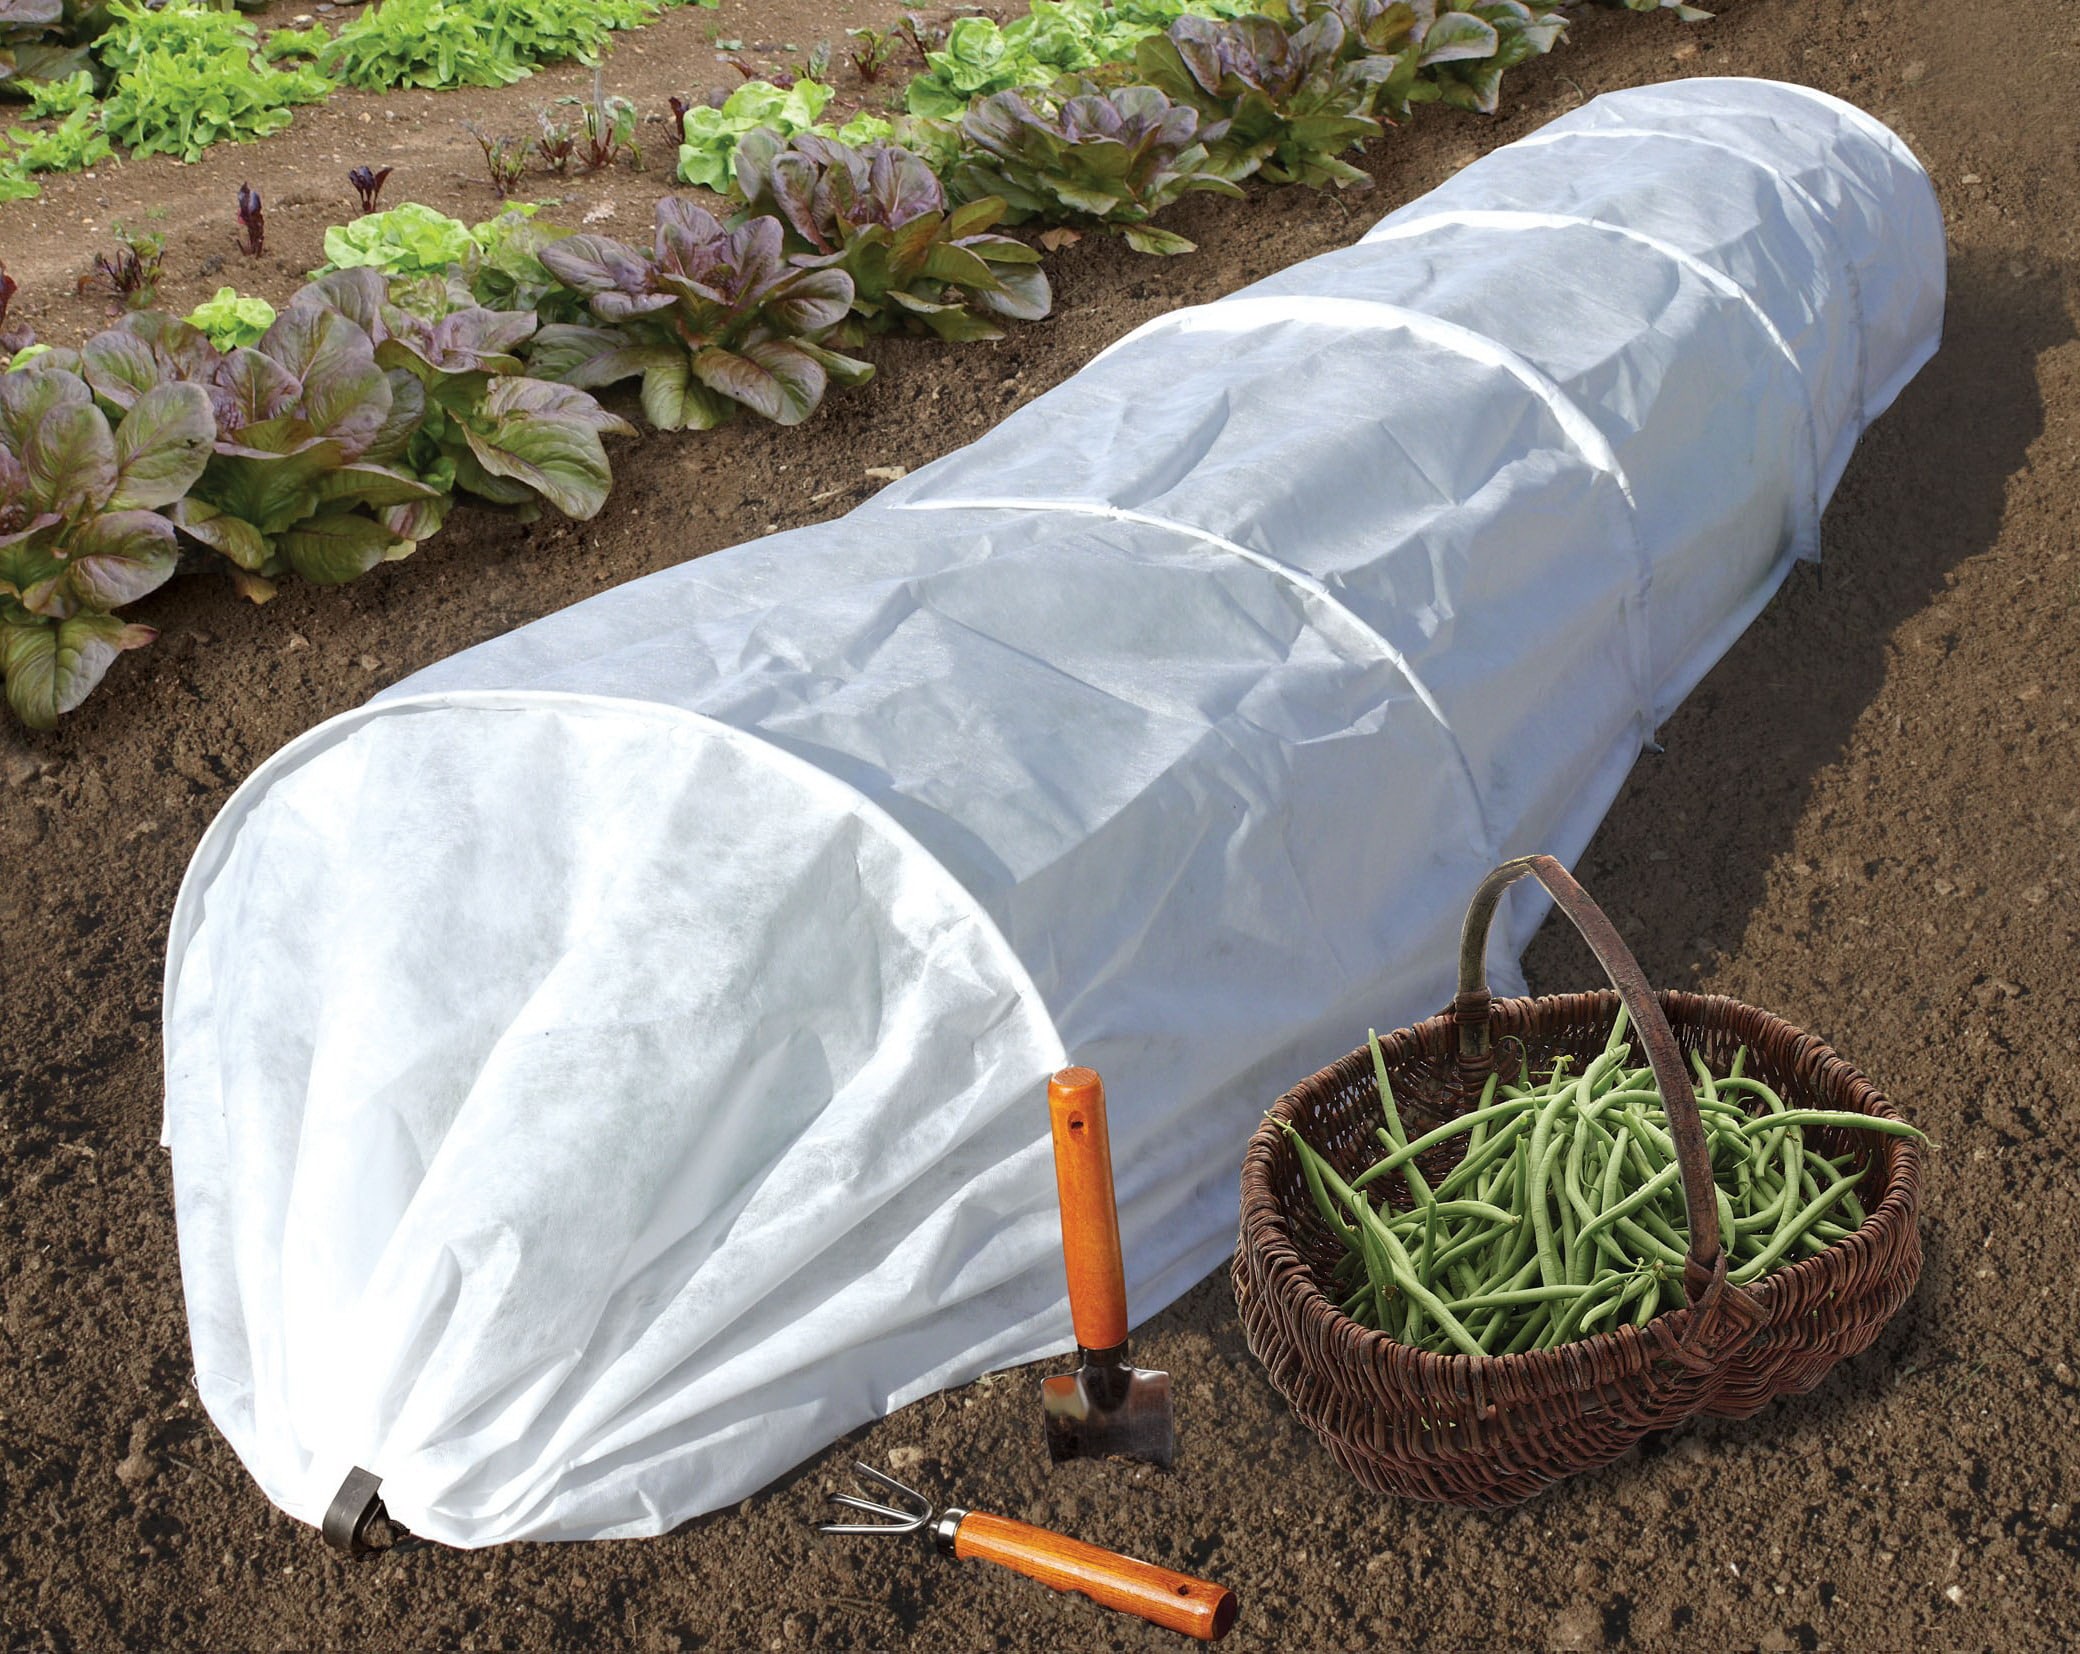 Cover material for plant care: features of use
 Types of winter covering material for plants
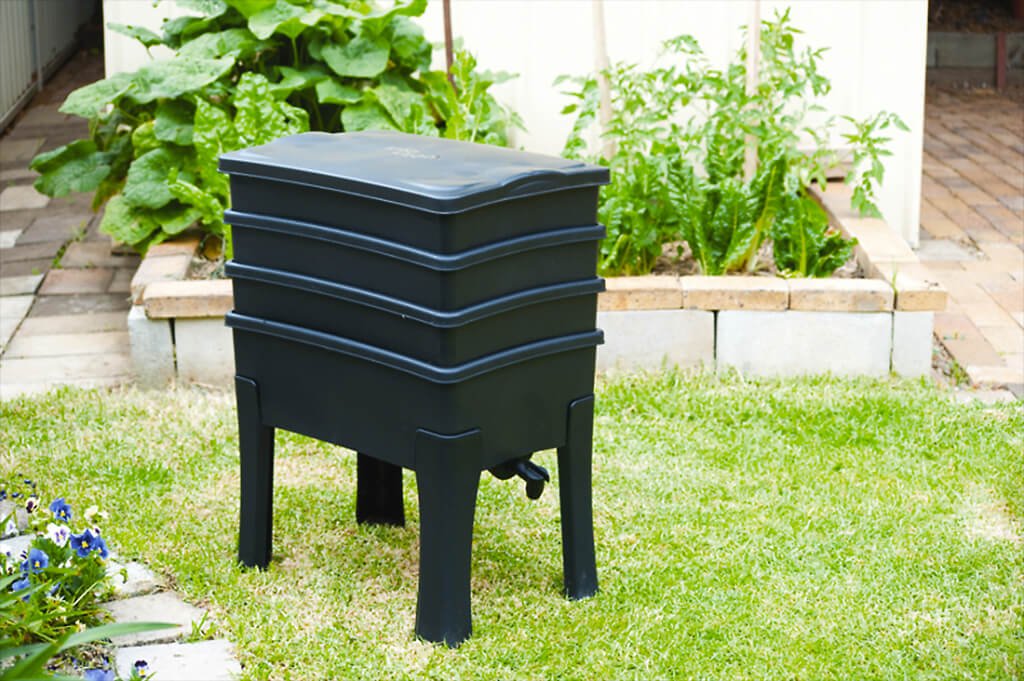 Farm for the extraction of vermicompost
 What covering material to choose for a greenhouse?