Greenhouse convertible
Many garden crops begin to grow early. Adverse environmental factors and bad weather can ruin the plants, so gardeners need to take care of protecting the future crop. Reliable and long-lasting protection is a polycarbonate greenhouse. The cover of such a structure is thrown away or removed, and there are many constructions of greenhouses. Any model can be purchased at the store or do it yourself.
What are the greenhouses with opening top
 Greenhouses grow small plants that love heat and give a good harvest in conditions of constant heat. In addition to polycarbonate for the manufacture of greenhouses also used glass or foil of durable polyethylene. These materials freely let the sun through. The sun warms the earth and plants well, and the heat in the room is stored for a long time. Due to the greenhouse effect, the temperature inside the structure is always stable.
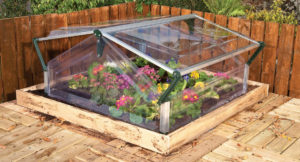
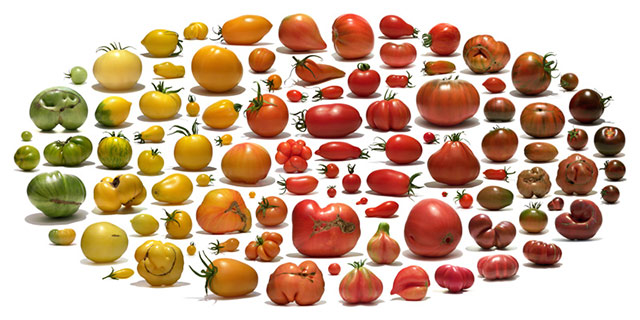
Greenhouse is much smaller than greenhouse. It is compact, it is not heated, there is no automatic watering system in it. In a small greenhouse can not grow large crops, but it is ideal for greens (dill, sorrel, parsley, onions). You can plant carrots, turnips and beets in it or make strawberry beds.
If there is decomposing organic matter near the greenhouse or inside the beds, all crops will grow much faster.
Greenhouse suitable for lovers of floriculture. It can grow flowers until late autumn.
Advantages of the construction

Despite the modest size and simple design, the benefits of a greenhouse are obvious:
- reasonable price;
- flip cover;
- durability;
- ease of assembly;
- constant lighting;
- simple overheating protection system.
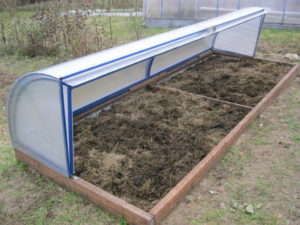
Thanks to the hinged lid in the winter snow falls inside the greenhouse. Its a bit, but enough to ensure that the earth does not dry out and does not lose salt. Removable cover protects plants from overheating. It is much better than the window leaf: since the window leaf occupies a limited area, warming up is uneven.
Close the greenhouse for the winter: step by step instructions
Experienced gardeners are advised to start preparing the greenhouse for the next season immediately after the harvest of the current year ....
After installing the greenhouse you need to constantly monitor the temperature. If it gets too hot, the plants may die. In hot weather, you should always open the lid or flaps to ensure that the crops have access to fresh air.
Where to put a greenhouse
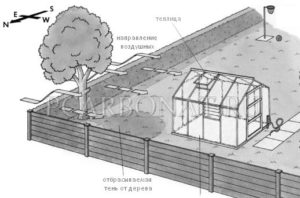
Placing greenhouses in a modest area is easy, but if the site is large, the placement requires a competent approach. It is better to install the structure in a southerly or southeastern direction. Experienced gardeners do not recommend putting a greenhouse in the north or west. Placing under a tree or right outside the house is also undesirable: a permanent shadow is not the best option for growing crops. A good place is not far from the house or the fence, so that the greenhouse is protected from cold winds.
Foundation arrangement
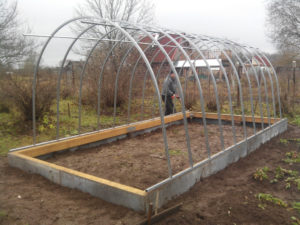
Before installing a greenhouse you need to build a reliable foundation for it.It has a supporting function, and is also necessary for thermal insulation and maintaining a constant environment inside. Materials for the foundation, usually serve as concrete, timber or bricks. It is possible to equip a support for a future construction as follows:
- make a marking around its perimeter;
- prepare a trench from 10 to 25 cm deep;
- fill it with sand by a third;
- lay out the inside of the bar or brick;
- fill with fine gravel or earth.
On the finished foundation set frame. It will need fixtures. Most often, long pins of metal are used, hammering them into the soil to a depth of 50 to 70 cm. Thanks to this method, the structure will not be blown away.
Types of greenhouses with opening top
There are many types of greenhouses with removable roofs. Before buying does not hurt to get acquainted with what they are. This will help you choose a good and practical option.
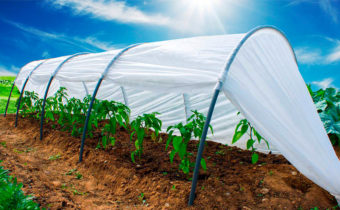
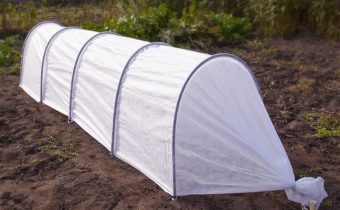
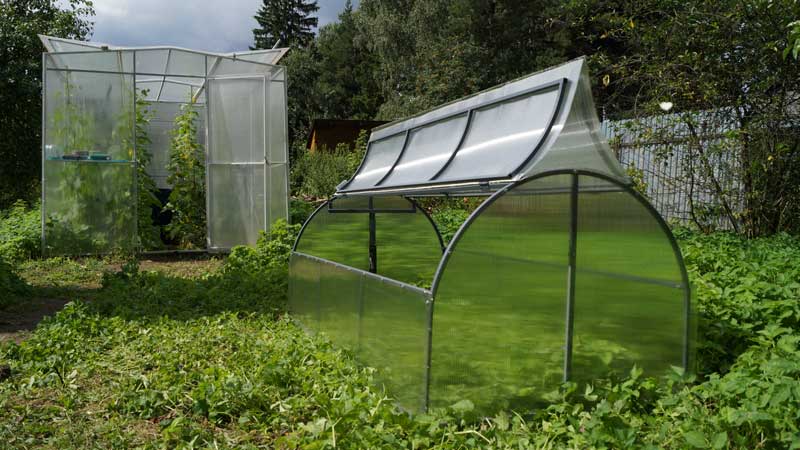
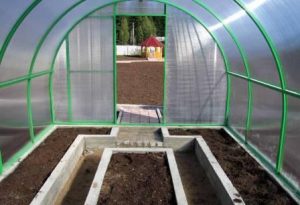
For the manufacture of arched roofs are always used polycarbonates - because of their flexibility, durability and reliability. They pass light well, and the semicircular form of the arch does not allow condensate to accumulate inside the room. Assembling arched roofs is simple, they look attractive in terms of aesthetics.
Growing tomatoes in a polycarbonate greenhouse: planting and care
Polycarbonate greenhouse structures are becoming increasingly popular with gardeners. Well-being ...
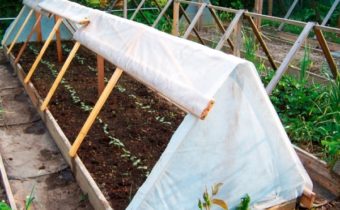
There are also solid gable roofs. They withstand heavy loads. In a greenhouse with a gable roof, you can grow both high and low plants. This design will allow to equip the room with a ventilation system, but it will cost much more expensive. It is more difficult to install than the arch. As for single-bar constructions, this is the most unfortunate option of all. As they adjoin the walls, little sunlight comes in, and snow constantly accumulates on the roof.
Greenhouse with arched roof is not designed for tall plants.
It is possible to equip a greenhouse with a triangular roof in the shape of a dome on the site. Thanks to the elements in the form of triangles in the room is always enough heat and light. Triangular roof can be fully open or shifted in any direction.
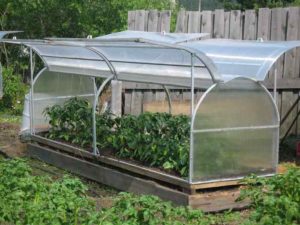
One of the varieties of arched structures - "droplet". It is named so because when installing all the faces of the elements under the slope are reduced up.
Instructions for the assembly of the greenhouse-bread bins
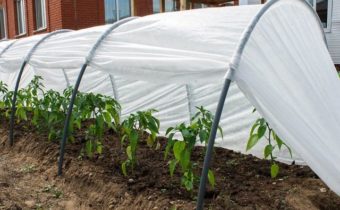
The roof of the greenhouse - "breadbaskets" can be single or double. Folds can be moved up and back. Movable elements of the greenhouse are attached with hinges, and sheathed with polycarbonate sheets. Their thickness is 4 mm. The frame is made of metal profile. This is a strong pipe with a cross section of 20x20. To assemble the breadbasket, you need to perform a series of consecutive steps:
- unpack the ends (they look like arches with a stand vertically in the center);
- remove the film;
- understand where the protective coating is;
- set the PC sheet on the end;
- attach it to the profile with screws;
- cut the sheet, focusing on the perimeter of the butt;
- assemble a skeleton of horizontal ties and ends;
- close the ends of the profile with plastic plugs;
- assemble the sash;
- to fix it on the frame (for this you need a moving mechanism);
- check the operation of the sash;
- make a pen.
Varieties of tomatoes for the greenhouse, resistant to phytophthora
Diseases of vegetable crops can completely deprive the entire crop. Many of them can affect different cultures ...
It remains to attach the fixing pillars to the frame so that it will not be carried away by the wind, firmly beating them into the ground.
Instead of screws, you can use thermal washers. This will prevent deformation of the skin in hot weather.
Butterfly greenhouse assembly instructions

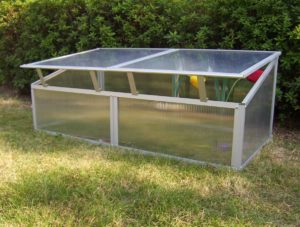
In contrast to the "breadbasket", the "butterfly" has a folding, rather than sliding sash. It is easy to assemble. It is necessary to unpack the kit, determining where the protective coating is located, and then follow this algorithm of actions:
- assemble the first end;
- collect hinged covers;
- bolts and butt the ends together;
- fix the covers with hinges (two for each);
- attach fixing posts for the valves;
- Attach a PC sheet to the end, fix the dowels and trim the edge;
- also collect the second end;
- put up a sheet of PC;
- attach it to the frame and covers;
- cut through the trim racks;
- attach a handle to each of the valves;
- install a greenhouse in the ground.
The ends of the greenhouse can be glued at the bottom and top of the sealing and perforating tape. This will help make it even stronger.
Assembly instructions for the Belgian greenhouse
A Belgian greenhouse is convenient because it lacks bent and round elements. It can be assembled very quickly, and when installing, use the usual instructions:
- to cut a profile in view of the initial sizes;
- assemble a rectangular frame;
- attach racks to the base of the structure;
- set between them elements that look like rafters;
- assemble the cover;
- loop it to the frame;
- make clamps for the cover;
- attach the polycarbonate sheet to the end;
- to fix its trimming with screws;
- cut the sheet around the perimeter;
- do the same with other walls;
- install a greenhouse in the ground.
Build a greenhouse "Zucchini"
Reviews
Alexey (Sochi)
“I decided to put a small greenhouse in the country in order to grow greens and vegetables in it. Installed on the site arched design. Vegetables grow beautifully, polycarbonate - the material is strong and reliable. Since summer is always hot in our area, I decided to replace the screws with special thermo washers so that the “house” would not be deformed. A greenhouse is the second year, does not take up much space and looks beautiful. "
Elena (Vladivostok)
“We have a big lot. By choosing a greenhouse, I decided to approach responsibly. I wanted it to be both beautiful and practical. I chose a design with a triangular roof. It took a long time to install it, and the whole family understood it, but not in vain. A cone-shaped roof not only adorns the site, but also lets in a lot of light, which is necessary for flowers. We grow flowers before the onset of cold weather, we are very satisfied. ”
Sergey (Moscow region)
“I have a comfortable butterfly garden in my country house. Polycarbonate is a durable material. It is ideal for greenhouses and greenhouses. It almost does not need to be cleaned, and the snow from the semicircular roof falls by itself. Of course, much depends on the quality installation. PC is a light material, so it can easily be carried away by the wind. I went to the installation responsibly: I made the foundation and a solid frame. The frame is additionally fixed racks. Spent time, but I do not regret it at all. I hope that the "butterfly" will last a long time. "
Alexandra (Leningrad region)
“The greenhouse for the dacha was constructed and assembled by itself. We decided this: if you do, then for a long time, so the best option is a gable roof. It is almost not necessary to scrape snow from it. Inside there is some snow and water, but it is good for the soil: it does not dry out and does not lose its qualities during the winter. For reliability, we were not too lazy to glue the ends of the building with a special tape. A greenhouse is worth the third year: the wind doesn’t care for it, and it doesn’t need repair. ”
Any polycarbonate greenhouse construction is simple to manufacture and assemble. It will take a little time, but, most importantly, approach the matter responsibly, so that the room serves for a long time, and vegetables, flowers and berries always delight in their abundance and harvest.
 (No ratings yet)