"Dachnaya-Strelka" - do-it-yourself assembly
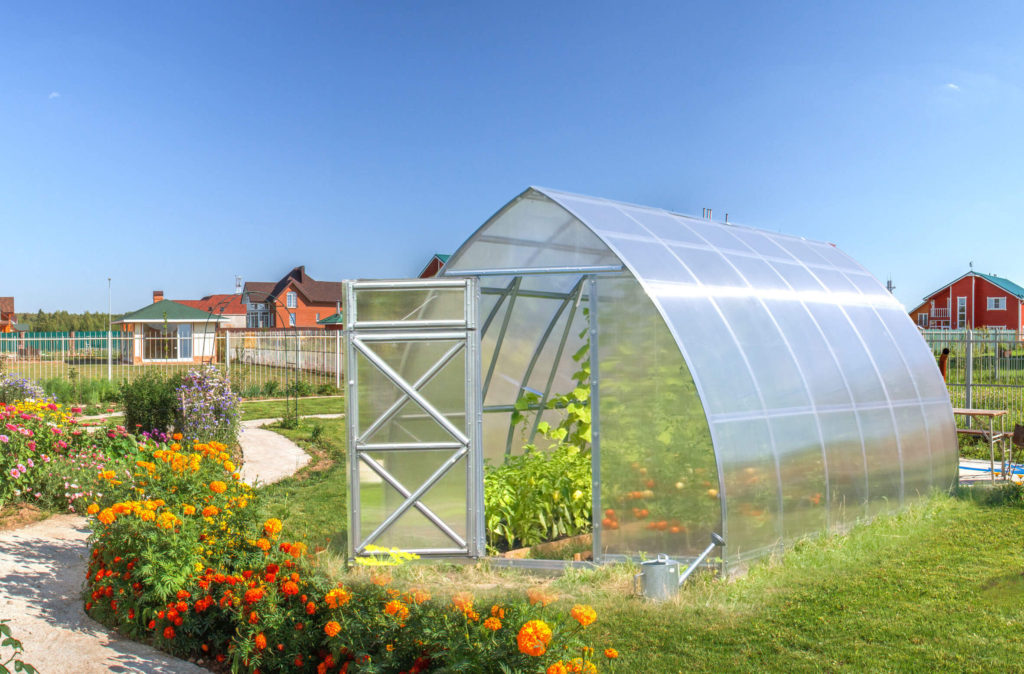
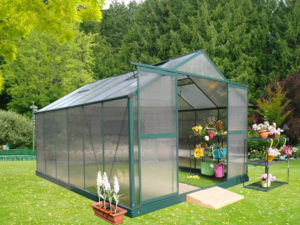
Where there is a lot of snow in winter, the dacha greenhouse will be just right. Engineers of Volia worked on its construction. It has been on the market for over 20 years. In its polycarbonate models, excellent yields of cucumbers and tomatoes are successfully grown.
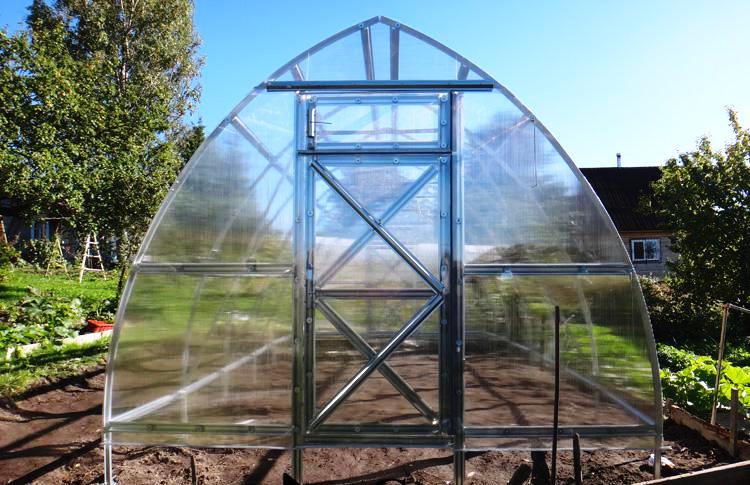
The original shape of the dacha arrows
The design of the greenhouse has been optimized. It is distinguished from other models by a frame of a peculiar form, designed for heavy snowfalls. The end of the design follows the pattern of the arrowhead. The model occupies an intermediate position between the arched and dvukhskatnyh structures.
The advantage of such a roof is that the snow does not linger on the polycarbonate, it slides down itself without human intervention. Summer residents do not need to go in the winter countryside, in order to clear the coating of a thick layer of snow.
The frame of the Dachnaya shooter is made of a high-quality metal profile that is not afraid of corrosion. A cross section of 20 mm x 60 mm is designed for a load of 450 kg / m². Its analog is a layer of dense snow 1.1 m thick.
Grow vegetables in the model Country hand convenient. The height of 2.5 m is sufficient for the growth of tomatoes of any type (determinant, indeterminant). Cucumbers feel comfortable. The width of the model (2.6 m) is enough to break 2 full-fledged ridges.
Create optimal microclimate vegetables easy. The design provides 2 mandatory vents. The frame allows you to increase their number. It is possible to install additional vents with automatic opening.
It should be noted anticorrosive properties of the greenhouse frame. Dacha Rama arrows are made of galvanized steel profile. The steel-zinc combination reliably protects the greenhouse from corrosion.
Advantages of a set Country arrow
A summer resident can first buy a 4-meter-long Summer Garden model and further expand the greenhouse up to 8 m. Volya produces an Insert set 2 m long. Basic models produce three types of length:
- 4 m;
- 6 m;
- 8 m.
Volia has launched the production of an improved greenhouse model 3 m wide - “Country Arrow-3”.
The buyer can choose the coverage. Sellex polycarbonate with a thickness of 4 mm or more durable 6 mm sheets is available. To strengthen the frame when assembling the structure, special power couplers and stitches are used. The lateral surface of the structure can withstand the pressure of snow weighing 700 kg.
Frame Country arrows can be installed in two ways:
- on the foundation (wooden, brick, concrete);
- without foundation.
A greenhouse without a foundation can be easily dismantled, transported (moved) to another place. For traction with the ground at the ends of the arcs, special “heels” are provided. Installation of the greenhouse can be done on its own. Comes with detailed installation instructions. Most truckers hire a team of installers, because without the skills to assemble the design is difficult.
Installation steps
Before proceeding with the installation, you need to prepare the tools, familiarize yourself with the detailed assembly scheme of the greenhouse Dachnaya shooter. All work can be divided into three stages:
- foundation preparation;
- frame assembly;
- laying cover.
Foundation
The construction on the foundation is longer.It is more stable and tight. For the base using wood, concrete, brick. Less time and effort takes a wooden foundation from a timber 10 cm x 10 cm. It is assembled according to the following scheme:
- using pegs and twine mark sizes;
- digging a trench along the perimeter (width 10 cm, depth 15 cm);
- timber on 2-3 layers covered with impregnation, dried, cut to size;
- the trench is filled with sand and gravel, level the layer with a level;
- lay timber, connect the structure with brackets, corners.
In the finished foundation surface must be strictly horizontal, the length of the diagonals are equal.
To pour concrete foundation, you need much more time. Concrete dries at least 3 weeks. Formwork is installed on both sides of the trenches, a layer of sand is poured at the bottom, concrete is poured. In it, in order to further fix the frame, install anchor bolts.
Brick foundation is the most expensive. Do it in the following sequence:
- dig a trench;
- pour concrete (7 cm);
- make brickwork with a height of 10-50 cm.
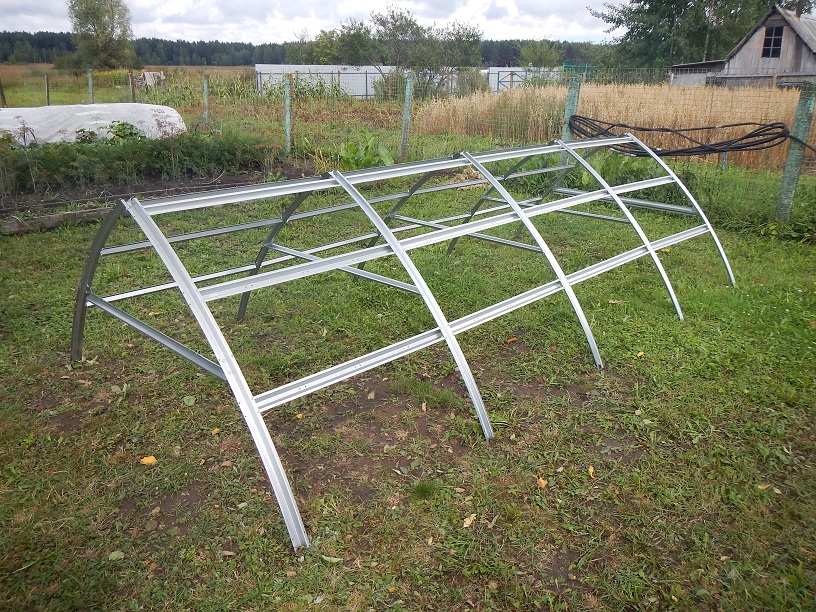
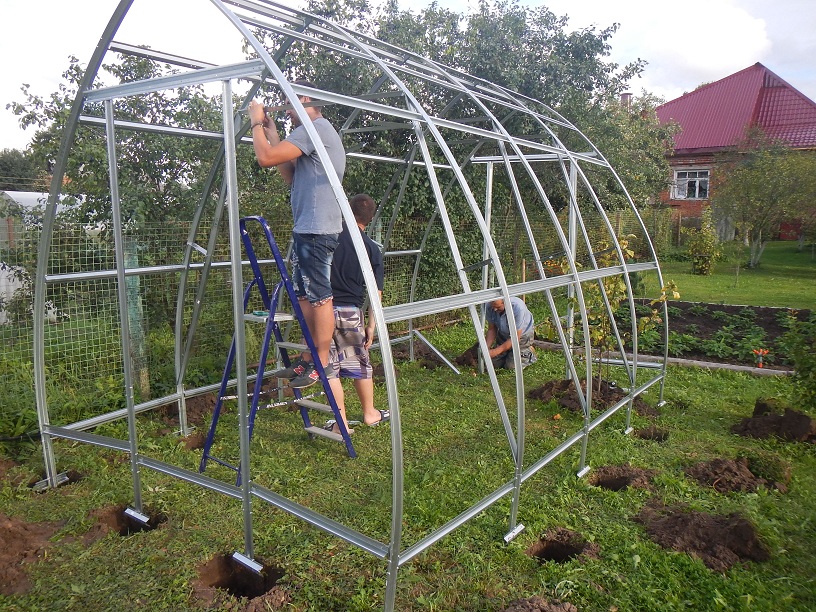
Frame
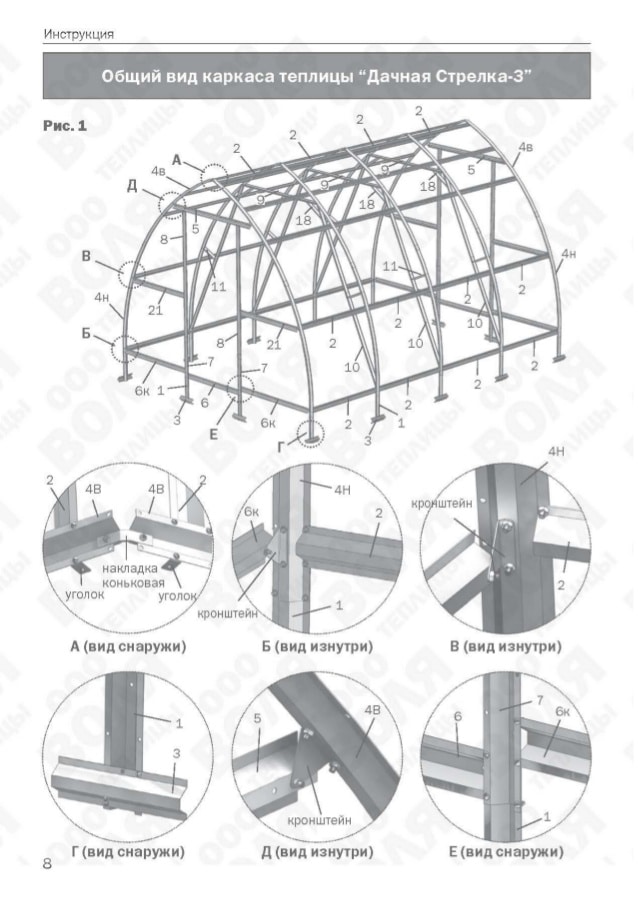
In the diagram that comes with the kit, all the details are numbered. In the diagram, the arrow indicates the installation direction. Details fasten with screws and nuts. Holes are combined with a nail with a diameter of 5 mm. Assembly steps:
- The frame is collected near the foundation. First, twist all arcs with marking 4B in pairs. Fix them with ties number 9. Between themselves connect runs №2.
- Extend ribs 4B with 4H parts. In the horizontal plane, the construction is fixed with runs No. 2.
- Parts 12 to 15, 19.20 are used to assemble air vents and doors.
- At the ends, on the bar No. 5, profiles No. 8, No. 9 are mounted, at the bottom they are fixed with runs No. 6.
- Inside the greenhouse, to strengthen the frame, mount side struts No. 10, spacers No. 11.
- Frame greenhouses attached to the foundation, install doorways and vents.
Coating
For marking parts of polycarbonate use a marker. Cut them with a stationery knife. Begin to sew the greenhouse with the ends. For each cover 3 parts: 1 horse, 2 sides. The edge of the polycarbonate should go along the edge of the profile.
Similarly cover the cover for the doorway. Polycarbonate is attached to the profile with screws and washers. Use a drill bit of 5 mm. The ends are treated with silicone sealant. Polycarbonate sheets (6 mx 2.1 m) are cut in half before laying. Get the pieces the size of 3 mx 2.1 m
Both halves are connected along an incision line with scotch tape and put a greenhouse on the frame. Each subsequent row to the previous one is overlapped. Along the entire length of the greenhouse set ridge profile.
Assembly tools
All fasteners (bolts, nuts) are included in the set Dachnaya shooter. For the installation work will require tools:
- roulette;
- level;
- knife;
- screwdriver;
- hacksaw;
- drill.
Set the model Country arrow better from north to south. This orientation to the cardinal points ensures good illumination of greenhouse vegetables. The assembly is better to do together. In order not to damage the polycarbonate coating, do not tighten the bolts tightly. Greenhouse assembled by hand Country arrow will serve a long time.
We are interested to know the opinion of summer residents on the operating experience of greenhouse models from other manufacturers. Share your thoughts in the comments!
 (No ratings yet)