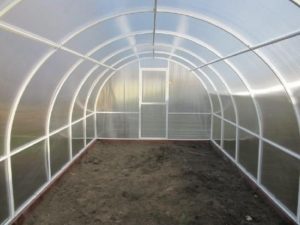
Homemade heated greenhouse
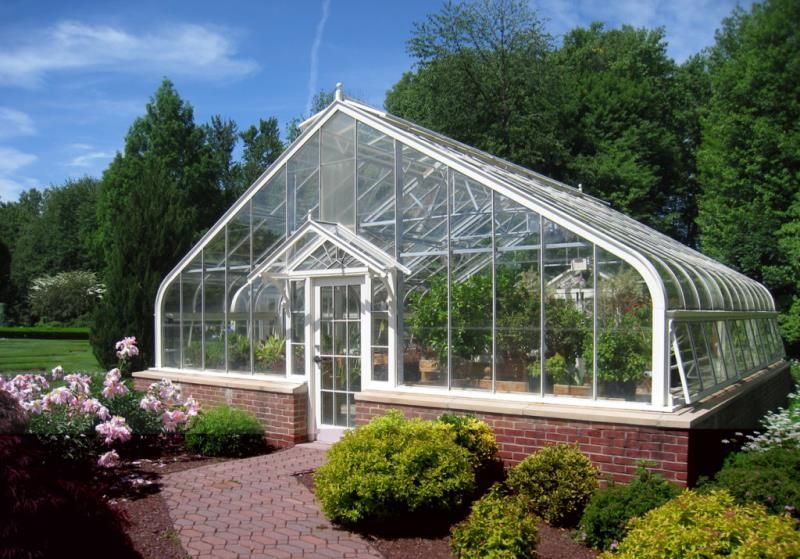
Many gardeners dream of a greenhouse that will function even in winter. After all, growing and gathering crops of greenery, berries and enjoying the beauty of flowers is pleasant and useful. But the construction of the winter version is expensive. There is a way out! Make a winter greenhouse with your own hands!
The most energy efficient design
A great solution is a "thermos". She is endowed with a huge amount of positive qualities. The main is a significant savings and heat preservation.
It operates 12 months a year. It is not afraid of frosts and northerly winds, it is capable of supplying not only food, but also to become a source of income. She has the following positive qualities:
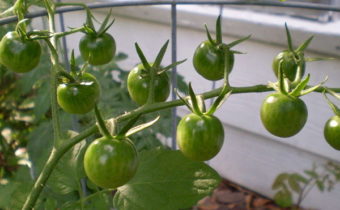
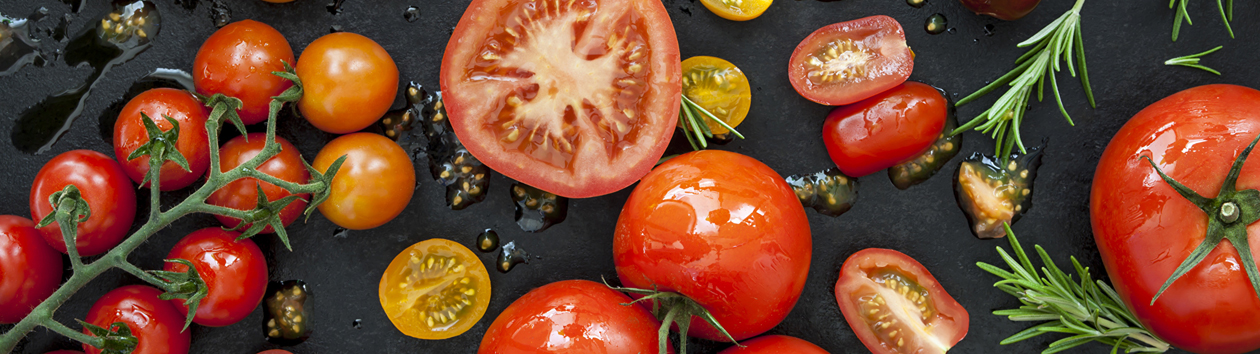
- Fresh vegetables will delight all year round.
- Works in any climate.
- Perfectly passes a sunlight, evenly distributing it on all area.
- When used in the construction of high quality insulation, the sun's energy is converted into heat and a sufficiently long period of time can be maintained.
- Savings on utility bills.
- Due to its design, it is possible to grow vegetables, perennials and exotic fruits, grape bushes.
"Thermos" - almost all is in the ground, but there is no shortage of lighting. Due to the huge window openings inside there is always a lot of light.
Energy saving materials
The following materials are used to conserve heat in the “thermos” construct:
- reflective foil;
- natural wood;
- polycarbonate sheets;
- polystyrene foam.
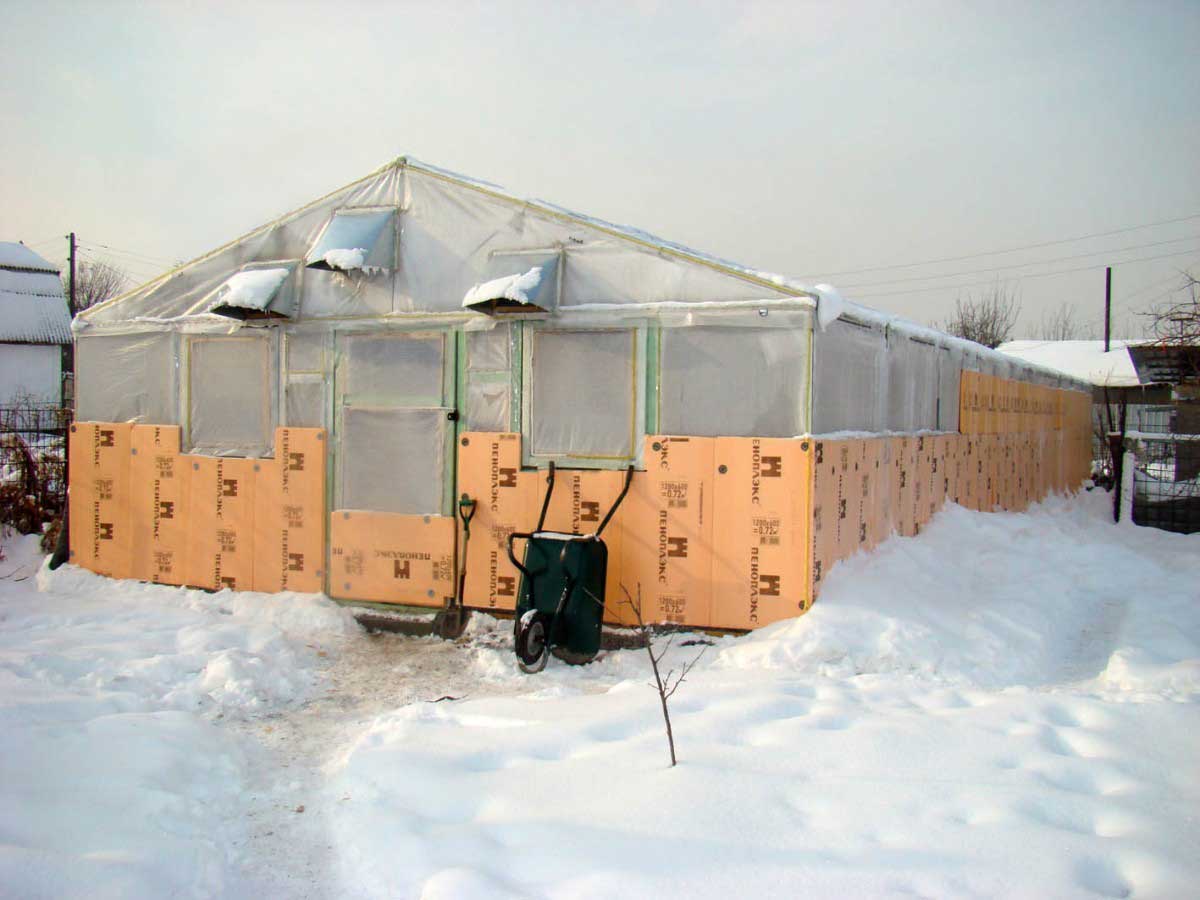
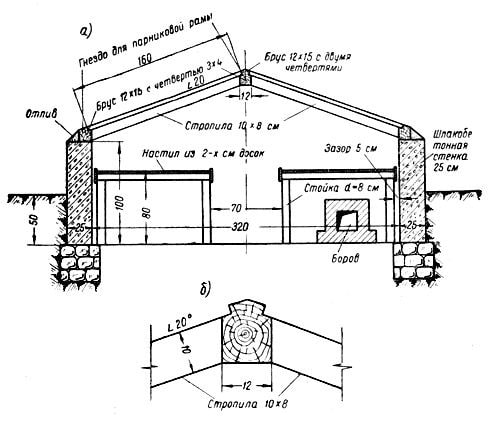
For the main structure, a metal or wooden frame is used. Gardeners in the construction of greenhouses of this type use gable or single-pitch models. In order for the lighting to be excellent, the north wing of the roof should be made higher than the south one.
A more detailed description of the materials in the table.
|
Construction Materials |
General characteristics |
| Rail wooden, metal profiles | For the construction of the roof frame. From reek to make the frame easier than from the profile. When using a metal profile, you will need to weld the elements together. But unlike wood, strength is much higher. |
| Polystyrene foam, mineral wool | These materials "thermos" is insulated. Here only you can decide which material is best to use. |
| Sand, cement, crushed stone, metal fittings | For the construction of foundations and walls of the greenhouse |
| Thermal blocks | They have light weight and cavity inside. They perfectly keep warm. Concrete is poured into the void. They play the role of formwork. They are used for the construction of walls. |
| Film with reflective light and thermal insulation effect | Helps to increase the flow of light and additionally protects against heat loss. |
| Polycarbonate | Cover material. |
| Materials for fasteners | Nails, screws, washers and bolts. |
The project "thermos" - greenhouses
When building this greenhouse with your own hands, you need to go through several stages step by step.
- Perform pre-design.That is, make up a drawing and draft of a winter greenhouse with your own hands. Calculate how much construction materials and accessories needed for its construction.
- Construction of the pit, which must be at least two meters deep. At the same time its bottom and walls are aligned. After produce fill foundation. To do this, use concrete or concrete blocks. This stage is considered very important, since it is the foundation that is responsible for the thermal insulation of the greenhouse. In order to pour concrete, it is necessary to install timber formwork.
- Building walls of thermal blocks. The supporting part is reinforced concrete. A polystyrene layer and heat-insulating blocks are placed inside. Fastening between them is a cement mortar.
It is necessary to carefully choose the place on the site where the greenhouse will be installed. Water inside the ground should be far from the surface.
The construction scheme "thermos" - greenhouses:
- On the inner surface of the walls install foil, which is a reflector. It is best to lay it out in a couple of layers, or use expanded polystyrene with a reflective surface.
- At this stage, the required number of holes are drilled in metal profiles or in wooden beams, slats. Begin to build her skeleton.
- Installation of polycarbonate leaves or polyethylene. For the construction of the outer side of the roof using only polycarbonate sheets, otherwise it just may collapse.
- We mount a convenient passage inside the winter greenhouse, which is best built in the form of a tambour.
- Sealing from the inside. To do this, use plaster or foam.
|
Process |
How much material is needed |
|
Formwork Set the stakes, the distance between them is 30 centimeters. |
Along the perimeter of the pit |
| Making "pillows", a mixture of sand and rubble | 1 * 1, for example, a bag of sand and a bag of rubble |
| Making the frame of reinforcement | 4–6 rods perimeter |
| Foundation mortar | Crushed stone, sand, cement (3 * 5 * 1) |
| Greenhouse wall |
Must exceed the ground level by at least 0.5 meters. |
Warming greenhouses
The main thing in the construction of a winter greenhouse with heating - is the observance of the order. We have already talked about the construction of the pit and the construction of the foundation and walls. We now turn to more complex processes.
Warming
The main thing is to install a heat-insulating film on the walls inside. If the climate in your area is particularly harsh, then you can use foil thermal film. Laying make in 2 layers.
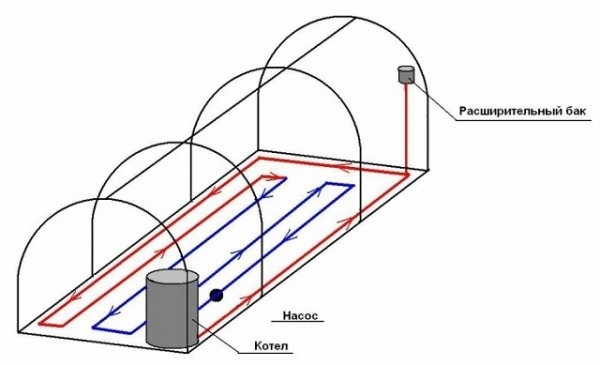
Installation of heating equipment
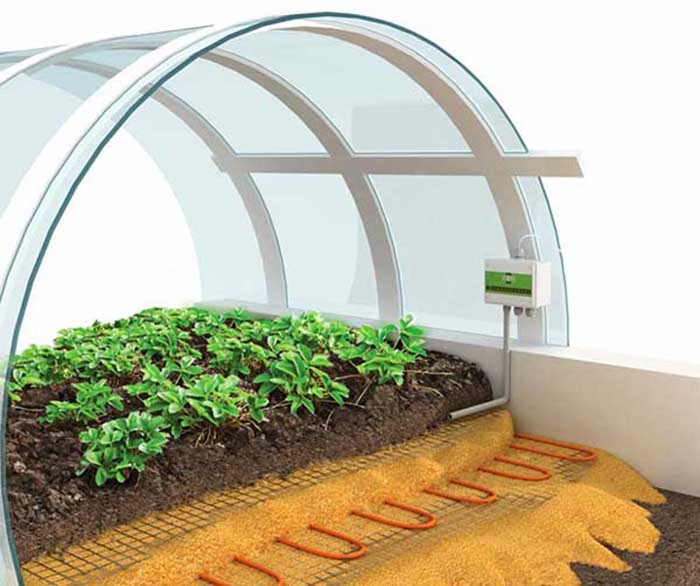
An excellent solution in the full heating of the greenhouse will be the installation of the "warm floors" system. It can be mounted directly into the ground, but in order to avoid damage, it is poured and reinforced. For good plant growth, warm soil is not enough.
The best heating system
To create an optimal temperature regime for plant growth, it is necessary not only to heat the soil, but also the air inside the greenhouse. When choosing a heating system, pay attention to:
- What size greenhouse.
- How much finance there is an opportunity to spend.
- Regional climate.
- Growth conditions.
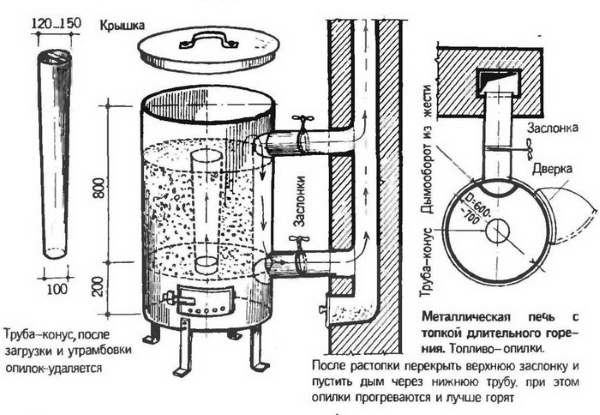
For heating the winter greenhouse "thermos" a great option is the furnace. An ordinary “stove” is used as a heating device. It is very simple to design it yourself. This will require:
- metal sheets of heat-resistant material;
- cast iron, steel and ceramic pipes of equal diameter;
- metal rods and corners;
- plumb with a tape measure;
- a device for cutting metal products;
- welding machine;
- bolts, couplings;
- calcined brick;
- limestone or clay mortar.
One oven - “stove” heats the area of about fifteen squares. There is a gap of at least 30–40 centimeters between the furnace and the walls.For polycarbonate greenhouses, the distance is at least 60–80 centimeters.
The process of assembling or installing the heating system
 The furnace - "potbelly stove" is one of the old and well-known heating systems. It includes in its design a firebox, chimney, chimney.
Installation of the furnace begins with the foundation. It allows you to make its operation less flammable and increases the service life.
Foundation
Foundation construction begins with the arrangement of the pit. Its depth must be at least half a meter. Its depth depends on the dimensions of the furnace. For pouring concrete mix with sand, fine rubble and brick splinters is used. Its thickness is from 15 to 20 centimeters. After the formwork is mounted and cement is poured. Gaps are covered with sand and covered with ruberoid. This provides additional moisture resistance. The last stage of the construction of the foundation is laying brick. He put a double layer.
Installation of "potbelly stove"
Types of furnaces - "burzhuek" quite a lot. The simplest design is a rectangular stove. For more convenient operation, the firebox should come to the surface.
- Make a drawing of the future furnace.
- For the construction of the furnace used any heat-resistant metal.
- Metal sheets are laid out, and the bottom, walls and roof are cut out.
- Three walls and the bottom are welded together.
- At a distance of about 15 centimeters from the bottom of the welded corners of metal. On top of them set the grid. It can be independently made from twigs. The distance between them should be from 1 to 4 cm.
- Oven cover. A round hole with a radius of 6.5–7.5 cm is cut through it. After it is welded to the walls.
In order to place the chimney under the soil, it is possible to install a hole for the chimney not only in the roof, but in one of the walls and even in the bottom of the stove.
- In front of the furnace, a hole is made for laying the fuel and the hole is blowing. The doors are attached with hinges and welding. Also do not forget about the pens.
- The facade of the furnace is welded to the rest of the structure.
- There is a round hole in the roof, into which a narrow metal ring is welded. A chimney will be connected to it later.
- Attach the legs to the oven.
- If there is a need to impose a brick oven.
Chimney
During installation, you can use solid pipes and pieces. If the greenhouse is small, then it can be laid under the soil layer.
- All chimney pieces fasten together.
- After attached to the base.
- In the case of laying the chimney under a layer of soil digging holes in the ground, a height of 0.25 - 0.4 meters. Put the pipes in them. The distance between them is not less than 0.6 m. All clay is covered with clay. The end is outside.
- When building a ground-based chimney install props. The end of the pipe must be lifted. The pipes outside are covered with lime.
Chimney
She is responsible for removing smoke from the room. It must be covered with insulating material and attached to the chimney.
- A spark arrestor is put on the end of this pipe.
- Install a damper for adjusting the thrust, which is controlled by two wires bred to the outside.

Alternative heating
If you do not want to bother with stove heating, you can use the following types of alternative heating systems:
- Sunny This is the most natural heating. That is, the greenhouse must be installed in the brightest place on the site.
- Electric. It is recognized as an excellent option for heating small areas.
- Airy The most difficult installation of all known heating systems.
- Warm floor. Heats only the soil.
- Biological. Apply manure. In the process of its decomposition gases are released, which heat the greenhouse.
Lighting in the winter greenhouse
Lighting for greenhouses winter options, and especially in the design of the "thermos" should be given special attention. In the development of plants all ranges of light are important.For example, for seedlings need blue light, and for the development of red fruit.
If we exclude any range in the development of plants, then get a tasteless harvest. That is why in all winter greenhouses there is light with different spectral data.

Types of light modes
At arrangement of light in the winter greenhouse it is possible to meet two types of lighting.
- Daytime. The light passes in the necessary quantity for plants. The range is from 400 to 1,000 nm. Used as a permanent, automatic lighting. But it is better to use it infrequently.
- Night lighting. It is used when you need to extend the daylight. It is used periodically.
Plants need a rest period from light.
Varieties of lamps
For good growth and fruiting of plants, all lamps that are installed in the greenhouse should have a tilt angle of more than 90 degrees. But only if they hang low. Also, the lamps should be light in weight and miniature in size.
The following types of lamps are encountered:
- Glow plugs. Not suitable for greenhouses.
- Fluorescent. When installing such lamps you need to pay attention to the original color of the lighting.
- Energy saving. Used in tandem with a reflector that reflects light.
- Metal halide. Basically possess a blue sector. When using these lamps is imitation of lighting in spring. Used with the growth of seedlings and growing greens during the growing season.
- Mercury high pressure. It has high radiation in the ultraviolet sector. It is used only when the seedlings begin to stretch.
- Sodium high pressure. Radiate red light. Great for growing exotic plants.
- LED. Approaching the sunlight to the maximum.
As a result, it is clear that lamps of LED models will be an excellent solution in lighting the greenhouse. They can also make additional lighting and do not spend on additional equipment, for example, fitolamps.
Greenhouse electrification
For a detailed calculation of the number of lighting fixtures:
- Make a plan, which will indicate the location of the sources of lighting, electrical wires and switches.
- Calculate the amount of material required.
- At this stage, wiring occurs in the greenhouse.
- Install the lamps.
Watering greenhouses
In order for you to enjoy a fresh crop all year round, you should pay attention to the watering system of the greenhouse.
Scientists have proven that it is best to use a drip irrigation system. To install it you need to turn to professionals. They will provide your property with moisture in a few hours. Its final cost will depend directly on the size of the greenhouse and the number of plants growing in it. So, for watering one bush requires one horn drip irrigation. Its cost is from 50 to 300 rubles.
Greenhouse - "thermos" is a good option for winter plant growth. It gives excellent yields. It can be built both independently and with the help of professionals. Learn! Build! Use the results.
 (2 ratings, average: 5,00 from 5)