
More and more people care about the environment, independently using organic waste using earthworms and getting biohumus. In the conditions of a large personal plot, a compost pile is being built for these purposes; in a small apartment, special vermicomposters are used to obtain biohumus. The industry produces several options for such worms, but it is easier and cheaper to make it yourself. Let's figure it out together how to make a small vermicomposter for a home with your own hands.
Content
Why do you need a vermicomposter
 Vermicomposter is a device for receiving vermicompost and disposing of household waste using earthworms. During its operation, the vermicomposter solves three problems:
- Earthworm breeding for feeding poultry, for fishing or for sale.
- Year-round production of large quantities of biohumus.
- Disposal of household waste of organic origin.
The device and principle of vermicomposter
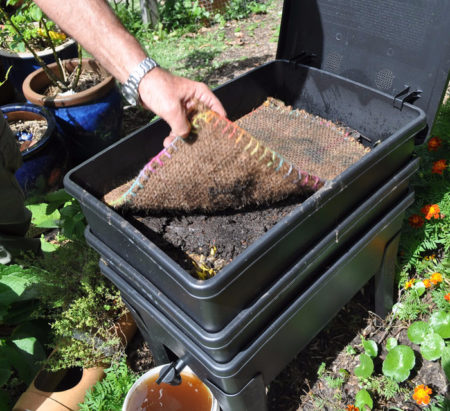
All vermicomposters are identical in design and are a tower of boxes stacked on top of each other.
The bottom drawer is made in the form of a tray with a sealed bottom. Its purpose is to collect liquid flowing from the upper floors. A crane is installed at the bottom of the tray to drain the machine. In some industrial designs, a filter for a vermochay is mounted in the lower tray.

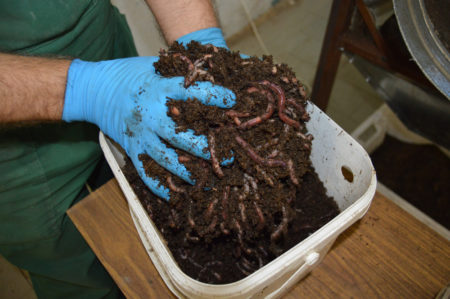
The middle box is considered the main one. It hosts the bulk of the worms. The food in the worm is laid on top, processed into vermicompost by the stomachs of animals and settles at the bottom of this box. As soon as the middle box is filled with vermicompost, the next one is placed on top of it.
The upper box is installed after overflowing with biohumus of the main middle tray. With regular feed intake in the upper box, the worms gradually release the middle tray, allowing the host to remove biohumus from it.
Benefits of DIY
 The industry produces several options for vermicomposters, but much more profitable punch make yourself.
The advantages of making do-it-yourself vermicomposters:
- homemade worms are made from any improvised materials, so their cost is several times lower than that of purchased;
- Home-made designs are made taking into account their future location and, therefore, optimally fit into the interior of any room;
- the number of animals in the worm is constantly increasing. With the use of home-made structures, you can quite easily, if necessary, build up the tower to the required volumes.
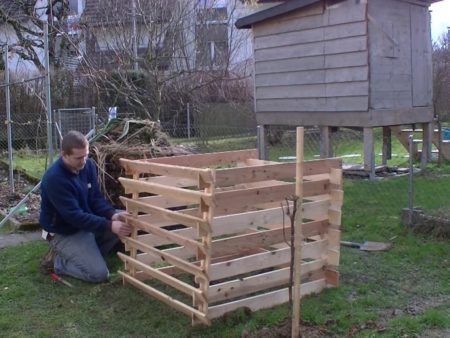
DIY Vermicomposter
Making a vermicomposter with your own hands does not take much time and is quite feasible at home.
Necessary tools
To make a worm, you will need the usual set of tools:
- for marking the material you need a square, tape measure, a ruler;
- for drilling work - drill driver, set of drills;
- for woodwork - jigsaw, files.
Materials for assembling a domestic worm
 The variety of materials used depends only on the imagination of the master. The following can be successfully used as a basis:
- boxes of wood and chipboard;
- salted fish buckets, empty cans;
- meat and cheese curd boxes;
- seedlings from Ikea;
- high volume containers.
Vermicomposter of the worm bin system
 The simplest version of the worm is made according to the "worm bin" system. Translated from English - it simply means a bucket of worms.
For the manufacture of such a design, the following materials will be required:
- a plastic or wooden container with a lid of 20-40 liters or a large flower pot;
- shallow pallet according to the size of the container;
- two wooden blocks with a section of 30 by 30 mm.
Assembly
- In the bottom of the tank every 5-7 cm holes are drilled with a diameter of 1-1.5 mm.
- Holes with a diameter of 1 mm are drilled in the side walls after 10-15 cm.
- Whetstones are sawn across the width of the container and placed on a pallet.
- The container is mounted on sticks.
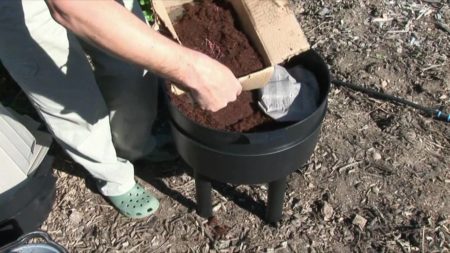
- The container is filled with a mixture of the base substrate and feed in a ratio of 2 to 1 and watered with settled drinking water.
- Worms of the “Diligent” breed or the California Red Worm are launched into the worm and closed with a thick cloth or lid.
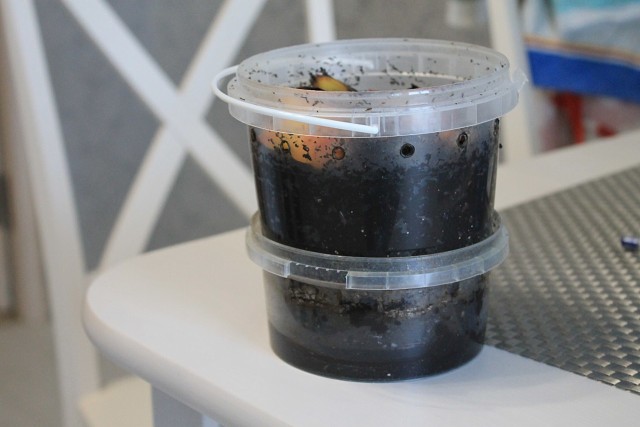
This version of the vermicomposter practically does not require attention. It is filled once for the entire cycle, then all maintenance is reduced to weekly humidity control. After a few months, the worms process the entire contents of the container into vermicompost. After that, they are selected from the ground and relocated to a new place, and the container is emptied and put into operation in a new way.
If there is no desire to arrange a two-story structure and install the box on a pallet, you can not drill holes in the bottom. In this case, a layer of gravel or expanded clay is laid at the bottom.
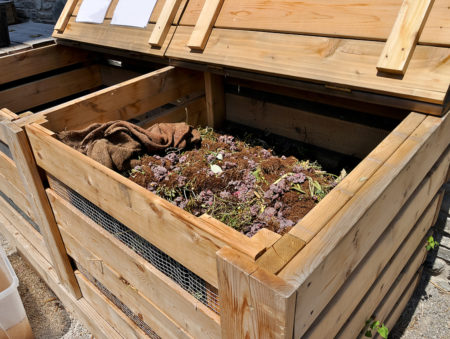
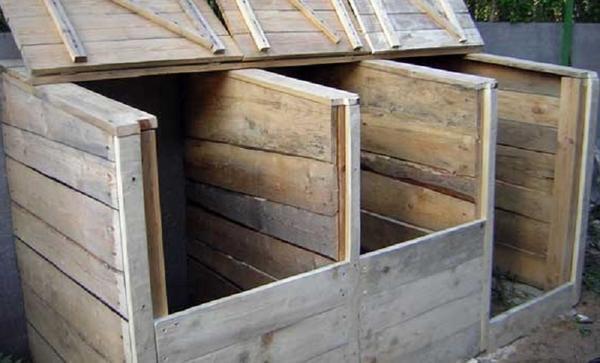
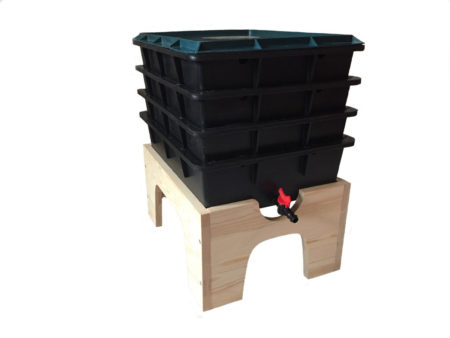
Tower type composter
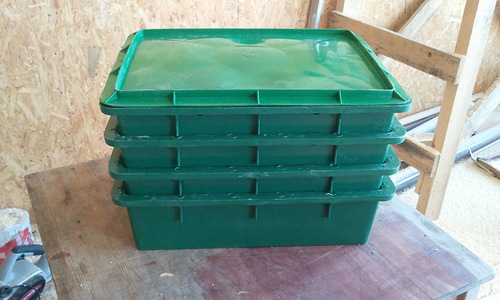
The Tower-type composter is versatile enough and can be used to produce a livestock of worms and to process household waste into vermicompost. The following materials are required for the manufacture of the structure:
- 4 plastic drawers that can be tightly mounted on top of each other;
- lid on top box or piece of plywood;
- faucet with accessories for draining the vermochay;
- plywood, chipboard or furniture board for stand;
- bars with a section of 50 to 50 for the legs of the stand.
Assembly
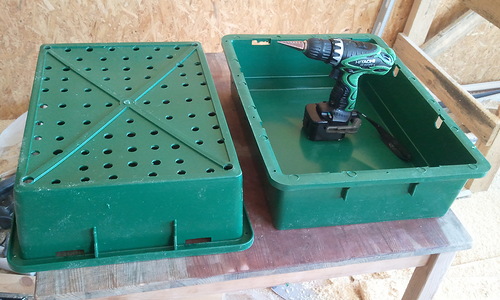
- A hole with a diameter of 13 mm is drilled in the bottom of the tank. A crane is inserted into the hole and, through two gaskets, is screwed to the bottom of the tray with a nut.
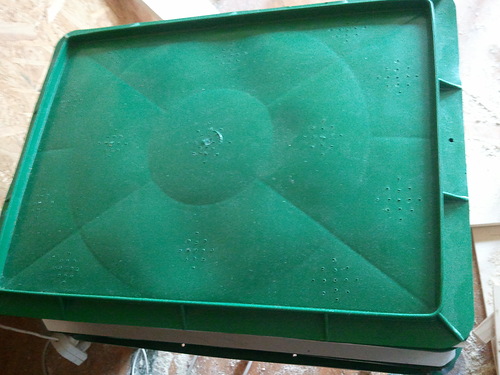
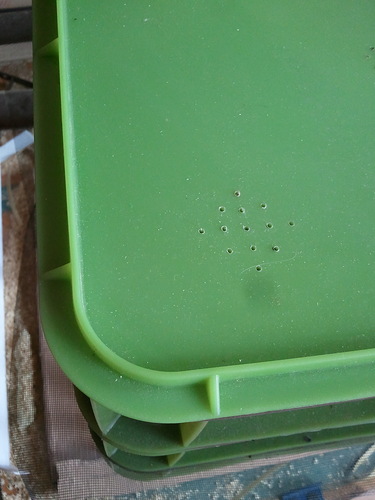
- In the bottom of the three remaining boxes, holes with a diameter of 5-6 mm are drilled through 30-40 mm. For more accurate drilling, the centers of the holes are pre-punctured with an awl. Holes with a diameter of 1 mm are made on the sides of the ventilation drawers.
- In the lid, after 5 cm, air holes are drilled with a diameter of 1 mm. In the absence of a plastic cover, it is made of plywood.
- From the furniture board, plywood or chipboard with the help of a jigsaw, the base of the stand is cut. Using a core drill at the base, a hole for a drain cock is cut.
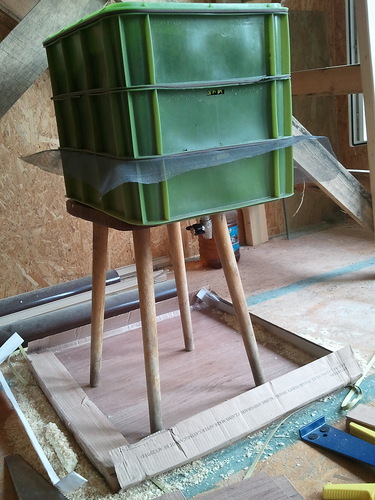
- On the legs, you can use bars with a cross section of 50 by 50 mm or trimming thick boards. The legs are sawn off in size and attached to the base using self-tapping screws.

- in the lower tray gathers a vermochai;
- in the second bottom tray is going vermicompost and a small number of worms live;
- the third tray - the permanent habitat of animals and the uterine compartment;
- the fourth tray is a feeding trough.
After the bottom of the box is completely filled with biohumus, it is removed, emptied and mounted on top of the tower. The worms gradually move to the upper floors, thereby again filling the second bottom drawer with vermicompost.
Industrial composters
 In specialized stores you can buy worms of various designs and volumes.
Worm cafe
Australian-made composter consists of a collecting tray and three large boxes for recycling. The kit includes a filler for initial startup. The height of the tower in the assembled state is 85 cm, the dimensions of the boxes are 37 * 55 cm. The cost of the Worm Café is 12,000 rubles.
Can-o-worms
 Can-O-Worms Vulture has an original round design. It consists of a tray made of coconut fiber and two round trays. The diameter of the composter is 51 cm, the height is 65 cm. The delivery kit includes a filler for initial start-up. The cost of Can-O-Worms is 5500 rubles.
Conclusion
For the independent manufacture of vermicomposter, you can use any version of plastic boxes or buckets. It will take a minimum of time and tools to work, and the result will please you for many years.
 Cover material for plant care: features of use
 Types of winter covering material for plants
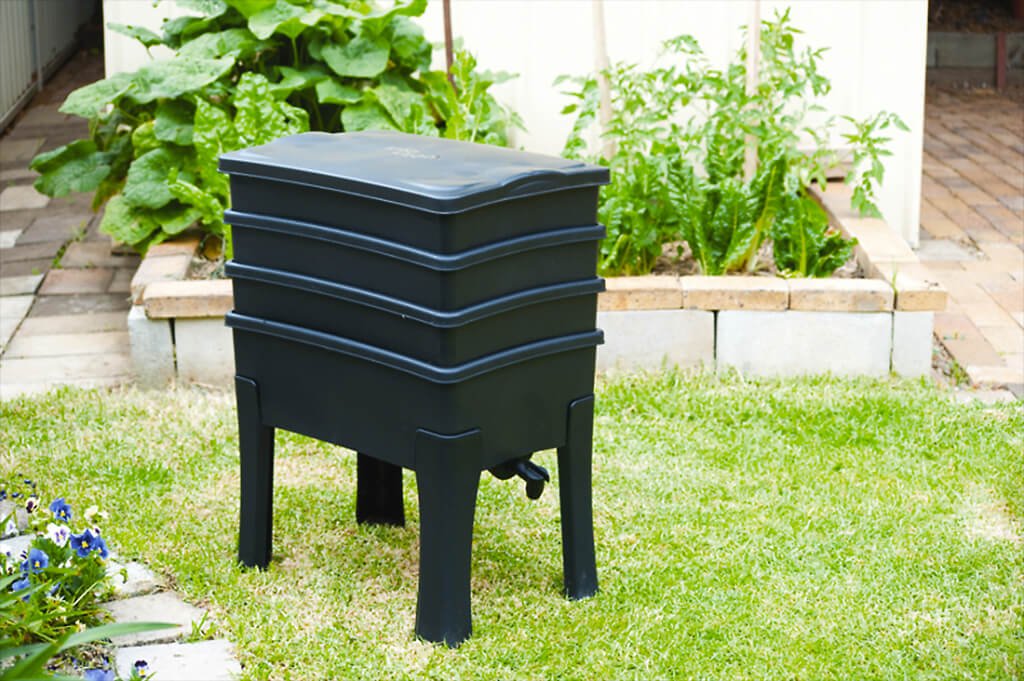 Farm for the extraction of vermicompost
 What covering material to choose for a greenhouse?