
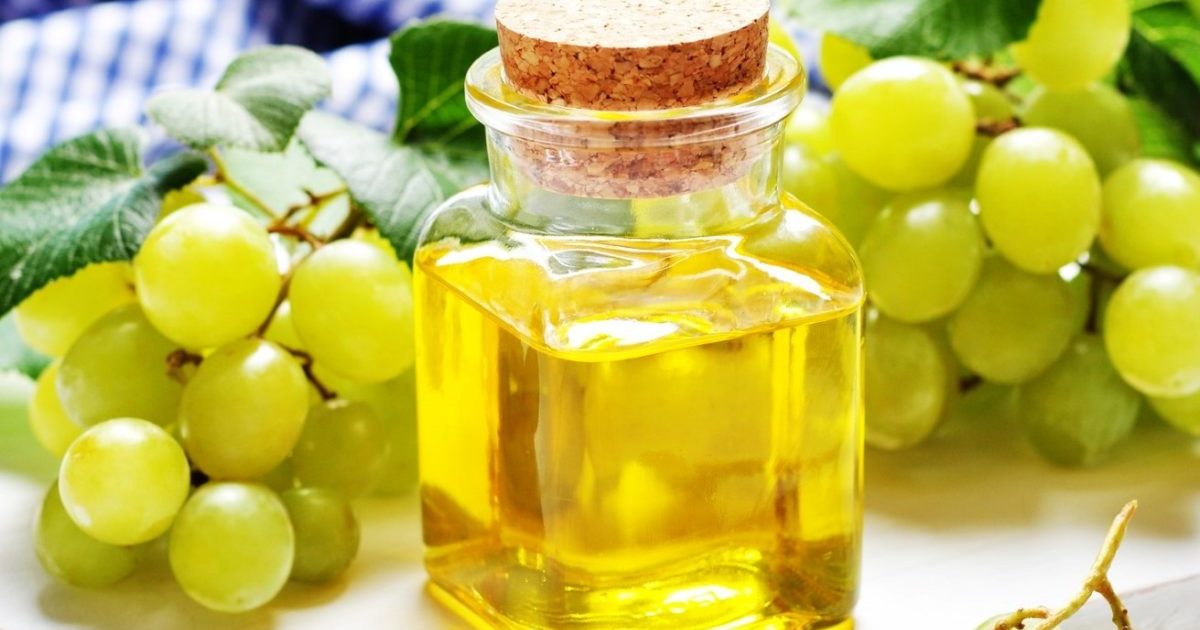
Currently, heat-loving grapes are grown not only by residents of the southern regions, but also by the middle strip and even Siberia. The main thing is to choose a suitable variety and create comfortable conditions for growth and wintering. Grape cuttings for sale, roads, in addition, it is not known how an unknown type of grape will behave on your land. Therefore, it is possible to distribute, liked in the region, tested in this region, a variety you like.
Content
Harvesting cuttings
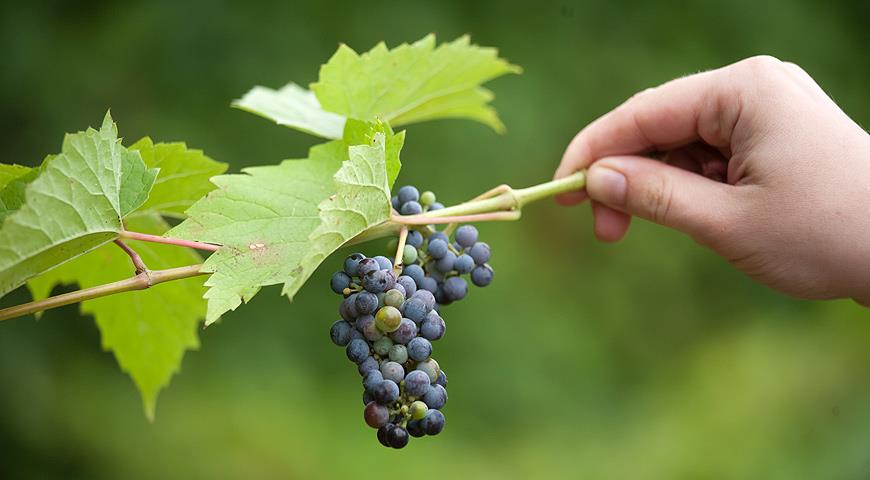
 Harvesting cuttings (Chubuk) grape usually occurs in the fall. It coincides with the time of pruning of the vine, when a bush is formed and extra branches are removed. For harvesting cuttings, a vine is selected so that it:
- grew on the sunny side;
- was completely ripe;
- healthy
- gave a big crop;
- had shoots of dark straw color;
- was in diameter from 5 to 8 mm.
Autumn cutting of grape cuttings differs from the spring by almost 100% survival rate of planting material, due to the presence of the largest amount of nutrients in the vine during this period.
Pruning of the vine is carried out in late September - early October, 2 weeks after the leaves fall. Shoots not suitable for slicing:
- old shoots;
- lateral growth;
- growing in the shade;
- thick and thin;
- matured.
Methods for cutting cuttings
Choose a suitable shoot, cut off the top of 4 peepholes from above.
There are several ways to cut:
- long cuttings with 5 or more eyes;
- medium - 3.4 kidneys (the most popular);
- short - 1.2 kidneys each (used for vaccination).
It is advisable to cut the cuttings so that they begin and end with a knot with a mustache. It contains membranes that prevent moisture from evaporating.
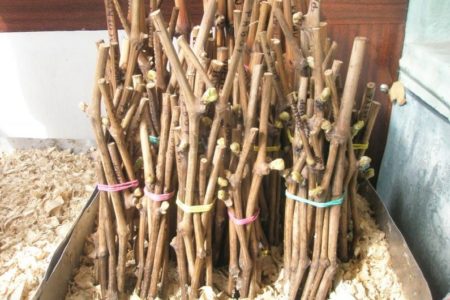
Storage preparation
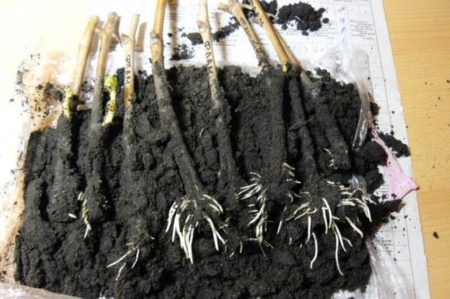
So that during the winter storage the Chubuki do not dry, they are soaked for a day in a bucket of water. Then for 30 minutes. placed in a disinfectant solution of KMnO4 or 5% CuSO4. Chubuki lay out on a paper towel to dry. The cuttings are sorted, wrapped with wire, collecting several pieces together. Wrap with cellophane film.
Storage
You can store chubuki in many ways:
- in the fridge;
- in the basement or cellar;
- in the ground.
Cold storage
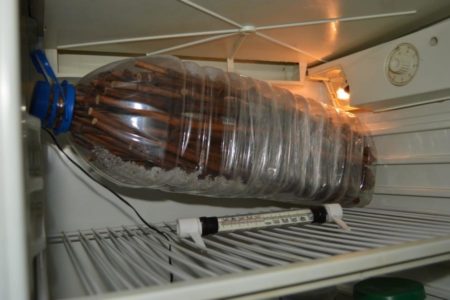 Twigs are placed in plastic bottles with a closed lid and stored in the refrigerator at a temperature of about + 2 - 6 degrees. Planting stock is checked monthly for mold and rot. If diseases are detected, the cuttings are washed with water, dipped in a solution of potassium permanganate or copper sulfate. When the cuttings dry, they are put in water for 6 hours.
Storage in the ground
You can store chopped cuttings in the ground, if the site has an elevated place with an outflow of water.To do this, they dig a trench, pour wet sand to the bottom, put cuttings on a sand cushion, cover with a layer of sand about 20 cm and earth from above. From above everything is covered with slate or other warming material.
Basement storage
This is the best method of preserving planting material until spring.
Method number 1
To do this, sawdust from coniferous trees is moistened with water until wet and placed together with bundles cut into a bundle in plastic bags that do not close hermetically and make ventilation holes in them. With this storage method carbon dioxide accumulates inside the bag, which is a preservative and contributes to better preservation of planting material. Sawdust is checked from time to time and, if necessary, moistened from the spray gun.
Method number 2
In the basement, they dig a hole 50 cm deep, put cuttings in it and fill it with earth from above. The optimal storage temperature is considered to be from 0 to +5 degrees. At a higher temperature regime of nutrients, cuttings will last only 3.4 months.
Spring preparation for rooting cuttings
 In February, they begin preparations for rooting the grapes. First, inspect the cuttings for the presence or absence of:
- fungus and signs of mold;
- damage to the cortex.
Garden secateurs update slices. A fully preserved shoot shoot has a green color, but not yellow or brown. In the first case, the chubuk dried up, in the second - it was waterlogged.
After inspection and rejection of damaged material, the following manipulations are performed:
- Prepare a dark raspberry potassium permanganate solution and lower the cuttings into it for 2-3 hours. Even if no diseases were found, such a procedure cannot be ignored.
- The solution is drained, and the branches are lowered into clean, decanted water. The time of immersion depends on the drying of the chubuk, but not more than 3 days. The temperature should not exceed +10 degrees so that the kidneys do not wake up ahead of time. In the absence of a balcony or basement, you can put a jar of shoots in the refrigerator.
- The candle is melted on fire and for a moment the upper cut is lowered into the melted paraffin.
- Cut the stalk immediately below the lower kidney. The nodes are concentrated nutrients, under the bottom and there will be a root heel.
- Cut the bottom knot (blind). If the kidney inside is green, this will serve as one more confirmation that everything is in order with the handle.
- Near the root heel, make 3.4 vertical small incisions and dust with Kornevina powder or another root formation stimulator.
Kilchevany
 Sowing, as a way of germinating Chubuk, is to create different temperature conditions for the roots and upper part of the stem. The cuttings are rooted in a moist substrate, which is placed so that heat comes from below (from the radiator), and cool air comes from above. Root formation is much faster.
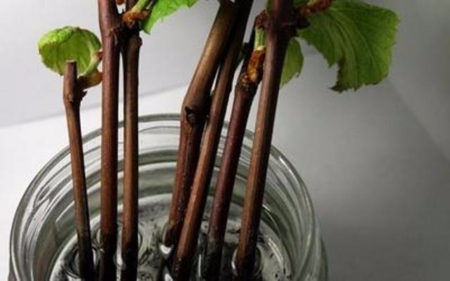
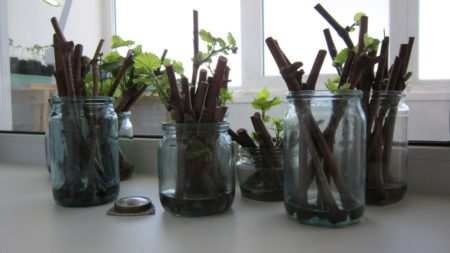
Germination in water
Cuttings with the head are immersed for 24-48 hours in water with the addition of honey (1 table. L per bucket of water). Then for 3 hours put in water with the addition of a growth stimulator and root formation. At the bottom of the liter jar, pour a little water, lower the stalk down there with the heel of the root down. They put on the illuminated windowsill. After 14-20 days, roots and shoots will appear.
Sprouting in plastic cups
 For this method, you will need 2 glasses with a capacity of 500 and 200 ml. In the bottom of the large, holes are made for draining water. At the bottom, about 2-3 cm high, a mixture of turf, leafy earth and compost is covered. A glass with a capacity of 200 ml without a bottom will prevent the center. Fill it with steamed sand, between the walls of small and large glasses, fill the earth mixture. A small glass is taken out, a depression is made in the center of the container and a stalk is planted. Close with a glass or plastic dome.Watering is carried out every other day with warm water and the bottle is removed when leaves appear on the forelocks.
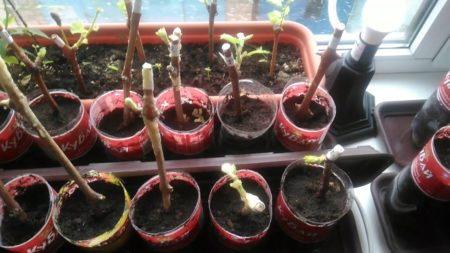
Germination in a plastic bottle
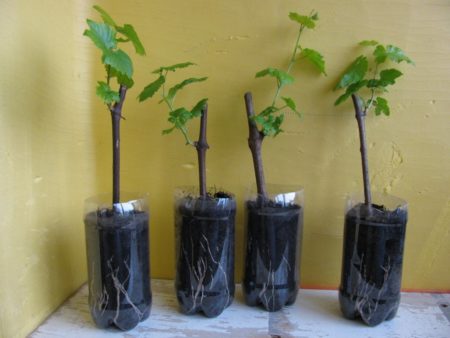 In a plastic bottle without a top, holes are made in the bottom, the drainage layer is poured, a nutritious soil mixture is added. Set the seedlings at an angle so that the top bud does not rise above the cut of the bottle. The distance to the top is filled up with steamed sawdust.
Plantings are closed with plastic cups and are not opened until the cuttings grow. Watering is done through a pan.
Germination in the filler
 At planting cuttings without roots, a loose planting substrate should be prepared.

- sand;
- soil;
- humus or compost.
Drainage holes are made in the tank, it is filled with the prepared composition. The stalk is planted so that 1 kidney remains on the surface. The seedling is watered with a pink solution of potassium permanganate. The container is placed in a plastic bag to maintain a temperature of about 25-30 degrees. Watered every day with warm water. To check whether the stalk is rooted, you need to slightly twitch it. If the shoot resists, then root formation has begun, watering after this is somewhat reduced. The bag is removed when the leaves unfold.
Sawdust sprouting
Gives a good effect sprouting in coniferous sawdust. To do this, they are boiled for 5-10 minutes, allowed to cool, fill planting containers and root cuttings, leaving one kidney on the surface. To create a microclimate and accelerate the rooting process, plantings are closed with plastic bags. As soon as the buds begin to grow, the covers are removed.
Puzenko Method
According to the Puzenko method, the prepared tips of the cuttings are wrapped in a damp cloth, and wrapped with polyethylene on top. The tops are left free and the cuttings are laid on the surface of the cabinet with the tops facing the light. After 2-3 weeks, small roots will appear.
A more reliable way of rooting in peat tablets. They are moistened with water, then shoots are stuck into them. Wrap the tablet with the bottom of the chubuk film and put it on the cabinet. The tops are turned to the lamp or window. After 15-20 days, the first roots grow. Remove the film and root the prepared material together with the tablet into glasses and pots, which are filled with a composition of sheet earth, sand and compost in equal proportions.
Radchevsky method
For this method, you will need cotton wool, foam rubber or foam. They are laid at the bottom of the can, water is poured so that it barely covers the materials placed there. The neck of the can is closed with polyethylene, fixed with an elastic band and cut holes for cuttings. Chubuki dipped in water. The root heel should barely touch the water. The optimum temperature at the bottom of the jar should be about 26-28 degrees, at the top below to delay the awakening of the kidneys. After 15-20 days, roots begin to form at the border of air and water. They are allowed to grow up to 20 mm and shoots are rooted for growing in containers with suitable soil composition.
Rooting in a pit and soil
 In the southern regions, winter-hardy grapes are planted in a pit. In the spring, before the buds open, a vine 50-70 cm long is cut. They fold it into a ring and tie it with wire. Dig a deep hole, lay the ring from the vine, so that only 2 kidneys are on the surface. By the end of the season, the branch will give roots. In winter, the plant must be protected from frost.
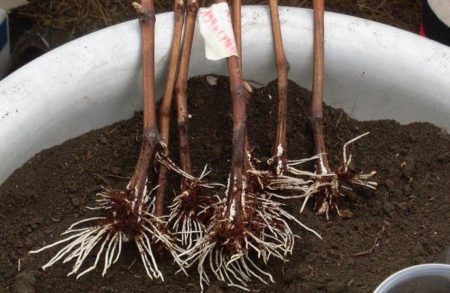
If the cutting of shoots occurred in the spring, the seedlings are reproached immediately into the ground.To do this, choose a high sunny place, add compost, sand and vermiculite to the soil.
The entire rooting period monitors soil moisture. Shoots that give roots are grown in containers from 500 ml to 1 liter of next spring.
Reviews
Marina
“I am using the method of rooting cuttings according to Puzenko. It turns out well, but you cannot leave rooted cuttings in a draft and often rearrange from one place to another. It’s better to use your own land and make the mixture yourself. ”
Lydia
"Took chopped last year cuttings in the fall, wrapped it in cellophane, made several holes, put it into the basement and forgot about them. In the spring I put it in water for several days and planted it in a pot. Of the 3 cuttings, only 1 took root. I’ll ask again this fall, in the winter I will monitor the humidity in the bags. ”
The rooting of grape cuttings is the main method in its propagation. And if you have certain knowledge, you can cope with this task by correlating the principles of landing with living conditions.
 Non-covering winter-hardy grape varieties for Moscow region
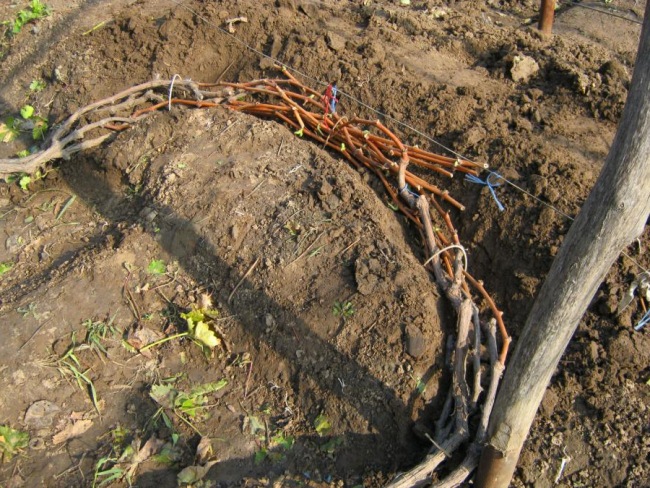 How to keep the vine in winter
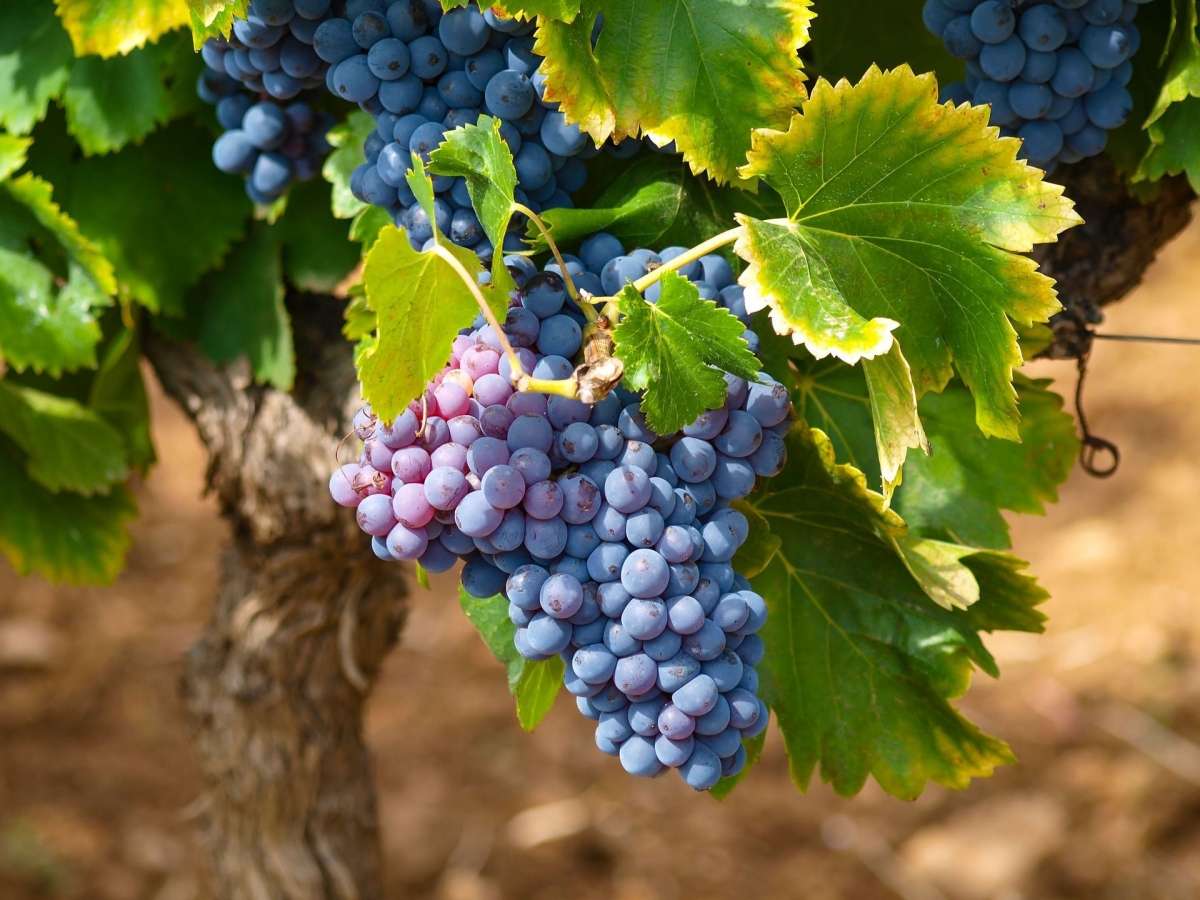 When can I transfer grapes to another place in the fall
 How to cover and prepare grapes for the winter in the suburbs