
To increase the vegetation period of thermophilic plants and to obtain an earlier harvest in the northern regions of the country, shelter structures - hotbeds are installed in household plots. Using the energy of the sun and the decomposition of biofuels (manure), they smooth out daily fluctuations in temperature and protect plants from sudden frosts. Trade offers many options for greenhouses, but with the independent production of forces and time for work, it will take a little, and the cost of construction will be several times less.
Content
How the greenhouse works
 Structurally, the greenhouse differs from the greenhouse only in size. The length of the greenhouse can reach several tens of meters, the width is chosen so that it is convenient to care for plants on both sides of the greenhouse. The height of the structure is selected based on the dimensions of the plants that will be grown in it. To obtain early greenery, the height of the structure is 30-40 cm, to protect cucumbers from the cold August growth - 1.5-2 meters.
By design, all the greenhouses can be divided into two groups:
- Horizontal In this case, a small blockhouse is installed on the bed, which is closed by glazed frames, polycarbonate or film on top. This design is not blown by the wind, it retains heat well. Its disadvantage is the low height of the plants grown.
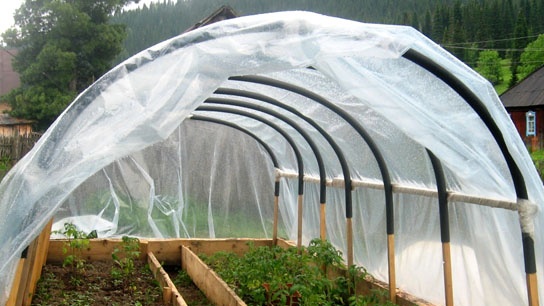
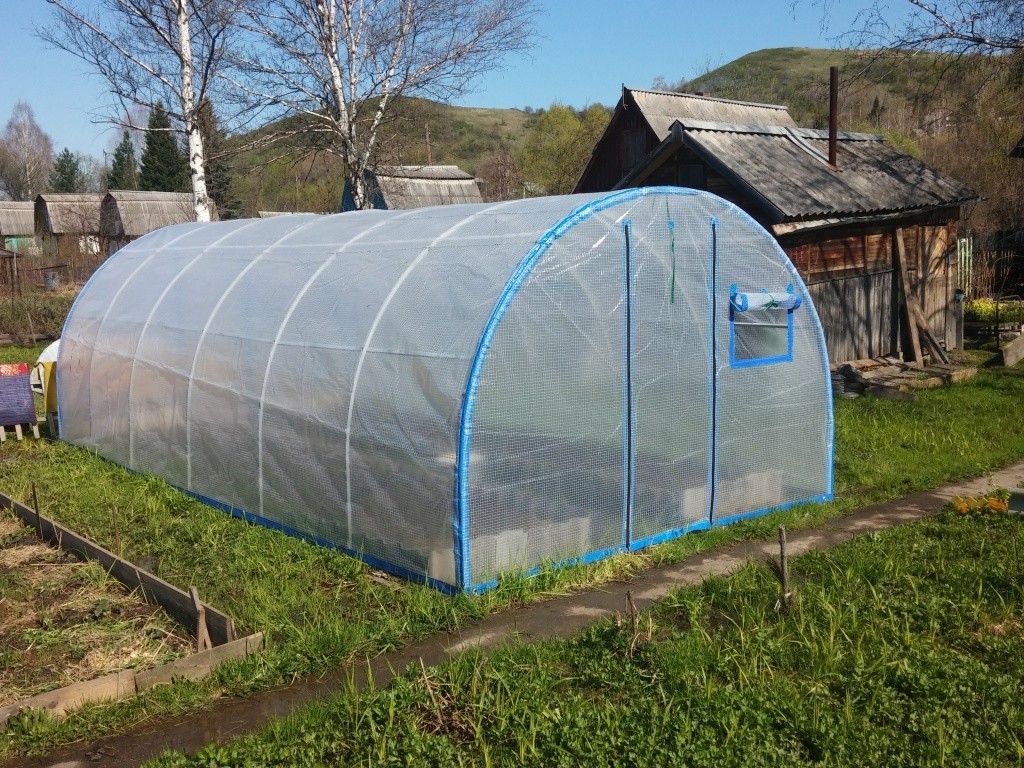
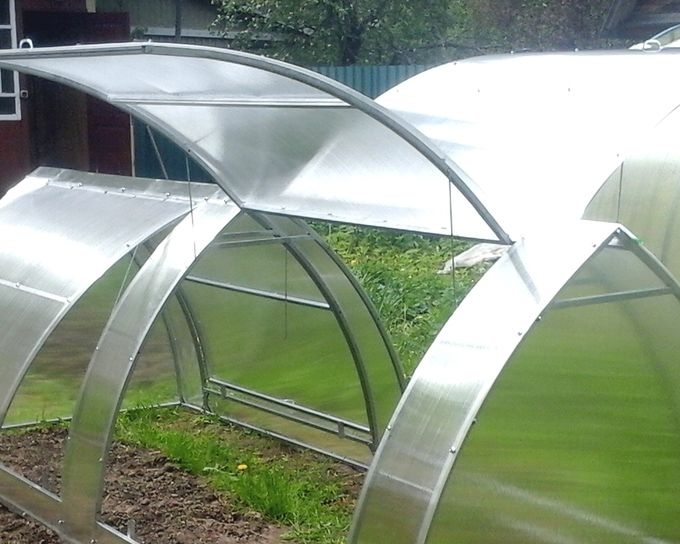
- Vertical or arched. In the manufacture of such hotbeds, arches or arcs are attached to the base, which are covered with a film or cellular polycarbonate on top. Arched greenhouses can be installed of any desired length, if necessary, transferred to the desired bed, they can grow plants of any height. The design drawback is low wind resistance and lower temperature inside the shelter.
Pros and cons of homemade designs
 Self-made greenhouses have their own advantages and disadvantages.
Advantages of homemade greenhouses:
- the cost of self-made structures is much lower than that of purchased options;
- greenhouses do not require financial costs for their heating;
- greenhouses are easily disassembled for winter storage in a dry place, thereby increasing the service life of the structure several times;
- light arched structures can be moved several times from place to place, putting them in the right place at the moment;
- home-made designs can be made from almost any materials available to the master;
- light arc shelters can be of almost unlimited length;
- only with self-production can a greenhouse fit perfectly into the landscape of the site.
Disadvantages of homemade greenhouses:
- for the independent manufacture of covering structures, the presence of bench and carpentry tools is necessary;
- Assembly of the industrial construction structure will require several times less time;
- tall varieties of tomatoes and peppers do not fit in low greenhouses;
- in greenhouses, it is problematic to organize water and electric heating.
Materials and tools for manufacturing
 Each type of greenhouse requires its own set of materials. For horizontal type shelters, a timber, boards or thin tree trunks are used on the log house. For the manufacture of frames, a shtaket or bar is needed.
For the base of vertical structures use timber or boards. Arches are made from arches of industrial production, polypropylene or metal pipes, profiles, wooden bars and battens. For the simplest version of the arcs, fresh willow rods with a diameter of 1.5 - 2 centimeters are used.
As a covering material use film, cellular polycarbonate or glass. In the event of a sudden freeze, for additional warming, plants inside the greenhouse are additionally wrapped with agrofibre.
Tools required for work
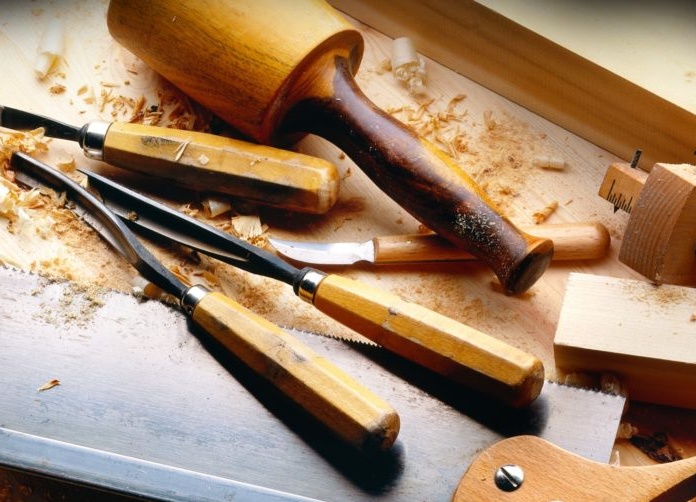 For independent manufacture of shelter structures, the following set of tools will be required:
- for marking you will need a joiner's square, marker, pencil, scriber, tape measure;
- to work with a tree you will need a saw, a hammer, nails, a plane, an ax;
- for working with metal, angle grinders are required (grinder), a hacksaw for metal;
- to connect parts you will need a drill screwdriver, screws, building corners, drills.
Materials used for greenhouse cladding
To protect plants in greenhouses, glass, cellular polycarbonate or film are used. Each of these materials has its own niche of application, its own advantages and disadvantages.
Glass
Glass is the oldest covering material used in gardening for hundreds of years. As a rule, it is used for glazing frames to shelter greenhouses.
The advantages of glass:
- very high light transmission;
- glass has the highest durability;
- when weather conditions change, the glass does not deform;
- low thermal conductivity of glass walls and frames;
- high chemical resistance. When aggressive solutions of fertilizers or pesticides get in, the glass does not cloud;
- glass does not change its properties for many years. Therefore, pieces of old window glass can be successfully used for glazing greenhouse frames;
- high abrasion resistance. Contaminated glass can be easily washed or wiped with a cloth.
Disadvantages of glass:
- high price;
- the complexity of manufacturing greenhouse frames;
- the difficulty of cutting glass and installing it in a frame.
Film
 Film is a very popular and widespread material for sheltering hotbeds due to its accessibility and ease of working with it. You can use it to shelter any greenhouses.
The most common are three types of film.
- Plastic film has the lowest cost. It comes on sale in rolls from 120 to 300 cm wide. A plastic film serves 1-2 seasons and is very afraid of mechanical damage.
- Polyvinyl chloride film is stronger than polyethylene film, it holds heat better, it holds infrared rays well. Its service life can reach 7 years.
- Reinforced film has the highest strength. Inside it are the threads of the frame that protect against tearing. The service life of the reinforced film reaches 3 years.
Advantages of the film:
- low cost;
- good transparency;
- high ductility;
- low weight.
The disadvantages of the film:
- low mechanical resistance. The film wears out quickly in places of contact with the elements of the frame;
- condensation builds up on the inside of the film at night. Wet film is quickly contaminated and transmits sunlight worse;
- the film is gradually destroyed under the influence of sunlight;
- at low temperatures, the film becomes very brittle.
Cellular Polycarbonate
 Cellular polycarbonate is a new transparent covering material. Polycarbonate does not tolerate multiple bending, so in the construction of greenhouses it is used to close the frames.
The advantages of polycarbonate:

- high abrasion resistance.If necessary, any contamination can be washed with a rag without damaging the surface of the polycarbonate;
- polycarbonate service life of 5-7 years;
- high transparency polycarbonate;
- Cellular polycarbonate is very durable. It easily withstands snow loads and hail impacts;
- the material is not destroyed by cold and heat;
- low weight.
Polycarbonate Disadvantages
- honeycomb polycarbonate is not suitable for sheltering arched greenhouses.
Cover material clips
The method of fixing the covering material depends on greenhouse designs and the material itself. To fix the glass in the frames, glazing beads are used, polycarbonate is screwed to the casing with self-tapping screws, a furniture stapler or small rails are used to clamp the film.
To fix the covering material on the arcs, several variants of home-made clamps were invented:
- a dense watering hose or a PVC pipe is cut into pieces of 7-10 cm. The segments are cut lengthwise and used as clamps;
- well press the film at the arcs stationery paper clips;
- To fix the film to the pipes, clips for sanitary pipes are successfully used.
The simplest arch tunnel
 The simplest arched greenhouse is widely used in the cultivation of a variety of plants. Due to the ease of assembly and disassembly, the arched tunnel can move from place to place several times during the season. In the spring, green crops or seedlings are grown under it, using as a shelter from the cold. In early May, arcs are installed over the newly planted seedlings, using as protection from the sun. In the middle of summer, the tunnel moves to strawberry and strawberry ridges to protect berries from birds. From above, the arcs are closed with a film (for heat), agrofibre (for shading) or a fishing net (from birds).
For the manufacture of an arch tunnel, the following algorithm is used:
- Bars for arcs are cut from wire with a diameter of 6-8 mm. The length of the bar is calculated by the formula: the width of the ridge is multiplied by 3.14 and divided by 2 plus 30 cm.
- Using a mallet according to the pattern, arches are bent from the rods.
- The bed under the future greenhouse is dug up, across it at a distance of 40-50 cm arcs are stuck into the ground.
- On top of the arc are closed with a film.
The film on the sides and ends is pressed by boards or bricks.
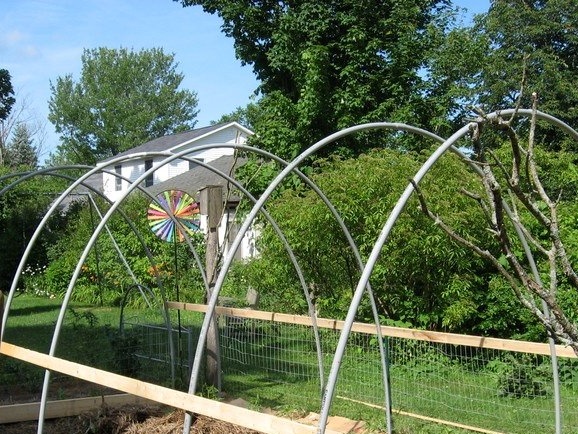
Insulated arched greenhouse
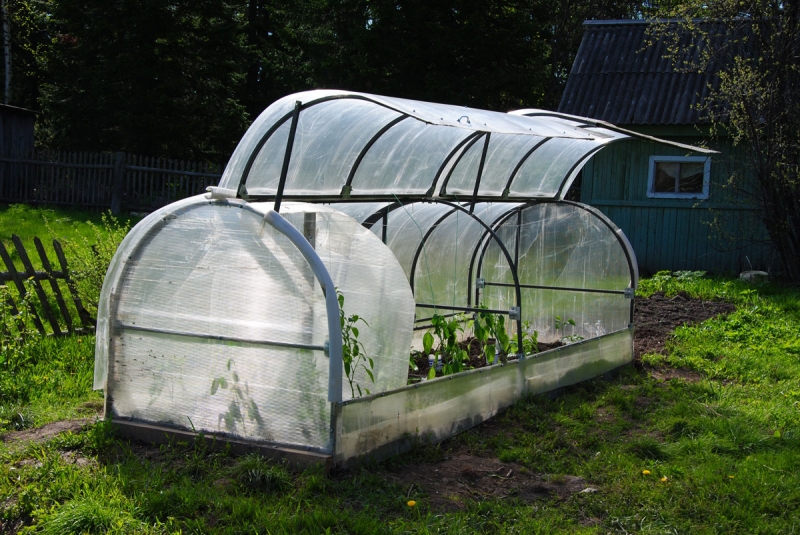 An insulated arched greenhouse is used to grow plants of any height. It is installed permanently in the most illuminated and non-blown place of the garden.
For its manufacture, the following algorithm is used:
- A box 30 cm high is hammered together from planks or timber.
- Arcs for a powerful insulated greenhouse are made of metal or plastic water pipes, a square section profile or smooth metal reinforcement with a diameter of 10-12 mm. The source material is cut into bars of the required length, then with the help of a pipe bender or a mallet, arcs are bent according to the template.
- Arcs are installed inside the base box, attaching to it with plumbing clamps. To give rigidity to the structure, a ridge is installed at the top of the arches. For a ridge, take a piece of a water pipe. Its length is equal to the length of the box. The arches are attached to the ridge with plastic clamps.
- To stabilize the temperature at night, heat accumulators are instilled inside the duct around the perimeter. As such batteries take plastic bottles filled with water 1.5 or 2 liters in volume. Water is heated from the sun during the day and gives off heat to plants at night.
- The ends of the structure are closed with plywood, polycarbonate or boards, attaching them to the arches with self-tapping screws.
- The greenhouse is covered with a film on top.
Shelter from plastic bottles
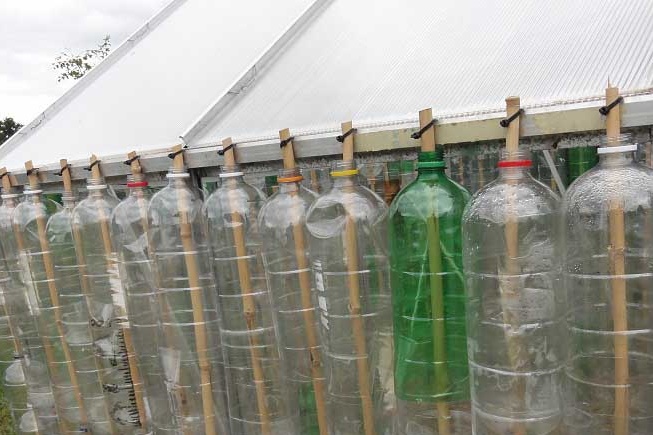 Transparent plastic bottles are good materials for making greenhouses.The plastic from which they are made passes sunlight and holds heat well. The following algorithm is used to make shelter from plastic bottles:
- A box with a height of 50-70 cm is knocked together from a bar or thick boards. The length of the box depends on the available material, the width is 120-140 cm. The box is installed on the ridge, leveling the top level.
- Greenhouse frames are made of thin slats. The length of the frames is equal to the width of the box, the width is 80-100 cm.
- In transparent 1.5-2 liter bottles of carbonated water or beer, the top and bottom are cut and a vertical cut is made. The resulting cylinder is placed on a flat surface, covered with a rag and ironed. After heat treatment, the plastic becomes flat. The resulting plates are sewn with wire or thin fishing line, getting a canvas.
- Using a furniture stapler, a cloth made of plastic bottles is attached to frames.
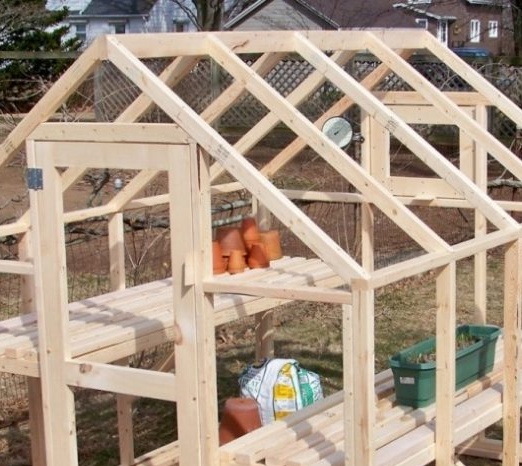
Window frame greenhouse
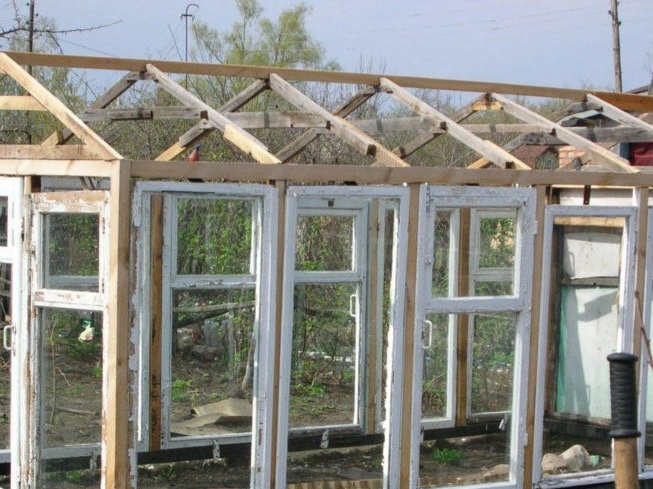 Old window frames are an excellent material for the independent production of a warm greenhouse. Glass perfectly holds heat, transmits the entire spectrum of solar radiation. Under glass frames, seedlings are gaining strength very quickly.
Before you begin, recalculate the available quantity window frames and calculate the size of the future structure. Further, everything depends only on the imagination of the builder. In the presence of a large number of frames using self-tapping screws, it is possible to make a transparent box base from them, which is closed from above by the remaining frames. If the frame is one or two, then the base is hammered together from the boards, and only the top of the structure is covered with frames.
Hut for cucumbers
Cucumbers give maximum yield when grown vertically. To cover the elongated lashes, the greenhouse should be at least one and a half meters high. Optimal design for vertical growing cucumbers will be a greenhouse in the form of a hut. For its manufacture, the following algorithm is used:
- From thick boards a box base 30 cm high is knocked together.
- Boards with a section of 50 by 100 mm are nailed vertically to the middle of the base of the end sides. The length of the boards is 170 cm.
- On the upper ends of the vertical boards, a ridge board with a section of 100 by 50 mm is laid. Its length is equal to the length of the greenhouse.
- Take bars with a cross section of 50 by 50 mm and nail one end to the lower box, the second to the ridge board. The horizontal distance between the bars is 50 cm. The upper parts of the bars nailed to the ridge board are cut horizontally and slightly rounded.
- The ends of the hut are covered with film, polycarbonate, plywood or simply sewn up with boards.
- To garter the lashes inside the hut, pull a garden net.
- Outside, the greenhouse is covered with a film or cellular polycarbonate.
Greenhouse made of twigs
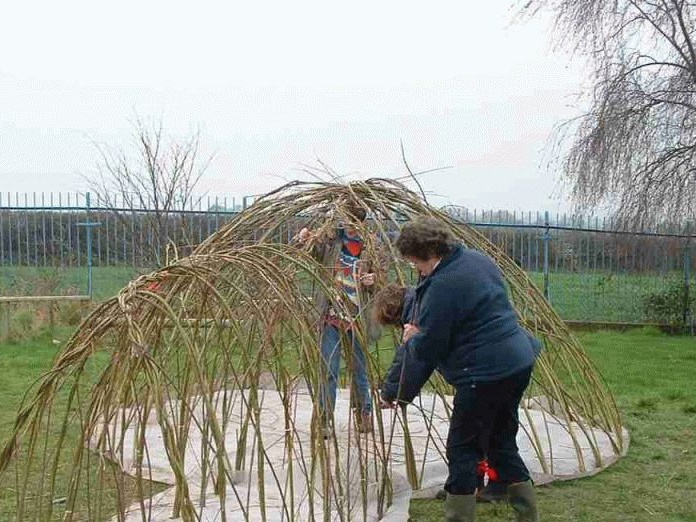 In the absence of material for the manufacture of greenhouse arcs, they can be made from willow rods. To make the simplest greenhouse from the vine do the following:
- From thick boards, a base box 30 cm high is made.
- A water pipe with a diameter of 25 mm is cut into pieces 15 cm long.
- Pipe sections are fastened with plumbing clamps to the inside wall of the greenhouse after 60 cm.
- For the ridge, they take a bar with a section of 50 by 60 mm in length equal to the length of the greenhouse. After 30 cm, through holes with a diameter of 20 mm are made in it.
- Willow twigs with a diameter of 15-17 mm are cut in the nearest bush. The length of the rods is 1/2 of the arc plus 20 cm.
- To build a greenhouse, one end of the rod is threaded into the base tube, the other into the hole in the ridge bar, alternating the right and left sides.
- Outside, the greenhouse is covered with a film.
Reviews
Elena, 34 years old
We made a greenhouse from an old tire from a tractor. They cut off the sidewalls with an electric jigsaw, put the tire on the garden bed. The first year they pressed on top of a sheet of polycarbonate, then made a wire frame and pulled the film.In such a nursery, sprouts of cabbage perfectly grow.
Nikolay, 43 years old
I have a greenhouse made from old window frames. Four frames are screwed in the form of a box with self-tapping screws, a sheet of cellular polycarbonate lies on top. In early spring, I set it over the garden bed on which I grow early garden flowers. After the end of return frosts, I remove the shelter.
The above examples show that make a greenhouse yourself the strength of any gardener. On the construction, you can use any materials that are at hand or in the nearest forest. The resulting work result will help to grow a plentiful harvest.
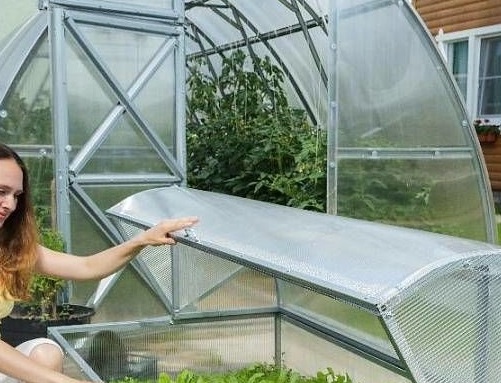
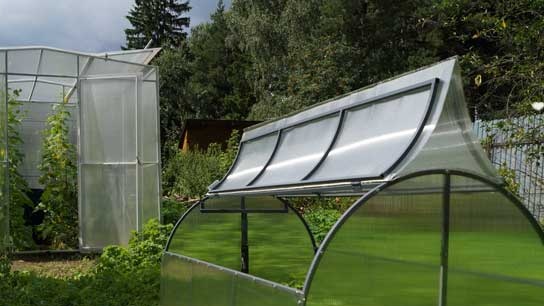 Why is a greenhouse open top?
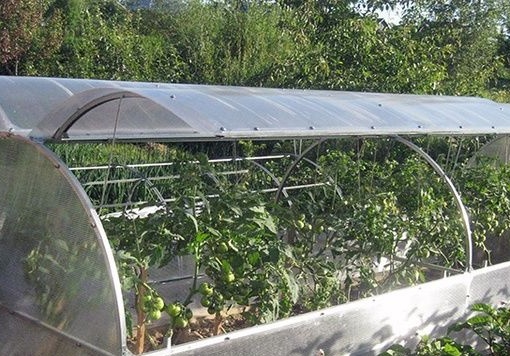 Greenhouse "Butterfly", is it worth it?
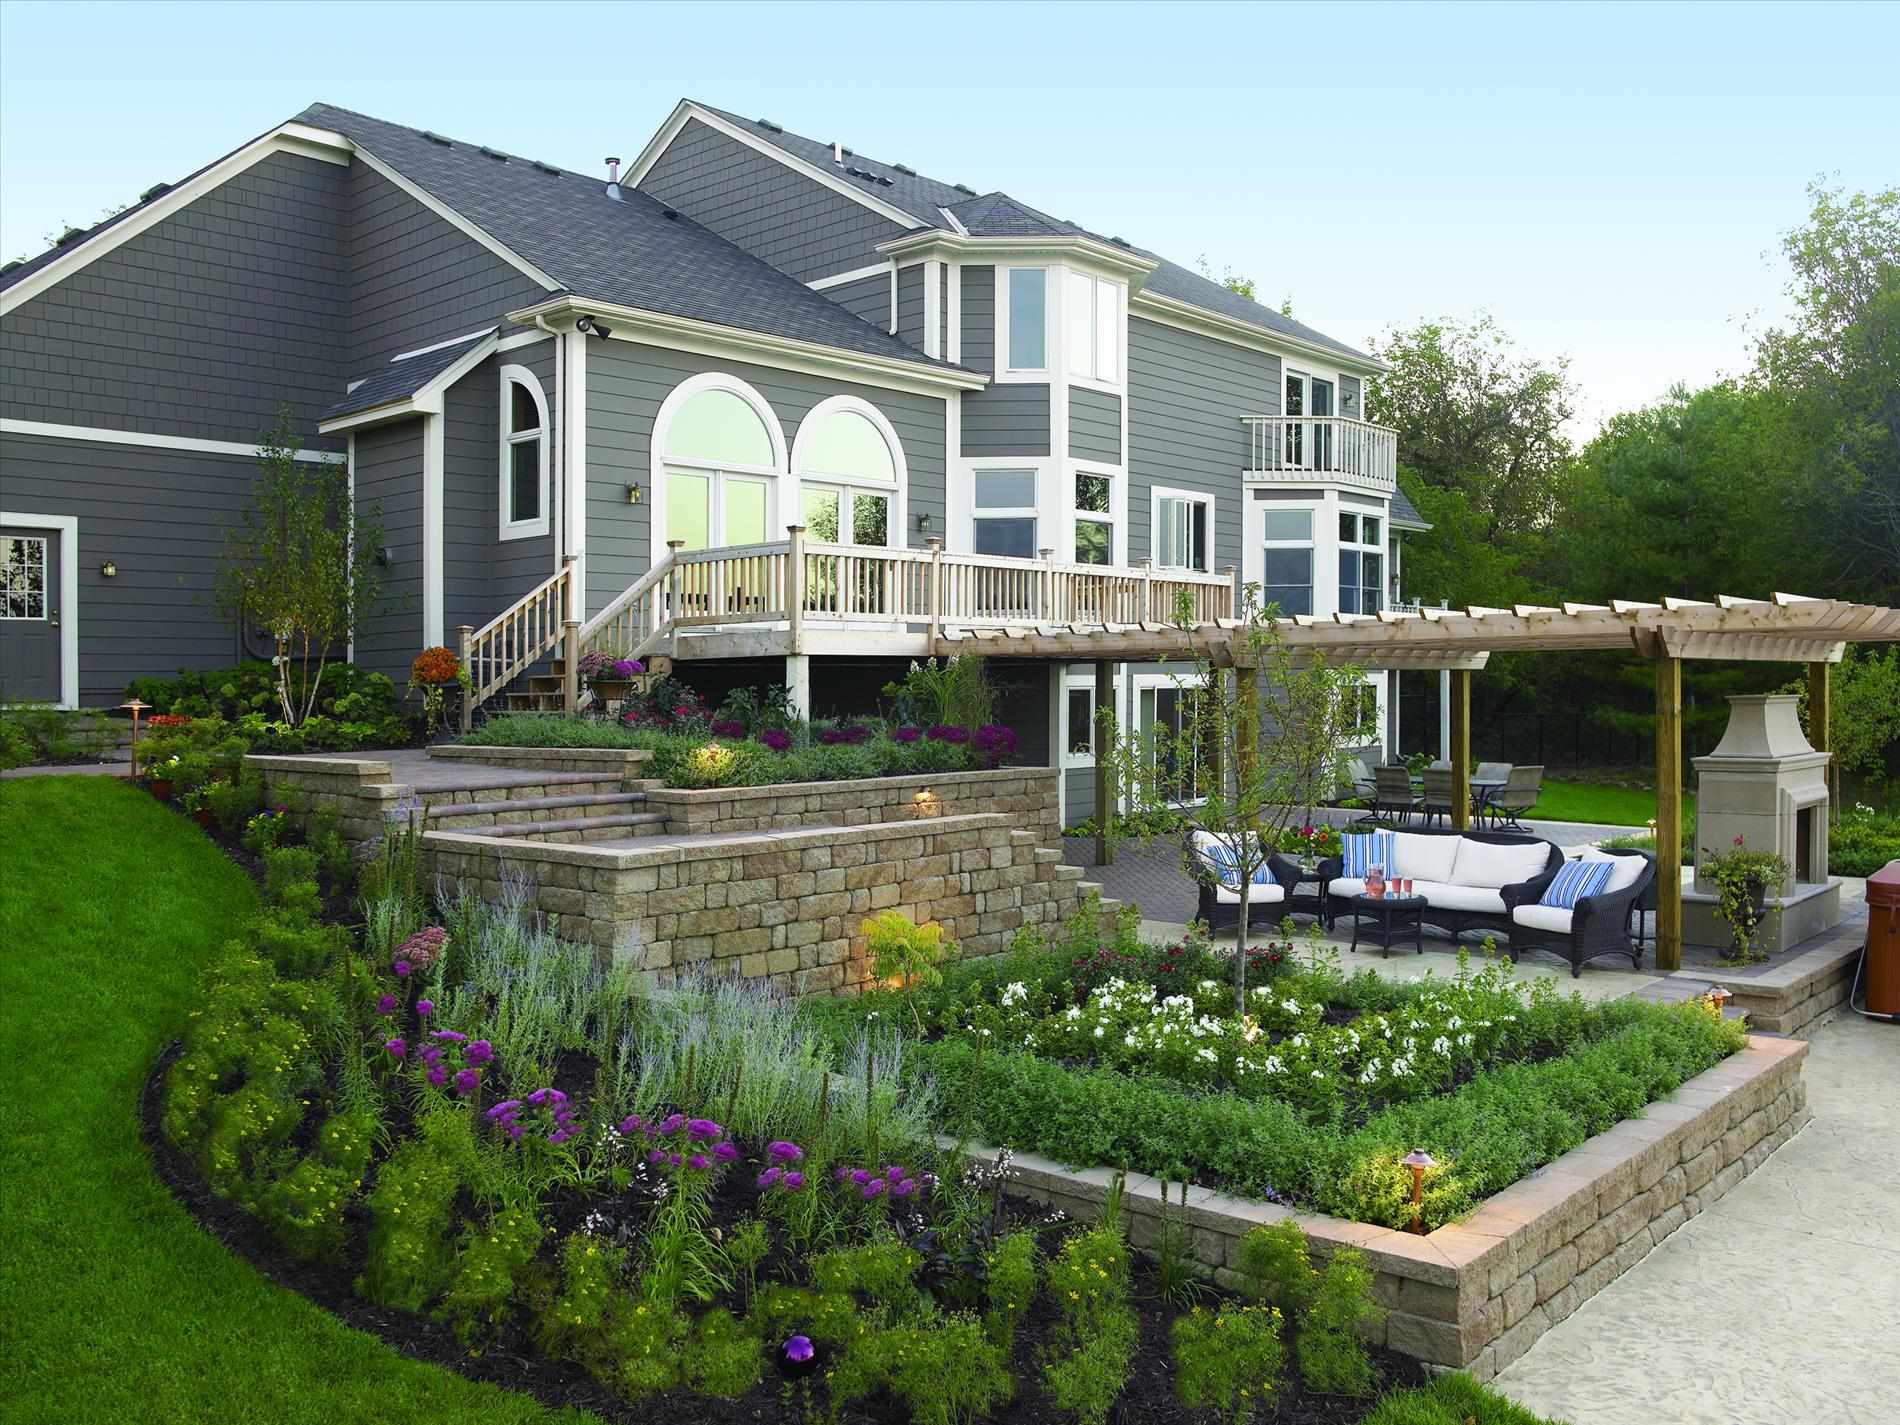 Do-it-yourself landscaping of an area of 8 acres: features of planning and zoning
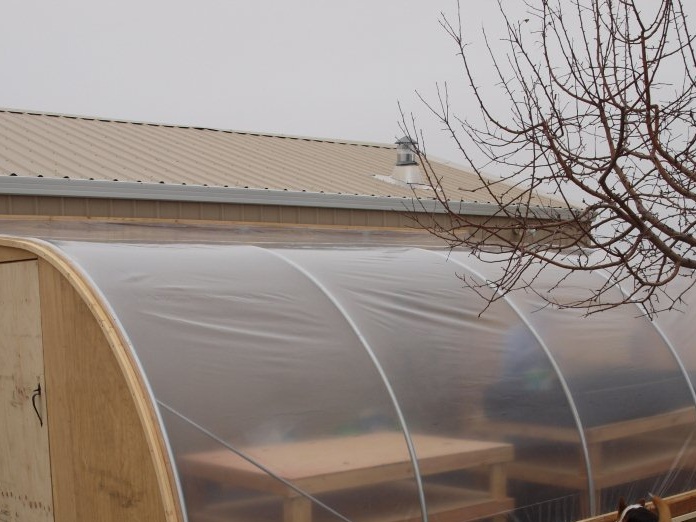 Shed greenhouse, pros and cons