
In a small suburban area, it is not always possible to put a full-fledged greenhouse. An alternative to the greenhouse is a small and compact greenhouse. Designs of greenhouses are different: single-pitched and gable, with a foundation and without a foundation. There are stationary and portable models. The hotbed "Khlebnitsa" fits well into the overall picture of a small country "hacienda". An arched house for plants will serve as a reliable shelter if you install it in accordance with all the rules.
Content
General Description and Size Options
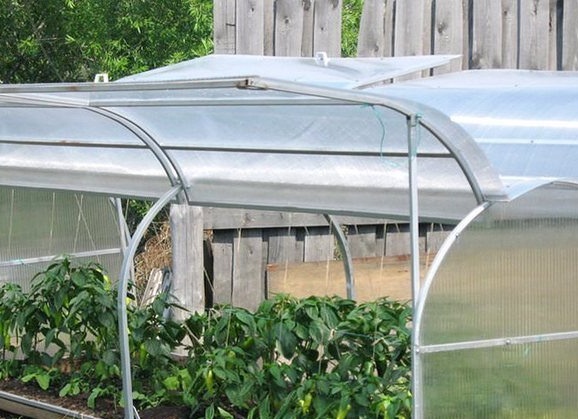
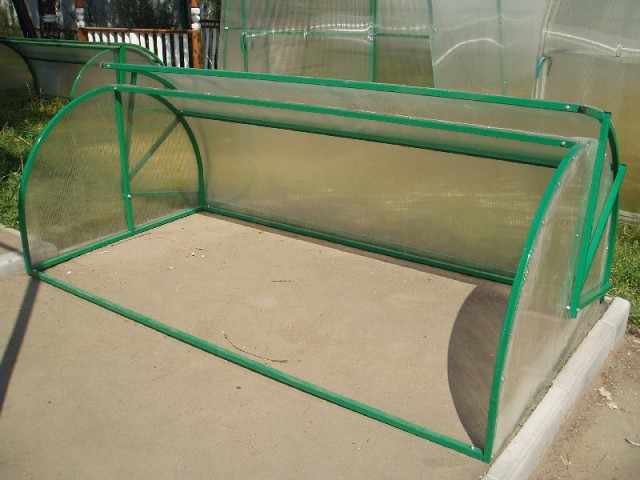
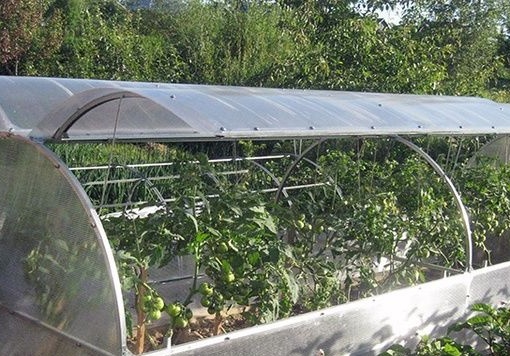
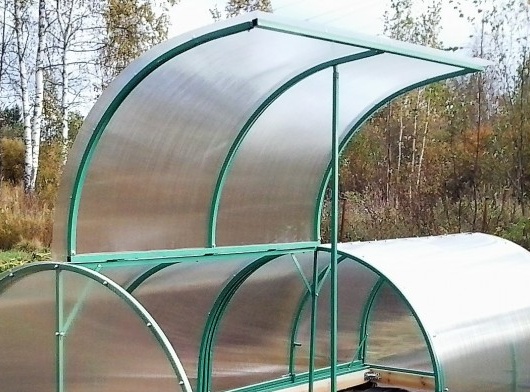
"Bread box" - a design in the form of an arched arc, it open top greenhouse. It is often made from a plastic profile. It lends itself well to processing. In self-manufacturing, the material is cut with a conventional hacksaw. For sheathing, polycarbonate sheets are used. The frame is sheathed in accordance with its openings. When buying a finished model, all parts are ready for installation. The main thing is to assemble them correctly, according to the instructions.
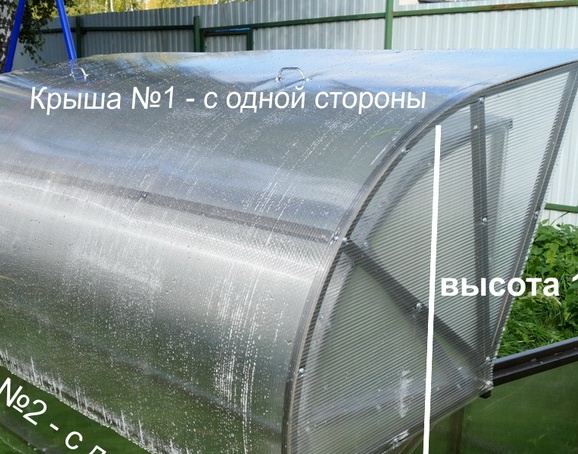
There are models of "bread bins" that open only one side. You can buy or make an advanced model with two doors. In a greenhouse with a double cover, the axis pivot line is at the bottom of the frame. It can be installed in the middle of the end column, located vertically.
The sizes of arched hotbeds are limited. The width of the house with one sliding cover is 1.3 m. If it has two wings, the maximum width is 2 m. The length of any building is from 2 to 4 m, the height is from 50 cm to 1.5 m.
Design and its features
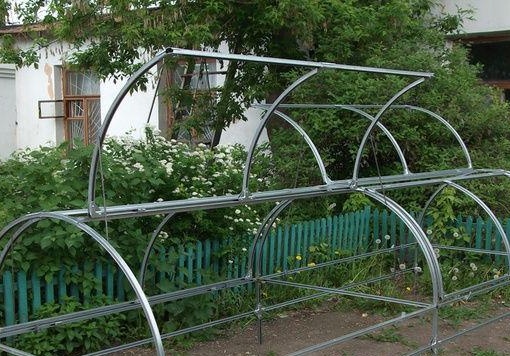
Greenhouse "Bread box" consists of three elements:
- foundation;
- two halves (right and left).
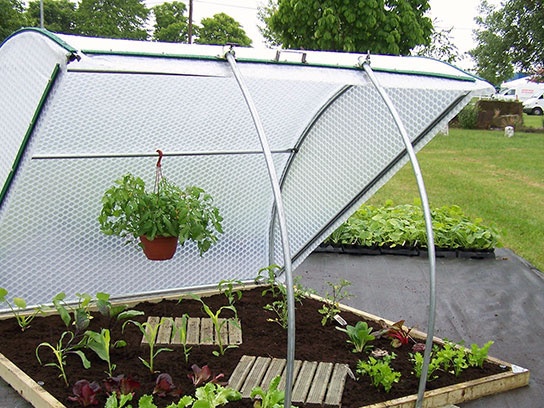
The microclimate inside the building is regulated by raising the side wing. The lid is fixed with hinges. In the suburban areas there are models in which you can fully open the sashes. To fully open the lid, the hinge mechanisms are fixed from below to the frame. The frame is additionally fixed with a bar of wood. Several cuts should be cut on it. Such a mechanism will keep the greenhouse flaps in one position. They will not be covered by wind or other extraneous influences.
The working mechanism of this greenhouse is made on the principle of a bread box, so the design got its name. The frame can be made of hollow metal pipes, but you need a welding machine to work with them.
The following types of crops are grown in the Khlebnitsa greenhouse:
- wild strawberries;
- Strawberries
- all kinds of greens and salads;
- carrots;
- beets;
- cucumbers
- Tomatoes
- flowers.
Tomatoes then need to be transplanted into open ground or in a large greenhouse.
Advantages and disadvantages
The Khlebnitsa hotbed has several advantages. The frame can be made with your own hands, using ready-made drawings. Drawings are on the Internet: they must be found, transferred to paper and used for their intended purpose. If you bought a finished model, you will quickly install it in the ground, as the assembly does not require much effort. Polycarbonate is a durable and comfortable material. If one element is damaged, it is replaced by another. The construction is easy: if necessary, it is collected and transferred to another place. It grows the main types of garden crops, with the exception of large and climbing.
The design has several drawbacks and operational features. The hinges must be inspected and lubricated so that the leaves do not jam or creak. In bad weather, you cannot keep the greenhouse open, because it will be carried away by a gust of wind. The size of the building is limited, and many plants in it can not be planted. One-leaf breadboxes are not always convenient to use.
Despite the shortcomings, such a model is a salvation for the gardener in the cramped conditions of “six hundred parts”. With proper care and proper location, the best option for growing flowers, herbs and berries cannot be found.
Greenhouses from different manufacturers
There are several ready-made breadbags from different manufacturers. The finished model can be bought on the Internet or in a garden goods store:
- Innovator Mini;
- Innovator Maxi;
- "Snail";
- The bread box.
The greenhouse "Innovator-mini" is produced by the company "Innovation". it simple mini greenhouse with one lid. The best place to install it is a small summer cottage. It grows seedlings and even gourds. The height of the building is 80 cm, the depth is 1 m, the width is about 2 m. Novator-mini is a strong greenhouse in which two crops are grown in one season.
Innovator-Maxi is an improved version of the bread box from the same manufacturer. It has two wings, it is much taller than the Novatori Mini. The frame base is painted with a persistent dye that is safe for plants. Sheets of polycarbonate for sheathing must be purchased separately, but most importantly, you do not need to bother with the manufacture of the frame. The height of the base is 1.2 m, the depth is 1 m, the width is 2 m.

“Snail” is another name for “breadboxes used by the manufacturer of ROiS”. It can be opened on both sides. The length of the greenhouse is 2 m, the width is 1-2 m, and the height is from 50 cm to 1 m. The section of the profile pipe for the base is 20x20 mm, the thickness of the profile is 1.5 mm. The model is quick assembly.
Another hotbed "Khlebnitsa" offers "BZMK". It is wider than the "Snail" from "ROiS" - 1.5 m. The length of the structure - 2 m. Width - 1.5 m. The frame is designed to be coated with cellular polycarbonate. For this model, a foundation of wooden beams is pre-installed.
How to prepare a place
The right choice of place for installing a greenhouse is the key to its long service and good harvest. It’s better to put a “breadbox” on the south side, where there is always sunlight that plants need. Nearby should not be tall bushes and trees that create a shadow.
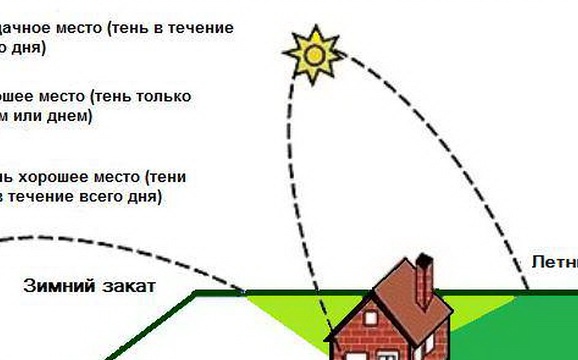
Install the greenhouse at the maximum distance from other buildings on the site. General rules for choosing a location and installation are as follows:
- the minimum distance between the greenhouse and another object is 5 m;
- distance from the toilet - 25 m;
- the site is preliminarily “tested” by the building level, checking to see if there are distortions on it.
Before installing the greenhouse, the site needs to be cleared, uproot all the stumps, remove weeds and garbage from it. Cleaning of the place is carried out carefully. If weeds are not eliminated, over time they can penetrate the building and destroy the plants.
Assembling the finished greenhouse
When you buy a compact greenhouse, you can take it to the collected site without disassembling it into separate parts. For transportation use the usual "Gazelle". After delivery, the breadbox is immediately installed on the prepared place. There are models that sell disassembled. An example is the step-by-step assembly of the Innovator Maxi design.
Open the box and carefully remove all items from it. In the box you will find metal ties, many nuts and bolts. Set aside the side flaps and basement parts. The horizontal ties at the ends have threads and holes. They can be twisted and immediately connected to each other.
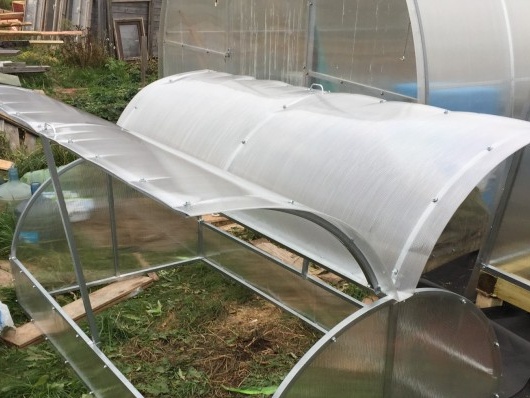
End flaps are made in the form of arches or semi-arches. Lay them on the floor. Remove the protective layer from the polycarbonate sheets and carefully lay them on top of both arcs. When laying polycarbonate, pay attention to its coating, which protects plants from ultraviolet radiation. Label it so as not to confuse the sides.It should “look” outward, not inward. All sheets must be placed exactly so that their border is flush with the edges of the wings.
 You may be interested in:
Polycarbonate must be screwed to the frame with dowels and trim the excess material around the edges. Assemble the side parts in the same way. To connect the two basement elements, use long horizontal ties. There should be five such joints on each side. After joining, make the casing.
The connection of the two wings should be done in three places - with long ties and sheathed with sheets of PC. For fixing use couplers without ledge. It remains to connect the “flap sides” and sheathe them. There should be a small sash on the base of the greenhouse. There are holes in it through which you need to thread a long bolt. Now place the large leaf and fix it with another bolt. Do not forget to put the plugs on the hollow ends of the frame and fasten the two handles to the wings. The hotbed "Khlebnitsa" is ready for use.
Self-made "breadboxes"
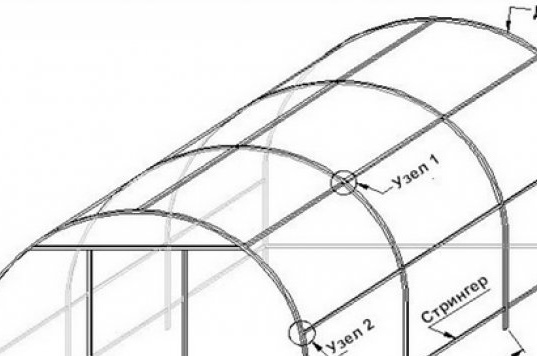
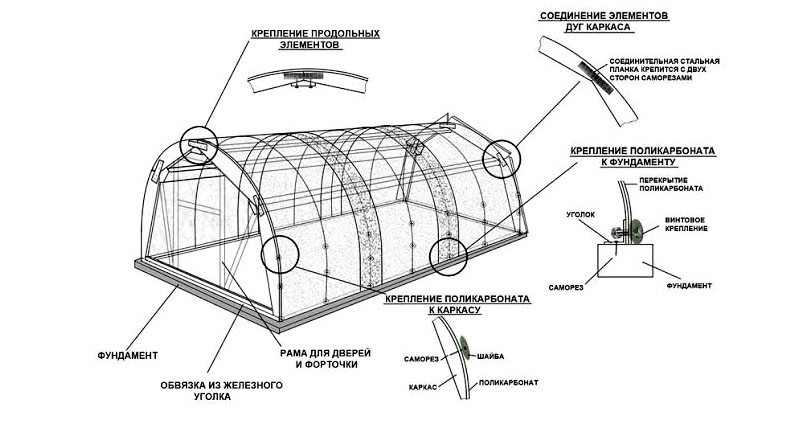
In the drawings, which are always available online, you can see that the basis of the structure is two parts in the form of half-arcs. Together they form an arch. For the manufacture of the frame using:
- square pipes made of plastic;
- metal profile;
- galvanized metal pipes;
- fasteners (suspensions and hinges).
If there is no polycarbonate, sheathing is made of plastic filmbut it’s not as durable as a PC. With the ability to work with wood, the frame for the greenhouse can be made of wooden beams. The best timber is spruce or aspen. Sizes of timber - 40x40 or 50x50. For the beam, a metal strapping will be needed: it will ensure the long operation of the articulated mechanism. Simple tools are enough for work: hammer, knife, drill or screwdriver, saw.
Working with metal requires certain skills. If they are, it is better to make the frame of a durable galvanized metal profile. The size of the pipe is 20 cm, the wall thickness is 1.5 mm. Of the tools you will need a welding machine, a hacksaw for cutting metal and a pipe bender.
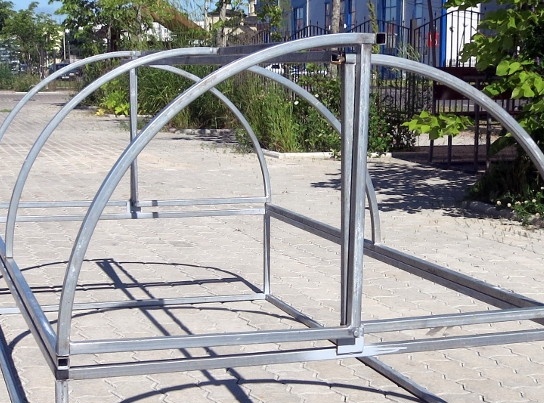
Production of a frame from a metal profile
The frame is made according to this algorithm:
- bend two large arcs of the same size;
- 4 identical parts (20x40 mm) are cut from the profile;
- arc welding with a lower frame by a welding machine;
- the angular parts of both arcs are released by 20 cm (on the back of the frame);
- strengthen the frame by welding profile sections in the middle of each arc (short and long);
- the active part of the greenhouse is made of two smaller arcs;
- metal corners are welded to smaller arcs.
In order to prevent rust, the frame can be painted with resistant paint.
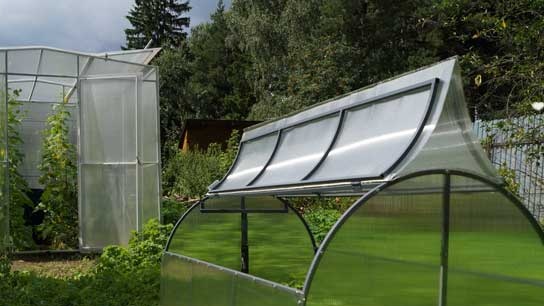
Sash Installation
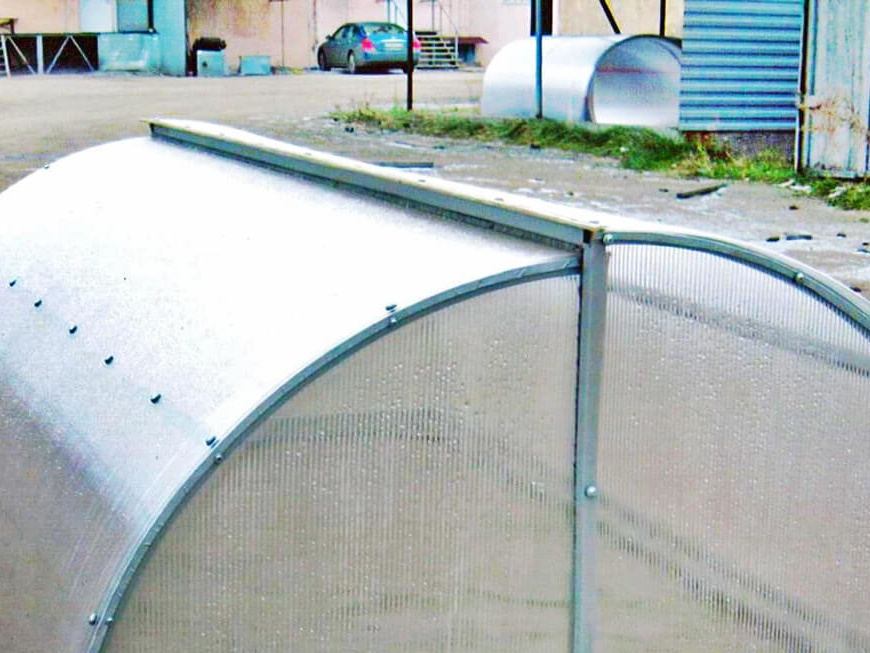
Sashes are moving elements of a greenhouse. Their frame is made of semi-arches, which are connected from above using a horizontal metal profile. It is better to make a double-sided lid so that it is convenient to water the plants and take care of them. Sashes are attached to the frame so that they can be opened and closed at any time. To do this, use hinged mechanisms on the bolts. They connect the lids to the working part of the structure. The mechanism that fixes the lids in a certain position can be made from any wooden bar.
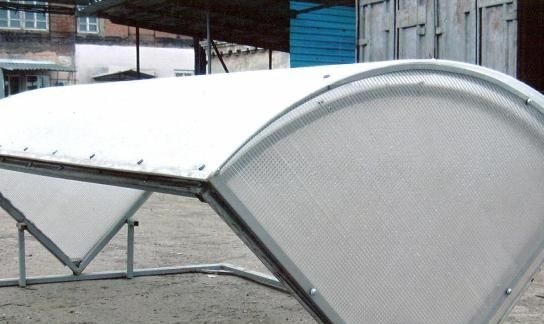
Sheathing sheets SPK
Polycarbonate sheets fasten to the base with thermal washers or ordinary screws. It is better to use thermal washers: they do not deform the material. The size of the mounting hole is “customized” so that each sheet is movable and protects the structure from moisture. The distance between the polycarbonate sheet and each hole should be 40 mm so that the material does not crack due to stress. The distance between the fasteners is 30 cm.
It is necessary to work with polycarbonate at an air temperature of at least + 10C. At the edges of the material protect the tape with perforation.
Reviews
Vladimir (Torzhok):
»I decided to make two identical greenhouses on my site myself. I took the sizes on the Internet as a sample, “fitting” them to my needs. Both “Breadbasket” I have 3 m long, 1.5 m wide. We grow cucumbers, tomatoes, zucchini. Polycarbonate is a material that is convenient for work. It is easy to cut and sheathe their frame. I made both frames from a galvanized metal profile for reliability, so that the structure is not blown away by the wind. When making the cover, I made a gasket so that the cover fits snugly to the base. This helps to keep warm, especially in early spring, when we begin to plant the first seedlings. ”
Irina (Korolev, Moscow region):
“I bought a ready-made greenhouse“ Snail ”from the company“ ROiS ”. I have a small IP: I grow flowers and sell them. The husband assembled the finished model according to the instructions. A neighbor advised not to spend money and buy a cheap model with one cover. It’s good that I didn’t listen to her. If I had a greenhouse with one leaf, on the other hand I would not have access to flowers. Since there are two covers, it’s convenient for me to open them, water the flowers and collect them for sale when necessary. “We have a small area, so this model was suitable and practically profitable.”
Vyacheslav (Kazan):
“Previously, I had a Butterfly greenhouse in my country house, but a year later both mounts broke. At first I tried to repair them, but then I decided to buy another design. I like the “bread box” in that it is comfortable and sturdy: it has strong fastenings for the wings, and it is much easier to open them. I bought a small greenhouse, in it we grow strawberries every year. This design is much more reliable than butterflies, and so that the joints work well, I regularly lubricate them with oil. "
Hotbed “Khlebnitsa” is a convenient and practical design. You can make it yourself or buy a finished model and adjust it to fit your needs. The main thing is to properly assemble the building and correctly place it on the site.
 Why is a greenhouse open top?
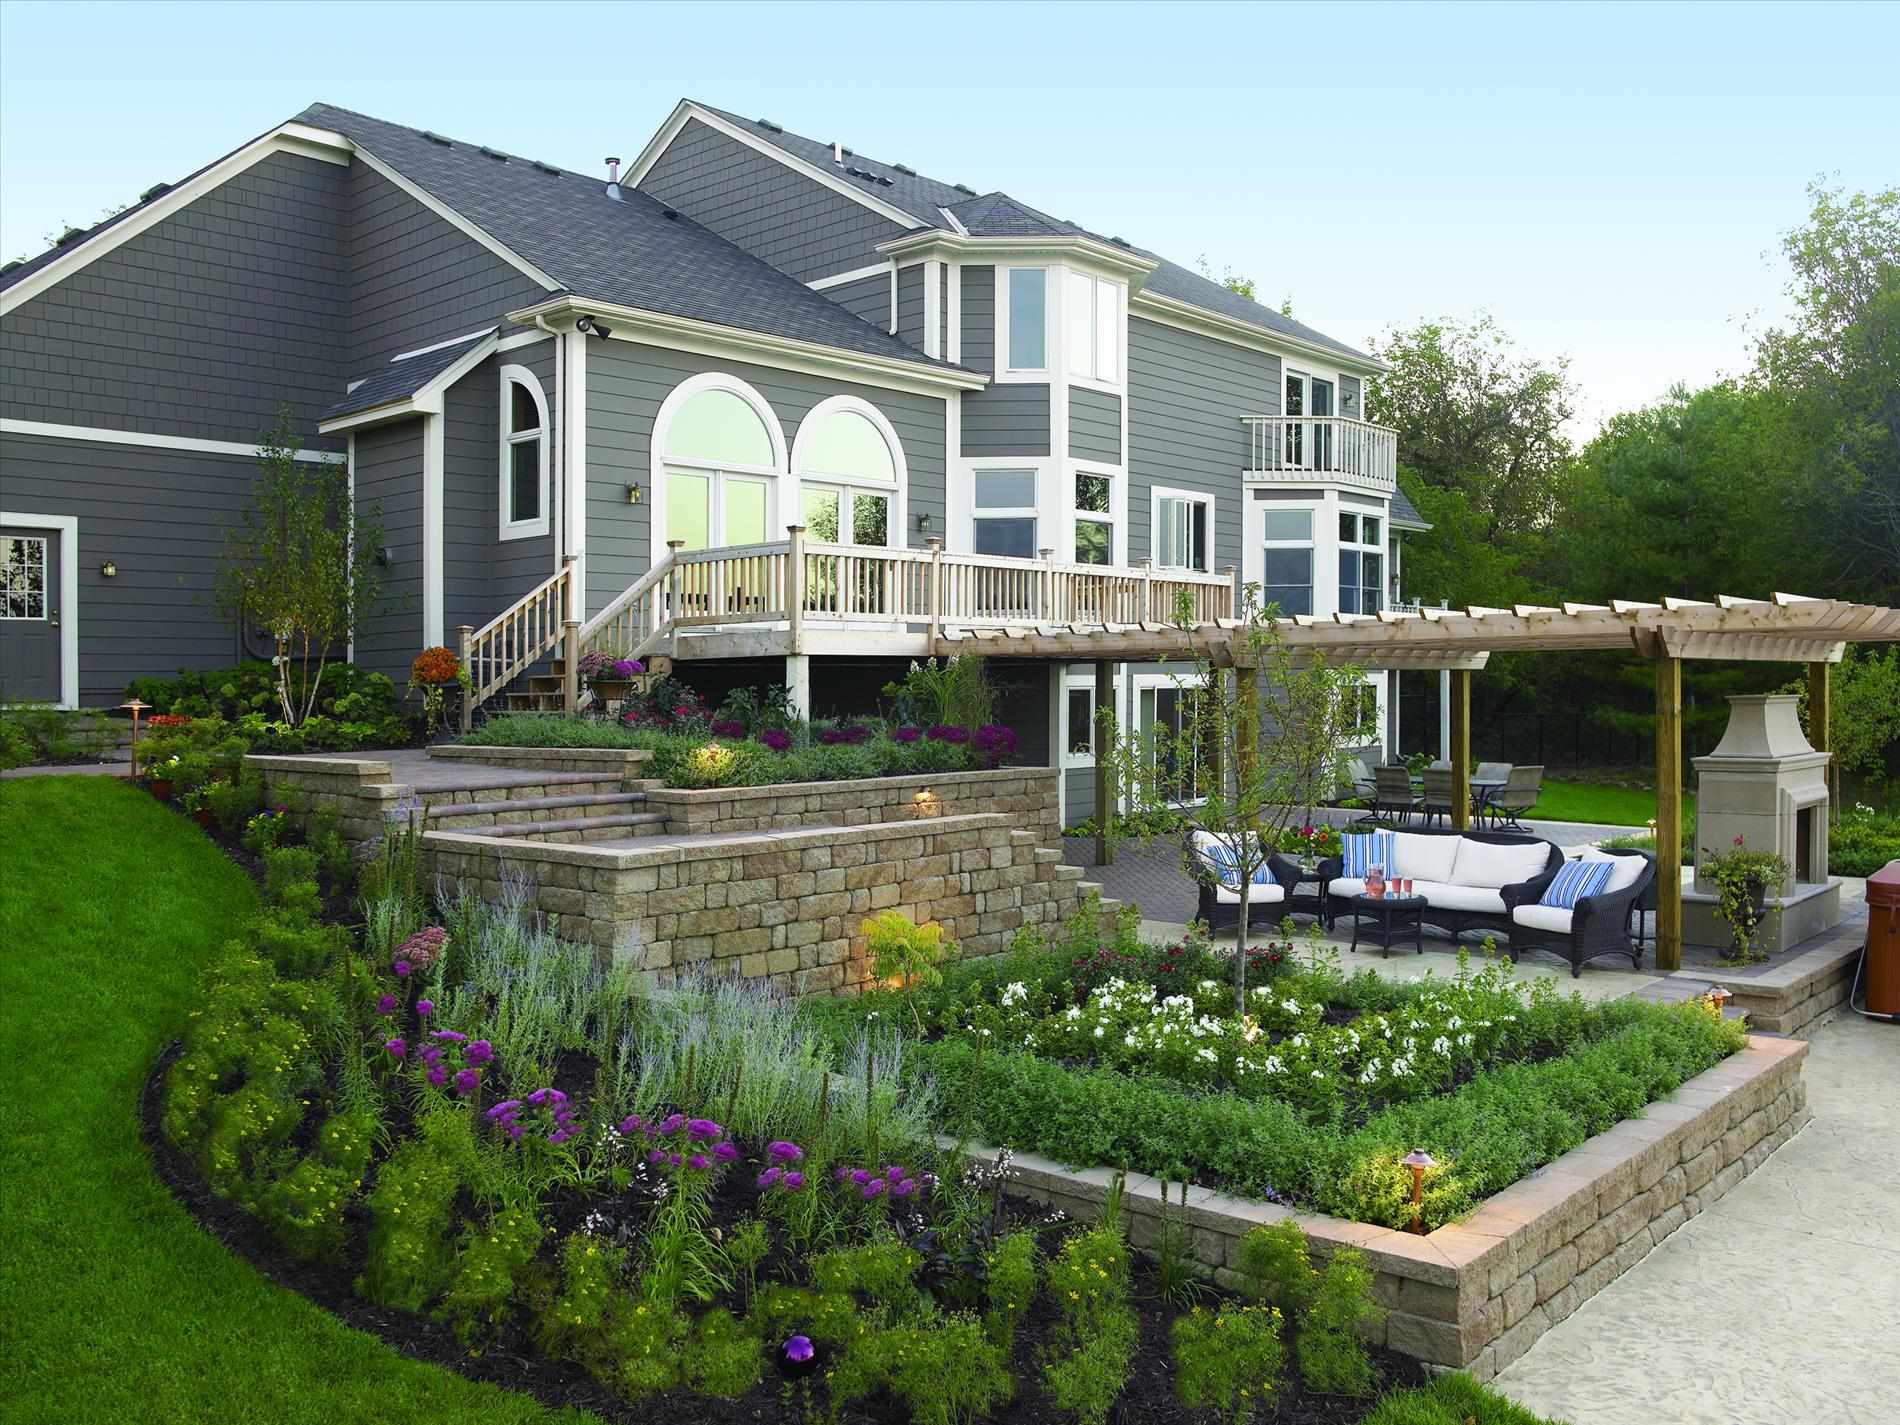 Do-it-yourself landscaping of an area of 8 acres: features of planning and zoning
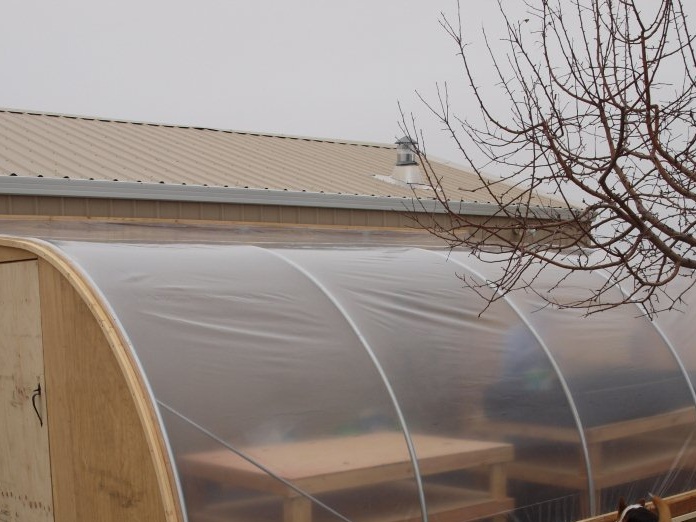 Shed greenhouse, pros and cons