
 Making a do-it-yourself swarm for bees according to the drawings seems to be a rather time-consuming task. The problem lies not only in the number of actions, but also in the accuracy of the processing of parts. Only with the maximum observance of all sizes and parameters, it is possible to create an ideal design for keeping bees using step-by-step photos and videos.
Inveterate beekeepers know that sooner or later, a new, young family comes out of the hive, they need to be prepared for life in a separate place and help her at the initial stage of independent life. The process is characterized by a lot of trouble for beekeepers.
At the first stage, you need to create a place of detention for bees at home. Knocking down the structure will be simply necessary, it will become the first home for the newly made bee family.
Content
Design parameters and appearance
[sc name = "info-dashed" text = "Since, in fact, a swarm is a temporary refuge for runaway bees looking for housing, its appearance does not have to correspond to all the parameters of the hive. It is enough to make it in the form of a basket in order to be able, if necessary, to transport the newly made bee family to another place. ”]
It should be noted that the war is not just a bee house, but also an object for their capture, because an escaped family can hide both on a tree and on the frame of the house, from where it will be needed with the help of this design to get (catch).
[sc name = "info-attention" text = "Each action is a certain stage and you should minimize the amount of difficulty when growing and caring for insects."]
Read also:
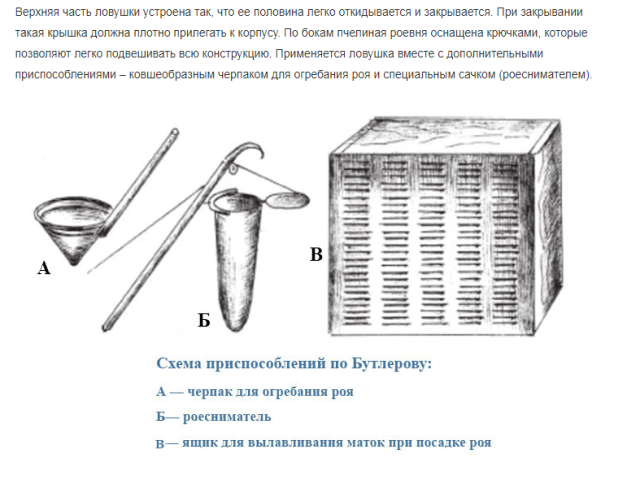
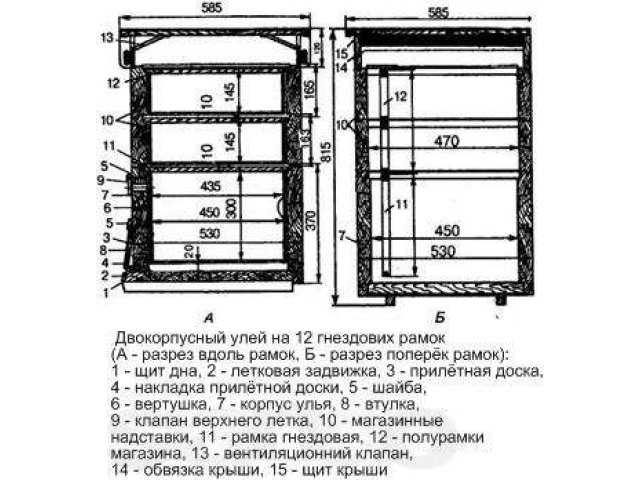
Drawing according to Butlerov’s scheme
Many beekeepers of our time, when creating this design, adhere to the Butlerov scheme. He invented a bee swarm in the form of a skeleton, there are several hoops with a stretched metal mesh on it.
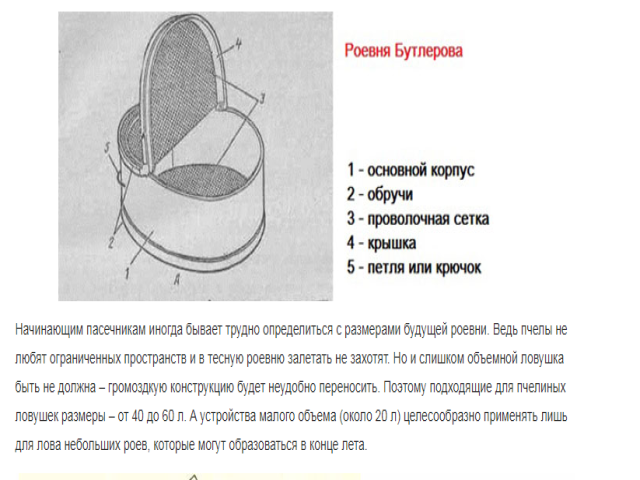
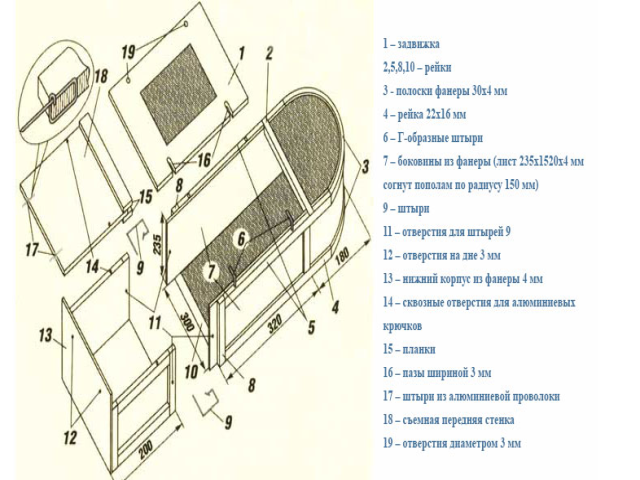
The lightweight construction, which does not require much effort, allows bees to be transported without difficulty and stored for a long time there, at least until the evidence is completely ready. Rover parameters according to Butlerov’s scheme.
- The diameter of the roar is about 300 mm .;
- Roam height - 450 mm.
The considered drawings for creating a swarm for bees with their own hands have many nuances. First of all, many professional beekeepers add some of their additional elements that simplify the work. Therefore, it is worthwhile to think over the entire project in advance in order to avoid problems later.

Additional accessories
To create a cozy temporary house for bees is important, but it is worth noting that to carry out work on their transportation and moving to the evidence, additional accessories are needed:
- scoop in the form of a bucket (with its help it is easy and safe to rake a swarm);
- pickup (a kind of net with a cover). If necessary, a swarm is dumped into it, after which it is closed with the aforementioned lid. After that, the family located in the receiver can be transferred from point A to point B).
[sc name = "info-hand" text = "Auxiliary components are fundamental when working with bees. For every honey collector, convenience is the main factor.All drawings of various types of Royans have a variety of design features, so you need to choose the right ones for you. "]
Step by step photos:
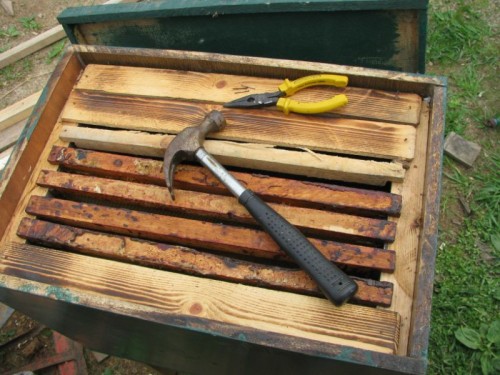
Step-by-step instruction
Above, one of the schemes for creating the so-called trap for bees was cited as an example; they buy it in stores, less often, they do it themselves. The difficulty lies in the manufacture of all parts exactly as in the drawings. In the future, there may be problems with the content and other non-docking.
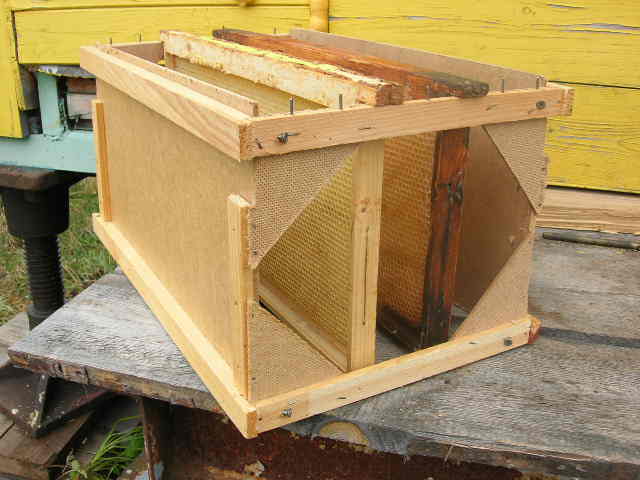
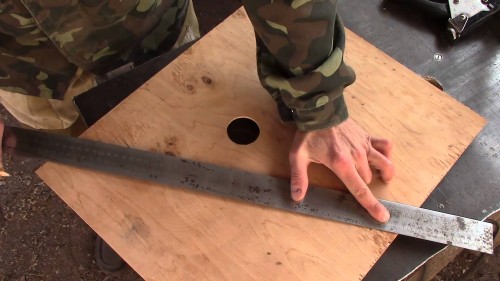
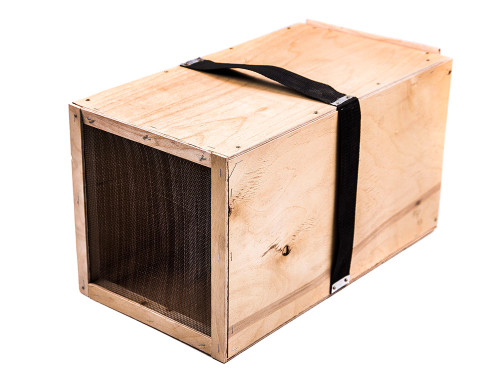
If we talk about how to make a trap at home with our own hands, then the best advice is to make it not in the form of a frame, but in the form of a box, it will also be simple to create and easy to transport. Step-by-step instruction:
- As indicated, for starters, you need to choose a shape for the future trap, preferably in the form of a box.
- After that, you need to prepare the materials: boards and pressed shavings.
- Connect the parts, it is necessary exclusively with glue.
- 10 × 80 is the size of the notch, which must be made in the center of the side wall.
- The ventilation frame should be covered with a mesh, preferably a mosquito, attached with nails (small).
- Next, the walls need to be fastened so that the shape of the box is obtained.
- Using the latch, you must attach the cover.
- Nail hooks to the outside of the side walls.
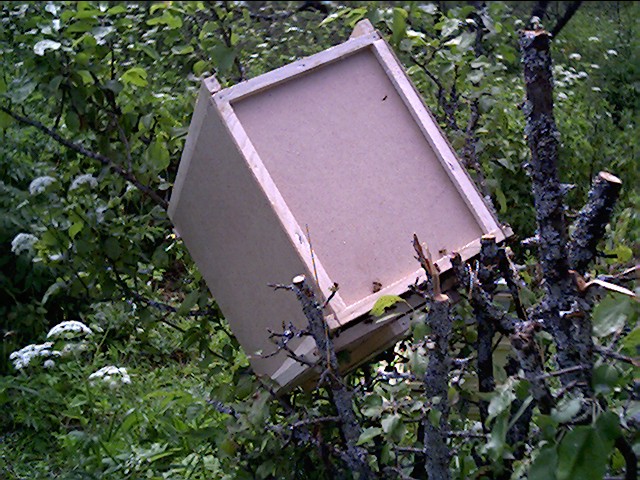
As a matter of fact, this is the end of the process of creating a swarm, then it is up to you. In many photos, the do-it-yourself bee-made swarm has different designs.
The most important thing is what is located inside and how it is done. External data are of secondary importance, since insects do not pay attention to it.
Different types of bee swords, which you can do with your own hands according to the drawings and step-by-step photos, are made with the same functional features, but according to different designs. Choose the one that suits you best.
Video:
 Why is a greenhouse open top?
 Greenhouse "Butterfly", is it worth it?
 Do-it-yourself landscaping of an area of 8 acres: features of planning and zoning
 Shed greenhouse, pros and cons