The material from which garden paths are made depends on the financial capabilities of the owners, on the design of the garden or cottage, and taste preferences. If only vegetables and fruits are planted in the country, gardeners do not seek to invest in the construction of paths, but facilitate the movement between the beds using cheap or free methods. If there is a summer cottage, used mainly as a resting place, they prefer to use more durable, expensive natural material (stone, tile) for landscaping the paths.
Content
The material used to make the track
Garden paths are made not only to quickly get to the right place without staining shoes, but also with the desire to emphasize the taste of the owner, not to get out of the general style of the garden or plot, and not to bring tangible material costs. For a wooden house, walks and paths from boards or stacked saw cuts are suitable on the site. For more expensive buildings, tile, stone are appropriate. Paths in the suburban area are built:
- from stone;
- from pebbles;
- from wood;
- from a brick;
- from a tile;
- from concrete;
- from corks from plastic bottles.
Track design
Before starting the main work, they are determined with the location of the main buildings on the site. Create this by drawing a plan on a computer or manually on paper. First indicate the location of the house, various outbuildings, a place for barbecue, children's games, green spaces, beds. Then they are connected by paths and paths, so that in rainy weather you can get to the most lush corners of the garden without any problems, without getting your shoes dirty. A fully thought out, prepared project is transferred to the garden.
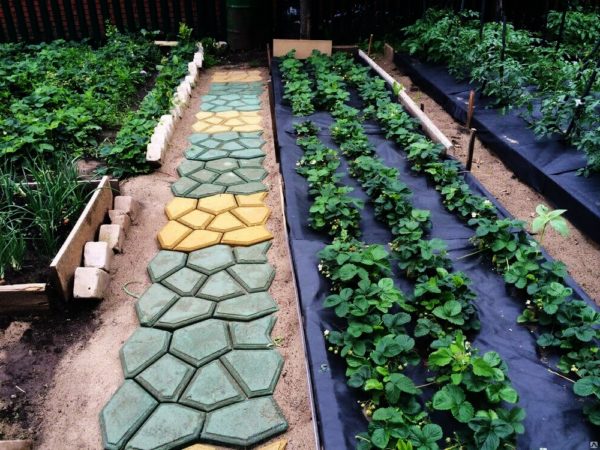
Markup
Marking of the tracks is done on the spot in order to fix the direction and width, this is necessary when laying out paths made of bricks or finished plates. Usually marking is done with a taut rope tied to hammered pegs. For a more accurate idea of the width of the path, the side borders of the markings are sprinkled with chalk, lime. Also, the white line indicates the location of future plantings (bushes, trees), flower beds.
 You may be interested in:
When marking, take into account that the main approaches to the house and important buildings are made wider using more expensive materials. The passages between the beds in the garden make less of cheaper material, but in harmony with the main. The path to the rear gate for removal from the area of mowed grass and weeds is made of simple and durable material and a width corresponding to the width of a wheelbarrow or trolley.
Preparatory Activities
So that after a while the track does not crumble and is not overgrown with grass, a lot of attention is paid to the preparatory stages:
- Dig a trench along the entire length of the same depth.It is 15-20 cm. The uniformity of depth is checked using a ruler.
- When marking the width of the trench, it is taken into account that the track is laterally strengthened for strength and durability by concrete slabs or stone.
- They dig a trench with a slight slope so that the water does not stagnate during the rain, but flows into a drainage trench, which is dug on the side where the slope leads.
- To prevent the walls from crumbling, concrete or wooden borders are installed immediately at the level inside the trench. To keep them in a horizontal position, pins are driven in nearby, which come out of the ground by 5-7 cm. In the presence of loose soil, the pins are driven in from the outside of the plates.
- A mixture of crushed stone with cement or sand is poured into the trench, carefully tamped. The height of the bed after tamping should be 5-10 cm.
- The "pillow" is spilled several times with water and rammed.
Laying brick and tile walkways
Clinker bricks, along with paving slabs, are used as material for laying tracks. They have strength, water-repellent properties, durability, heat resistance, resistance to adverse weather conditions. Step-by-step laying steps:
- A thick layer of sand is placed on the “pillow”, which is tamped, moistened with water and again tamped.
- Rule or level board align the surface horizontally.
- Start laying bricks around the perimeter of the path. The brick is buried in the sand at half height with blows with a mallet, (rubber hammer), which will not harm the surface.
- If the track is not fixed on the sides with concrete borders, the bricks from the edges are poured with concrete mortar, and after removing the wooden formwork, they are fixed using reinforcement. The space along the track is covered with gravel or gravel and rammed.
- To create a more durable coating, the location of the brick is alternated: along the length, then across the track, with the long side. A cement-based glue is poured into the joints, which will prevent the germination of grass in the cracks and give additional strength to the path, but do not dirty the outside of the brick with them, so as not to spoil the impression of the track.
- Sand is poured on top of the laid path and brushed into all the cracks between the bricks.
- To give brightness and attractiveness, the brick is coated with a deep penetration primer, followed by applying the varnish used to coat the stone in outdoor conditions.
Wooden walkways
As a material for tracks, wood is often used. If laying is carried out according to the scheme of digging in stumps and saw cuts, old sawn trees are often used for this. Such a path will cost the owners cheap, but you will have to spend time on its high-quality manufacture. Laying a terrace board will cost the owners more, but it looks more stylish in areas with pools, gazebos, places for barbecue and barbecue.
Digging wooden paths
An inexpensive but time-consuming process is considered paving garden paths with wooden saw cuts. To create such an original and unusual coating you will need a dry hardwood. To make the path, oak, birch and conifers are suitable. The tree is cut into chumps of such length that after installation on a tamped "pillow", they rise above the surface by 10-15 cm. Grind the surface with a grinder, achieving smoothness. To more fully fill the space of the path and adjoining parts to each other, logs of different diameters are used. Before installation, they are prepared for a longer service:
- Dip the stumps half the height in a container with an antiseptic for 4 minutes. The top is covered with a brush. Allow the material to dry completely.
- Chumps dipped in a solution of "Kuzbass varnish." It protects wooden surfaces in the ground from moisture, slows down the process of decay.Its disadvantage is instability to sunlight. Heated tar can protect the logs from above, due to the film formed on the surface of the wood after cooling. The film is resistant to high temperatures, sunlight.
A little sand is added to the side wall of the trench, the first row of chumps is installed, fitting them tightly both in height and in size. The gaps between the stumps are covered with sand. Next, set the next layer. Logs of different diameters are used here for a tighter installation, to reduce gaps. Thus, the entire trench is filled with hemp, the logs are rammed, the cracks are covered with sand.
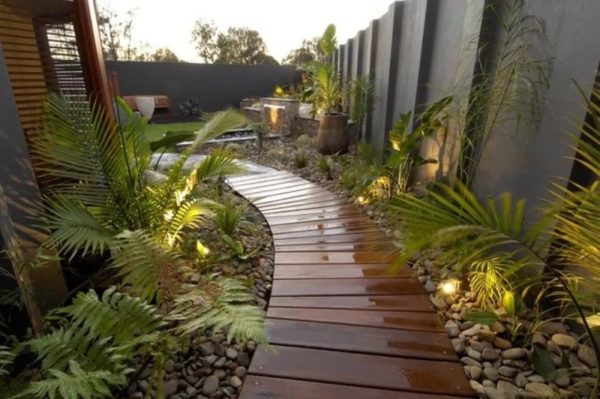
Wooden walkways
For the manufacture of this type of paths use a purchased terrace board. It can be like a wooden one made of thermal wood and a wood-polymer composite. This coating is distinguished by resistance to ultraviolet radiation, excessive moisture, and temperature extremes. The size of the boards is the same, they are processed against adverse conditions, ready for installation. Logs are laid on a flat concrete surface, a terrace board is fixed on them using self-tapping screws or special clips. A track with a not very long service life will be quite expensive.
Using a board in tandem with pebbles or gravel will be cheaper. On the prepared "pillow" stack:
- sand leveled;
- boards, at a step distance from each other;
- the gaps between the boards are filled with small plain or colored gravel;
- sprinkle the path on both sides with gravel, tamp lightly.
Garden parquet
A new fashion trend is the installation of garden parquet in recreation areas around the pool, gazebos, on balconies. The material is expensive, rarely used as a coating for country paths. Made from dense wood. It is resistant to excessive moisture, sunlight, frost. There is a plastic analogue, which is cheaper, but has a shorter service life. This type of coating is mounted on a "pillow" of sand, gravel.
Stone walkways
Paths made of natural stone and pebbles are gaining more and more sympathy. They look original, give unusual summer cottage. This method is not new; it was from stone in ancient times that roads and sidewalks were paved. In the middle of the 20th century, coatings made of stone were still found in the outback. The process of creating such coatings is simplified and adapted to the realities of today. Such paths look stylish, coupled with various objects of landscape design - fountains, sculptures, flower beds, decorated with stone.
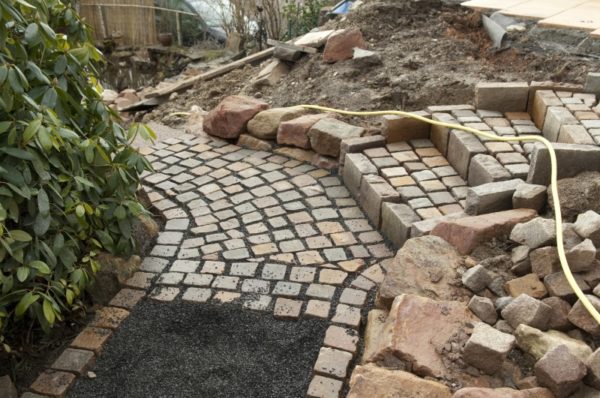
Pebble Path
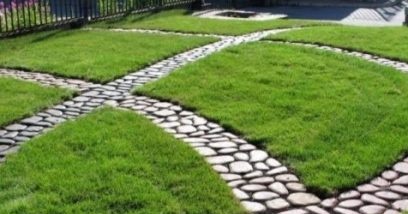
The paths of sea and river pebbles look stylish and original on personal plots and emphasize the taste of the owners. They are durable, superior to concrete, and tile, and asphalt. The enemy of such a coating are plants that, sprouting between the stones, destroy the cement. Pebbles are purchased in construction stores, independently collected on the banks of reservoirs, in quarries, at construction sites. Do it yourself at the cottage with pebble paths, observing the stages of work:
- Geotextiles are laid at the bottom of the trench.
- A mixture of gravel, sand is poured onto it, rammed, moistened with water.
- At the edges of the trench, concrete curbs are installed, which are fixed with a cement mixture.
- From cement, water and sand, the solution is mixed in a ratio of 1: 3: 3. Concrete is poured according to the level of borders and leveled using a board or rule.
- Pebbles are laid according to a conceived scheme, recessing stones in a solution halfway up.
- Level the stone in height with a mallet and a flat board. The board is laid perpendicular to the path and lightly hit it with a rubber mallet.
- The path with stones is covered with cellophane and left for a day to dry.
- A mixture of cement, water and sand is prepared in a ratio of 1: 5: 3. If desired, the solution is tinted. Pour the mixture onto the track, trying to fill all the voids.
- Residues are removed with a brush or foam sponge.
- Close the track for another 2 weeks. After complete drying, the path is ready for full operation.
Crushed stone and gravel bulk paths framed by wood
Make track in the country can of crushed stone and frame with wooden stumps. This is a more simplified version of the method of manufacturing a garden path. Chocks are prepared in a similar way, but they are installed only in one row along the perimeter of the path. The inner surface of the trench is covered with geotextile or dense lutrasil, bending the edges of the canvas onto the logs. Then crushed stone or gravel is poured into small parts, leveling it on the surface until the level of bedding is equal to the level of the soil. In this case, instead of hemp, you can use large natural stones as a border.
 You may be interested in:
Concrete track
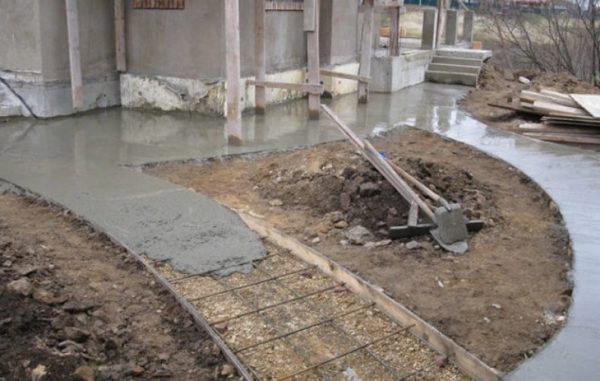
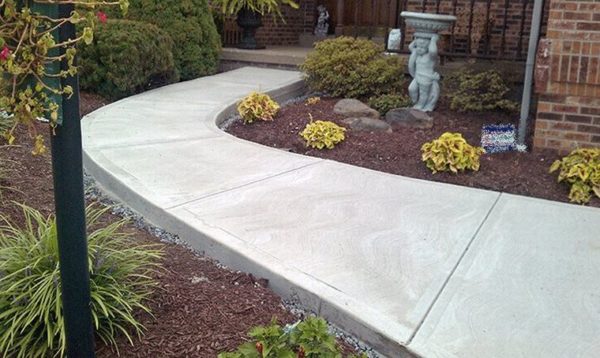
Paths made of concrete are inexpensive types of coatings and therefore are found everywhere. To make it, they dig a pit with a depth of about 20 cm. Then, on the sides of the path, wooden formwork or concrete borders are installed, leveling them in height. The bottom of the pit is covered with sand, moistened and tamped. The height of the dense layer is about 7 cm. A layer of gravel is poured onto the sand, and a reinforcing grating is placed on it, which will increase the strength of the coating. After this, a concrete mortar is kneaded and the space is poured, focusing on the upper border of the formwork. Level the layer using a rule or a straight board. One way to strengthen the coating is ironing. This is done using purchased special topping mixtures or sprinkling on a wet surface of dry cement and rubbing it into the surface.
Clay colored figures imprinted in concrete give the track unusual and originality. A thick clay solution is applied to a leaf of a large plant, such as burdock. They are waiting for complete drying, the sheet is removed. The clay imprint is painted and varnished. When pouring the top layer, the sheet impression is pressed into concrete. Instead of clay, gypsum and concrete solutions can be used to fill the leaves of plants.
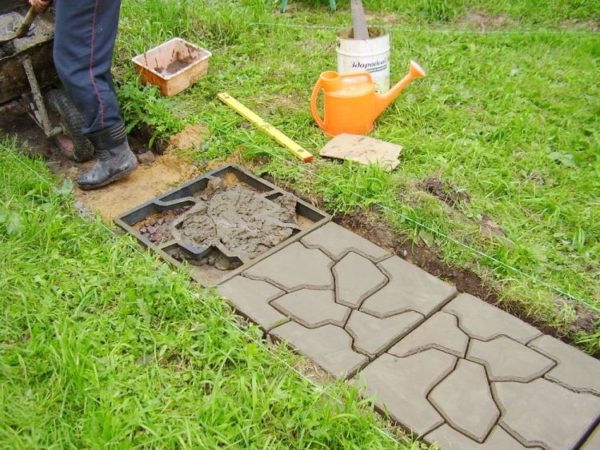
When using forms to simulate stone, a mixture of cement, gravel is poured at half the height of the formwork and aligned with the installed beacons. After the layer has dried, a mold is placed on it, it is poured with a cement mixture and left to dry completely for about 5 days. The mold is removed from the completely dried concrete, laid next to it and continue pouring. For the speed of the process, it is recommended to purchase at least 2 forms. Thus, the track laid out in this way is painted in suitable colors imitating the natural shades of the stones.
Economy - track options
In the absence of a large amount of money, in the presence of ingenuity, summer residents equip their sites with no less taste and originality with the help of improvised means. An alternative to a beautiful, dear paving slabs it becomes a fun, bright mosaic of lids, tracks from concrete forms after painting look no worse than from natural stone. Plastic panels come in handy as temporary tracks until the owners decide where the main ones will go.
Plastic lid tracks
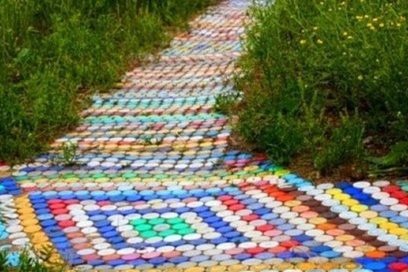
This method of making tracks in the country with your own hands refers to the economy option, since the material is available for free. The main thing is perseverance and patience.The advantage of this method also lies in the fact that the track is collected in separate conceived fragments, as the accumulation of ornamental material, and then they are collected together. Assembly of the covers is carried out using a heated awl and fishing line:
- an awl is heated on gas or an electric stove;
- each lid is pricked right through the side;
- connect the lids together using a fishing line, according to the design.
Individual fragments prepared during the winter are interconnected. Land preparation for laying a temporary path is quick. Digging a trench or pit is not required. Only weeds are removed, the soil is shed with “Roundup” or other weed remover, geotextiles are laid, and a mosaic of lids is laid on top of it. Throughout the area, the track is slightly tapped with a mallet. To reduce the hit of land on the track, a brick curb is installed.
Plastic panels for a garden path
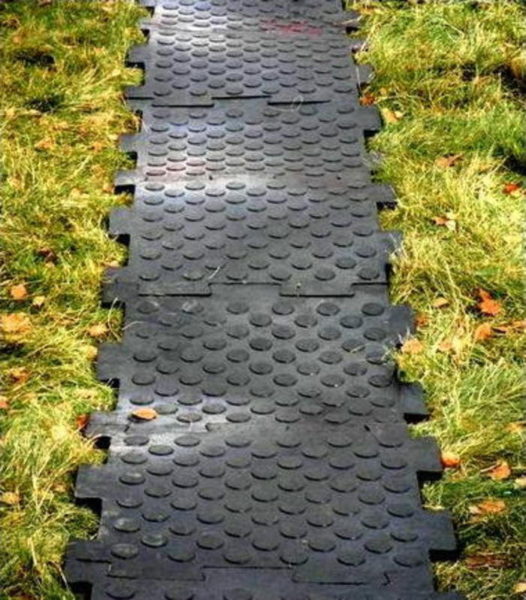
The fastest way to build paths on the site is to use prefabricated plastic plates. They are equipped with fasteners, so they can be increased both in length and in width. Fasteners give rigidity to the structure, are used as legs. The tiles are non-slip, do not accumulate water during rain due to the presence of holes. Design fragments are made of frost-resistant plastic. Therefore, in winter they are used as rugs in front of houses.
Using the tips, the novice master is able to lay paths and paths in the house area, using a coating that can fit perfectly into the landscape design of the site.

 Why is a greenhouse open top?
 Greenhouse "Butterfly", is it worth it?
 Do-it-yourself landscaping of an area of 8 acres: features of planning and zoning
 Shed greenhouse, pros and cons